Applying Looks
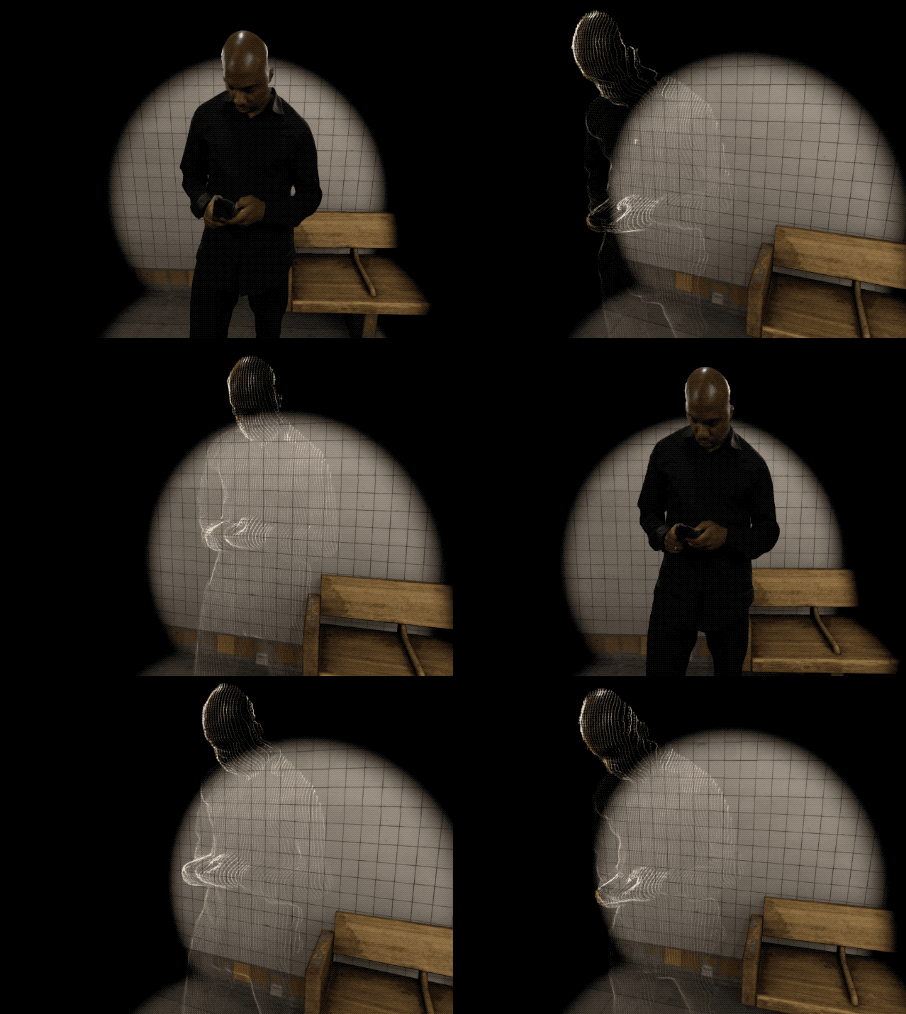
Looks are sets of effects that enable creative flexibility and a range of design styles with your Depthkit clips. In addition to a photorealistic rendering, you can also achieve a custom aesthetic with the help of Depthkit's first Zero Days Look. These Looks are available to use with the Unity Plugin and take the form of renderers; the Photo Renderer and the Zero Days Renderer.
Apply the Zero Days Renderer

Once the Zero Days package has been imported into your Unity project, you are able to select the Look in the Depthkit Clip Editor. If you don't already have the Zero Days Look imported, see here on how to Import the Looks Package.
Be aware of Plugin VersionsWhen importing the Depthkit Unity Plugin and a Looks Package, you must be importing packages with the corresponding version number. If importing Zero Days Look v0.1.0, you need to have already imported Depthkit Unity Plugin v0.2.6 into your project.
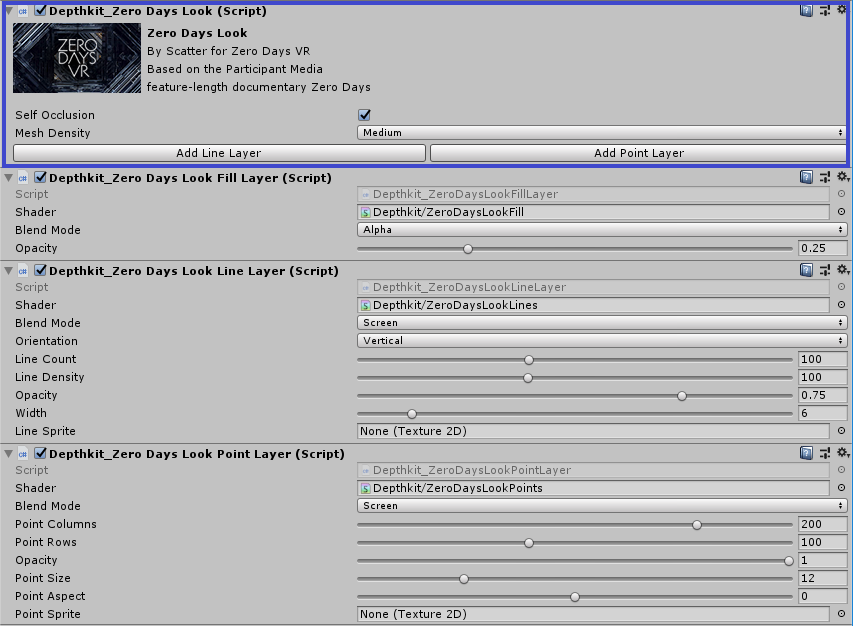
Once selected, the Clip Editor will add the needed Renderer components. For the Zero Days Renderer, this includes:
- The Zero Days Look (Script)
- Fill Layer
- Line Layer
- Point Layer
The Zero Days Renderer (Script)

This component allows you to easily build on the Look by applying Line and Point Layers. These layers are added as individual Unity components and can be blended with the Fill Layer and each additional layer you add. By default, one of each layer is applied to your clip once you apply the Zero Days Look (script), however, you can add multiple layers on top of each other. In this component, you can set the following,
- Self Occlusion: Toggle on and off for self occlusion across all Hologram layers. When self-occlusion is enabled the reverse side of the hologram elements do not blend with the front facing sides. This makes figures easier to discern when seen from the side, while still achieving an ethereal hologram look.
- Mesh Density: Specify the mesh quality of your clip. When switching between Looks, you will need to set this again.
- Line Layer: The line layer renders your Depthkit asset as lines instead of a full mesh.
- Point Layer: The line layer renders your Depthkit asset as a series of points, similar to a point cloud aesthetic.
Line Layer
The rendering of the Line Layer is blended with the rendered layer composition previously rendered and if the Self Occlusion option is selected in the default Zero Days Renderer then the rendering pass will only pass lines that are not occluded by geometry or not on the surface of the reprojected depth.
Blend Mode: Just like the Fill Layer, the blend will interact with the Fill Layer (and other layers you have applied) as an alpha, additive, multiply, or screen blending mode.
Multiply Blend ModeThere is a known issue in which the multiply blend mode does not blend properly. Opacity is also not accurately represented when using multiply.
Orientation: allows for the horizontal or vertical orientation of the line effect.
Line Count: adjusts the number of lines that make up your clip.
Line Density: adjusts the resolution of the lines, increasing or decreasing the quality of the rendered lines. It is recommended to increase this value for best visual results, however this needs to balanced for performance.
Opacity: controls the opacity of the individual line layer.
Width: adjusts the width of the lines.
Line Sprite: allows you to add a custom sprite texture that will be rendered at each vertex along the line.
Point Layer
The point layer renders your Depthkit asset as a series of points, similar to a point cloud aesthetic.
Blend Mode: Just like the previous layers, the blend will interact with the Fill Layer (and other layers you have applied) as an alpha, additive, multiply, or screen blending mode.
Multiply Blend ModeThere is a known issue in which the multiply blend mode does not blend properly. Opacity is also not accurately represented when using multiply.
Point Columns and Point Rows: adjust the resolution of the points across the projected depth surface.
Opacity: controls the opacity of the individual point layer.
Point Size: controls the size of the point layer.
Point Aspect: controls the aspect ratio of the point. In other words, if you would like to make the points rectangular, you can modify the aspect ratio independently from the point size.
Point Sprite: allows for a texture that is sampled to render each point quad. If not set then the renderer will sample the projected color map.
Working with Depthkit Looks
Switching between Looks
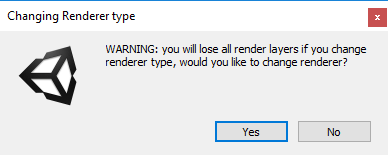
Your effects components will not save between renderers. For example, when you switch a clip from Zero Days to Photo, you will see the warning below. If selecting Yes, this will blow away any work created using the Zero Days Renderer.

Updated 8 months ago
