Embedding audio in Depthkit assets
If you have recorded audio from an external device, you can now sync it to your Depthkit combined-per-pixel video before taking your clip into the game engine. Since Depthkit exports a standard video file, this can easily be done by laying the audio file back in any video editing program.
Simultaneous playback in UnityIn the past, we have mentioned applying the audio file as a component in Unity. We do not recommend this, as it will often fall out of sync with the Depthkit clip.
In this page
Embedding audio in Depthkit Core/Cinema Combined-per-Pixel videos using Premiere →
Embedding audio in Depthkit Studio Combined-per-Pixel videos using FFMPEG →
Embedding audio in Depthkit WebXR texture video using Premiere →
Embedding audio in Depthkit Core/Cinema Combined-per-Pixel videos using Premiere
You'll Need
- a combined-per-pixel video exported from Depthkit
- a corresponding audio file
Steps
- Open Adobe Premiere, and create a new project.
- Import your Depthkit combined-per-pixel video and audio file into the project.
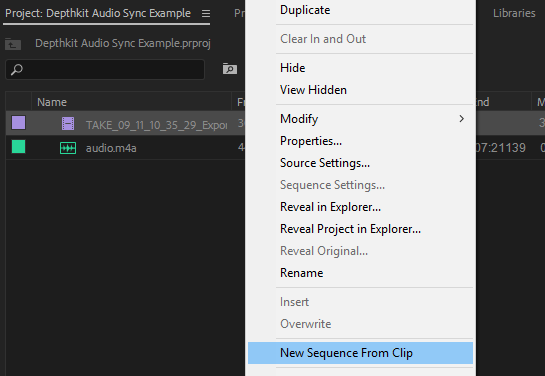
- Place the Depthkit combined-per-pixel video on a timeline, ensuring that the timeline's resolution and framerate match the Depthkit combined-per-pixel video precisely. This can be quickly done by right-clicking the combined-per-pixel and selecting "New Sequence from Clip".

- Add the audio clip to the timeline.
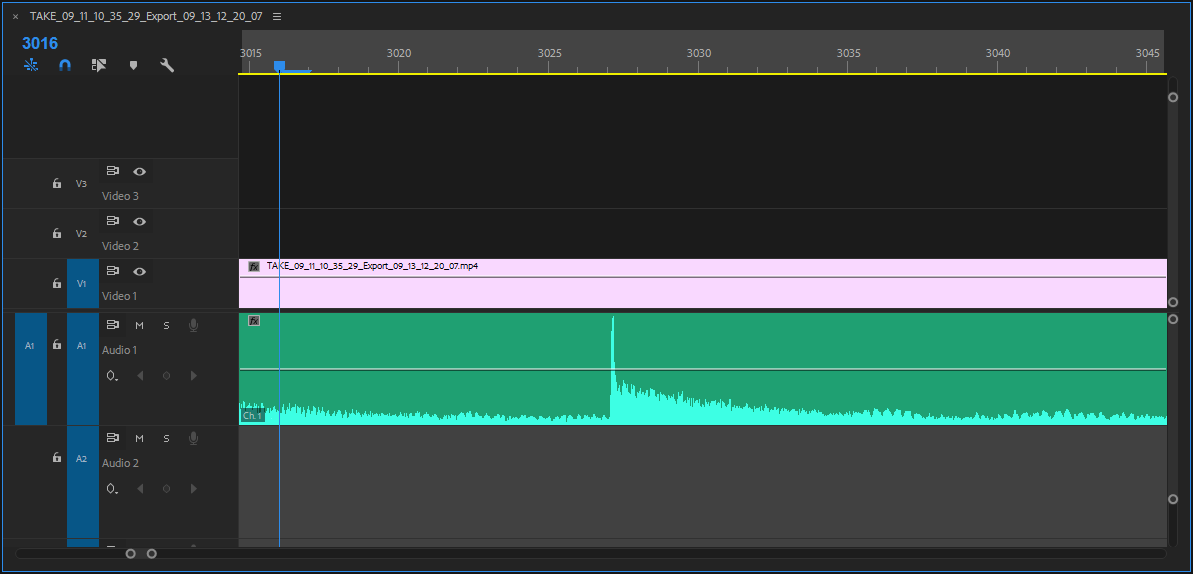
- If necessary, trim and move the audio clip along the timeline until it is in sync with the video. Using a clap or slate as a sync reference is useful for this.

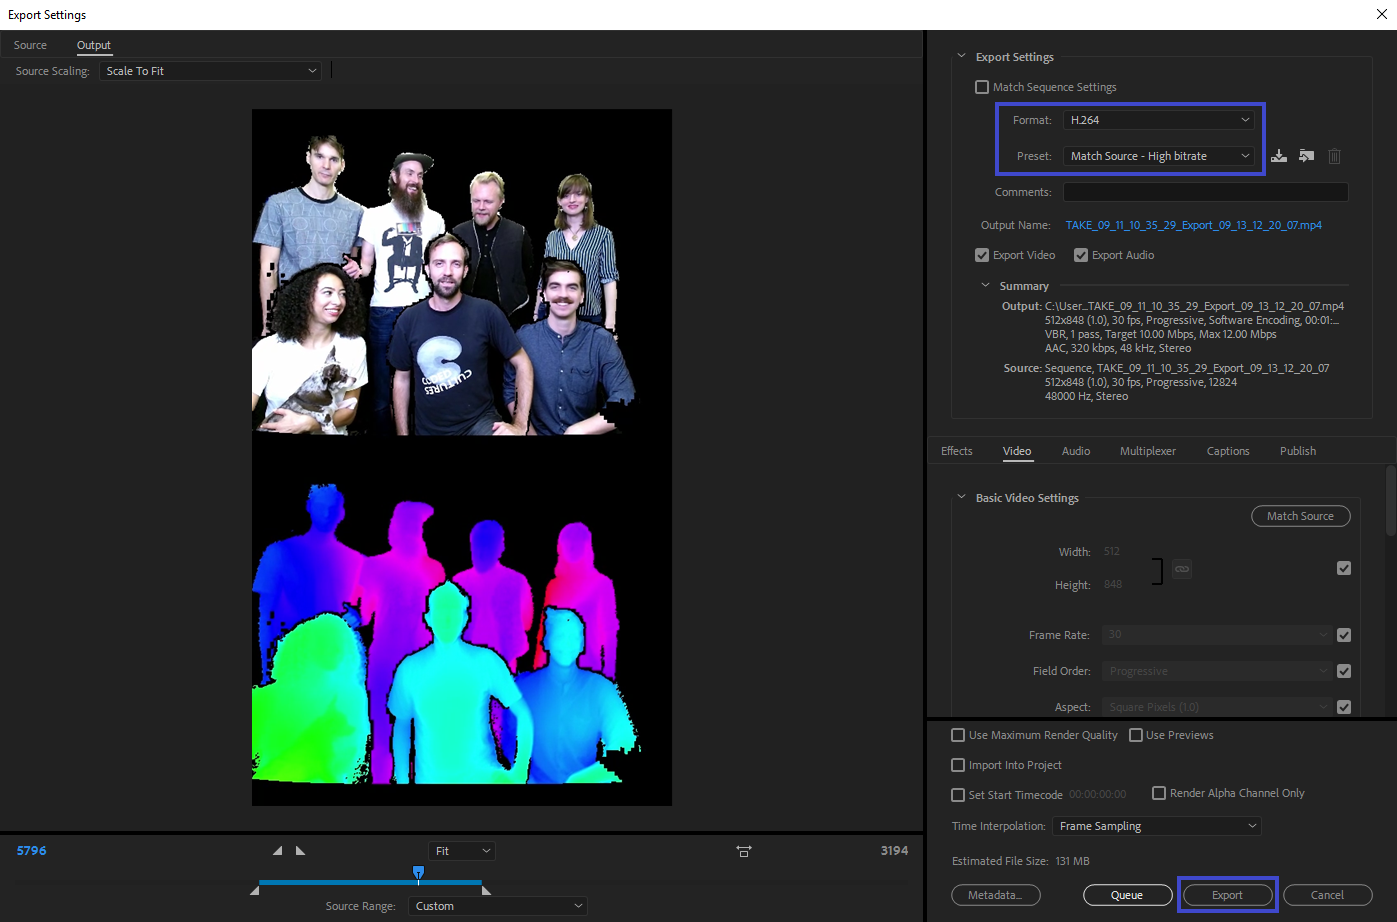
- Export the all or part of the timeline, again preserving the same resolution and framerate as the Depthkit combined-per-pixel video. Reducing the bitrate too much can impact the quality of the asset in Unity, so keep this setting above 5Mbps.

Embedding audio in Depthkit Studio Combined-per-Pixel videos using FFMPEG
Depthkit Multiperspective Combined-per-Pixel videos are particularly sensitive to subtle changes in color, so syncing your Depthkit clips to audio in a non-linear editor like Adobe Premiere can produce visual artifacts.
For this reason, FFMPEG is a great tool for embedding audio into a video file.
Trimming the audio fileBefore you embed the audio into the video, they must be trimmed to have the same starting point. Use the slate/clap in both the video and audio recording to trim the audio to the same start point.
You'll Need
- a combined-per-pixel video exported from Depthkit
- a corresponding audio file, trimmed to start at the same time as the exported Depthkit clip
Muxing
Open a command prompt/terminal window.
To mux audio into an existing video file, use the following example command:
ffmpeg -i video.mp4 -i audio.wav -map 0:v -map 1:a -c:v copy -c:a aac -b:a 320k -shortest output_wAudio.mp4-i audio_file.wav- specifies the source of the audio file. The beginning of the audio file must be trimmed to match the start of the video, and the duration of the audio clip must at least as long as the video to ensure the CPP video doesn't get trimmed in the process.-map 0:v -map 1:a- map the first-isource to the video channel, and the second-isource to the audio channel. Be sure to arrange your input options to map to the channels properly.-c:v copyUse this in place of the-c:v <codec>option to copy a pre-encoded video source without re-encoding, preserving the quality of the video. This can only be used when muxing an existing video stream into a new container; This cannot be used when encoding an image sequence to video, or transcoding one video to another.-c:a copyUse this in place of the-c:a <codec>option to copy the audio source without re-encoding. Use only if your audio source is already compressed to the codec and bitrate you want. This option to embeds the audio stream within the video with no changes.
Audio codec options
If your audio file is in an uncompressed format like WAV, use the following options to compress and encode the audio into a format compatible with the video codec.
-c:a aacsets the resulting audio codec to AAC, but this can be codec any supported by FFmpeg.-b:a 320ksets the audio bitrate to 320 kbps. You can adjust this based on your preference to balance file size and quality.-shorteststops the output at the end of the shorter source
Embedding audio in Depthkit WebXR texture video using Premiere
You'll Need
- a the texture MP4 (which accompanies the textured geometry sequence) exported from Depthkit
- a corresponding audio file
Steps
- Open Adobe Premiere, and create a new project.
- Import your Depthkit texture video and audio file into the project.
- Place the Depthkit combined-per-pixel video on a timeline, ensuring that the timeline's resolution and framerate match the Depthkit combined-per-pixel video precisely. This can be quickly done by right-clicking the combined-per-pixel and selecting "New Sequence from Clip".

- Add the audio clip to the timeline.
- If necessary, trim and move the audio clip along the timeline until it is in sync with the video. Using a clap or slate as a sync reference is useful for this.
Do not move video on the timeline.When aligning the audio with the video, it is critical to ensure that the video starts on the first frame of the timeline, and is not trimmed. Failure to adhere to this will result in the texture going out of sync with the geometry sequence.

- Export the all or part of the timeline, again preserving the same codec, resolution, and framerate as the original Depthkit texture video. Reducing the bitrate too much can impact the quality of the asset in Unity, so keep this setting close to the bitrate of the original texture video.
Updated 10 months ago
