Studio Lite renderer
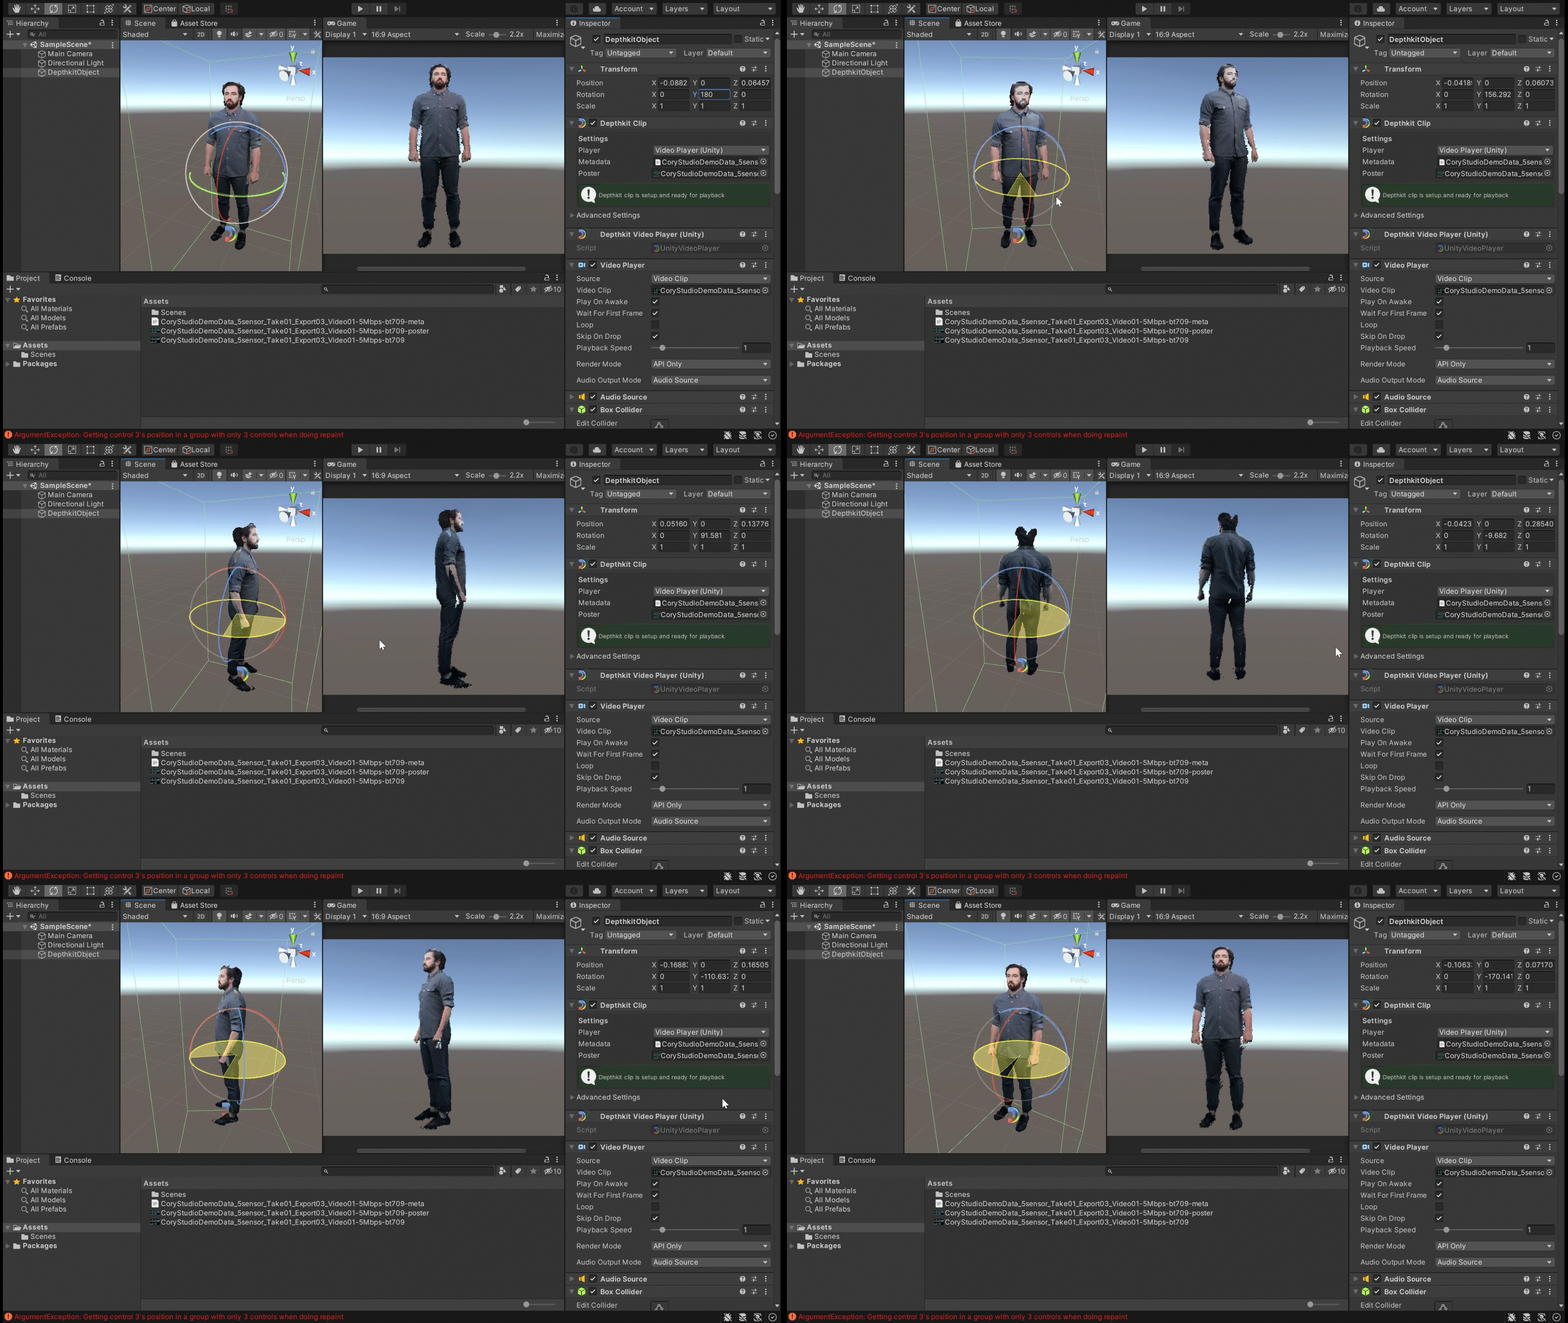
A 5-sensor asset using the Depthkit Studio Lite renderer.
The Depthkit Studio Lite renderer provides a new approach to rendering Depthkit Studio clips which dramatically increases performance. This can be especially useful in the following scenarios:
- Building to mobile devices or all-in-one VR headsets like the Meta Quest
- Simultaneously rendering multiple Depthkit Studio clips
- Rendering performances captured in large volumes
- Inside-out/environmental captures
Experimental featureThe Depthkit Studio Lite Renderer is a new feature, and because of the vast array and ever-changing landscape of build platforms and sensor configurations, we recommend against using this renderer for production use until you have thoroughly tested the kinds of captured performances and playback hardware you intend to use.
In this page
How it works →
Getting Started with Depthkit Studio Lite →
Configuring and optimizing →
Component reference →
How it works
The Depthkit Studio Lite renderer increases performance in a few ways:
- Selective View Rendering: selectively drawing only the sensors which coincide with viewer's perspective. The number of sensors drawn is user-selectable, allowing the user to find a balance between performance and coverage.
- View-Dependent Draw Order: drawing the mesh of the sensor which coincides with the viewer's perspective on top of the other helps to conceal edge artifacts from oblique sensors.
- Dithered Edge Rendering: using screen-door transparency to soften edges
Mesh coverageUnlike the Depthkit Studio renderer, the Depthkit Studio Lite renderer bypasses the fusion of all of the sensor meshes into one, which may reveal gaps in the rendered asset. If you plan to use the Depthkit Studio Lite renderer, be sure to adjust the positions of your sensors before calibration and capture to account for this.
In general, it is best to capture your subject with a sensor configuration that is designed so that each sensor sees your subject's full body.
Compatible with Core and Studio playbackThe Depthkit Studio Lite renderer is applied on a per-asset basis. This means that you can have multiple Depthkit Studio assets within a scene, and use the standard Depthkit Studio renderer to render some of them, and the Lite renderer to render others. This can be especially useful if you have a principal performance which requires the high quality afforded by the Studio renderer, but want to render additional background performances without compromising system performance and framerate.
Getting started with Depthkit Studio Lite
Unity Version & Render Pipeline SupportThe Depthkit Studio Lite renderer is supported in Unity version 2020.3.x (LTS), and currently only supports Unity's Built-in Render Pipeline - It is not compatible with Unity's VFX Graph.
- Create a new project in Unity.
- Open the Package Manager and import the depthkit.core and depthkit.studio.lite packages in that sequence.
- In the Hierarchy, create an empty game object.
- With the game object selected, go to the Component menu, select Depthkit → Depthkit Clip.
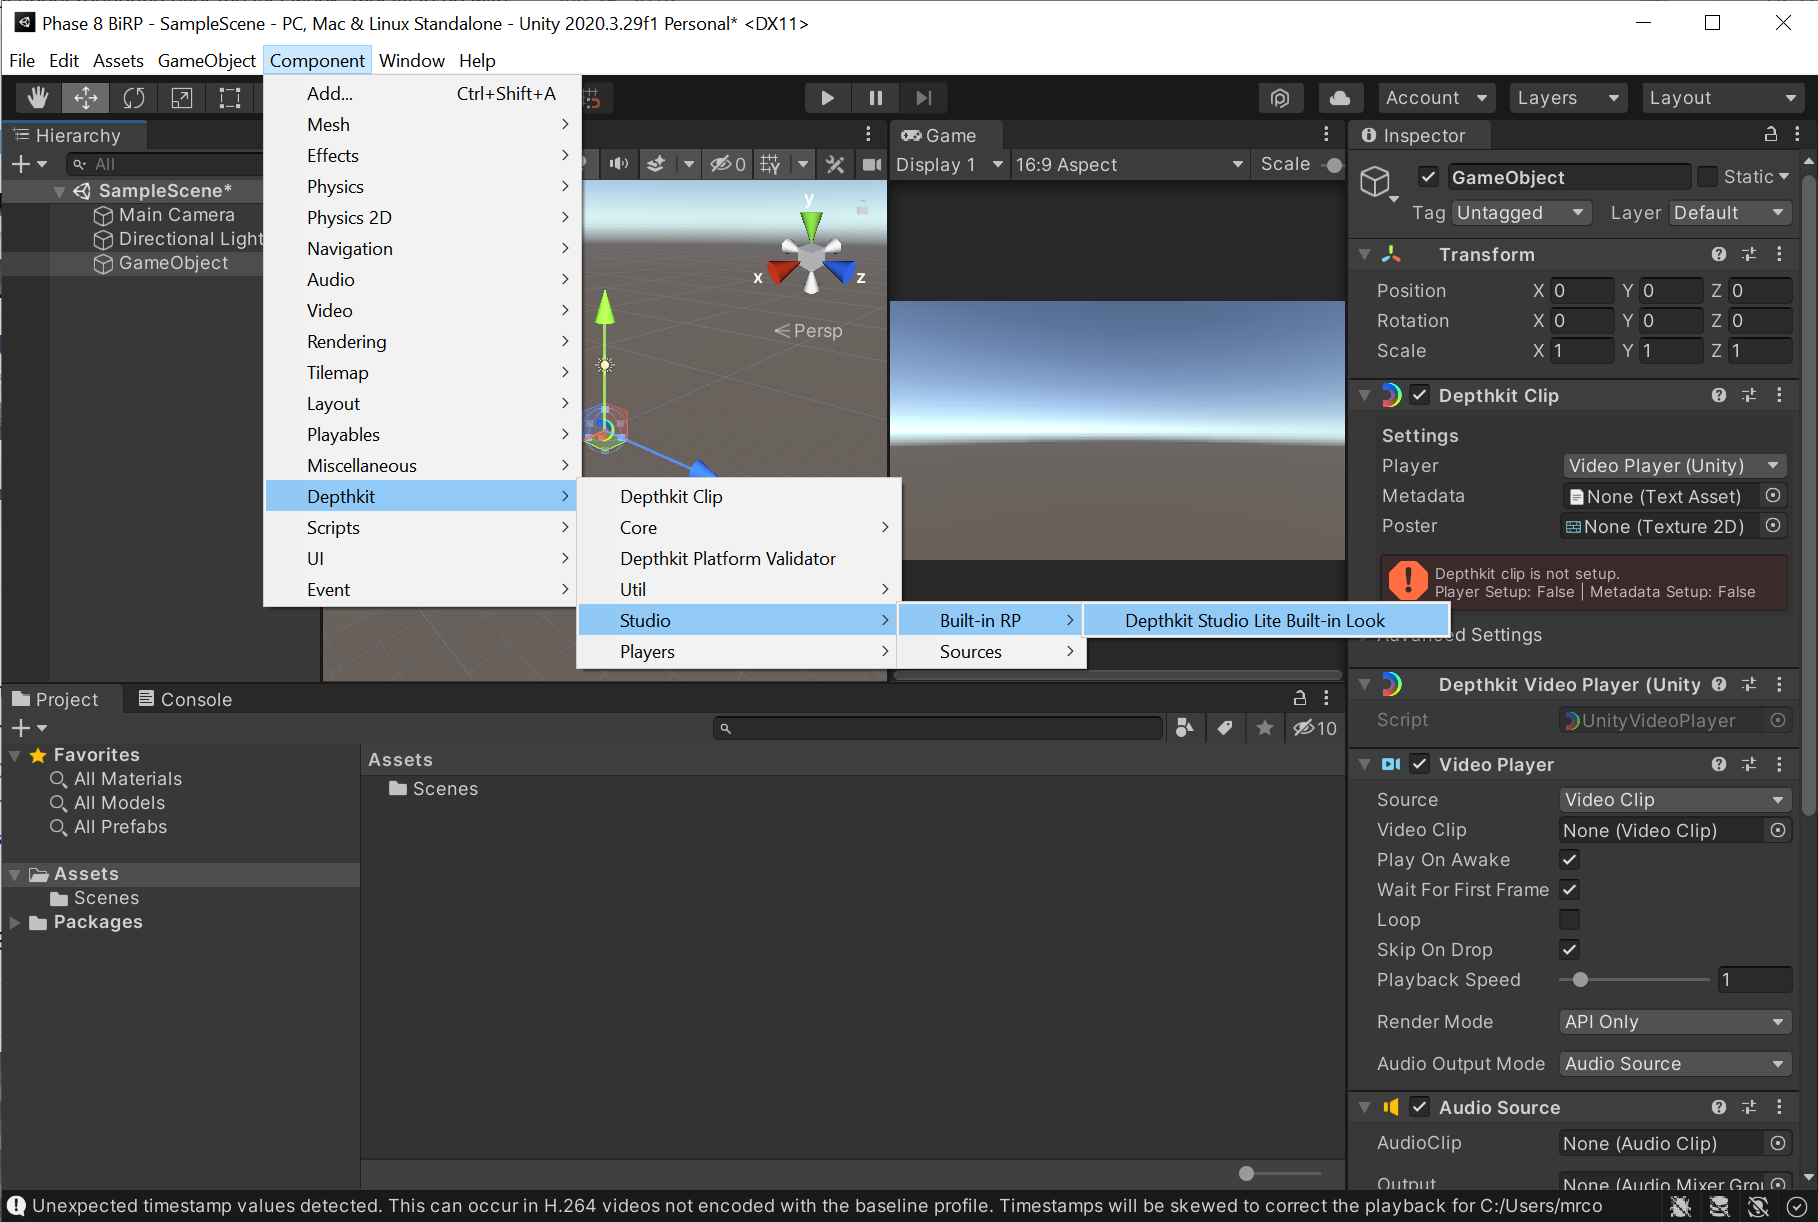
- With the game object still selected, head back to the Component menu and select Depthkit → Studio → Built-in RP → Depthkit Studio Lite Built-in Look. This should also add the Depthkit Studio Lite Mesh Source automatically - If not, it can be found in Depthkit → Studio → Sources → Depthkit Studio Lite Mesh Source.
- Import a Depthkit Studio video, poster, and metadata file into your project's Assets folder.
- With the Depthkit game object still selected in the Hierarchy, head to the Inspector, and link your Depthkit assets to the Video Clip, Poster and Metadata fields by dragging them on from the Project Bin.
Configuring and optimizing
Game ViewBecause the Depthkit Studio Lite renderer uses the scene's Main Camera to determine things like which sensors are drawn and in which order, use the Game view, not the Scene view, to visually asses you asset as you adjust settings.
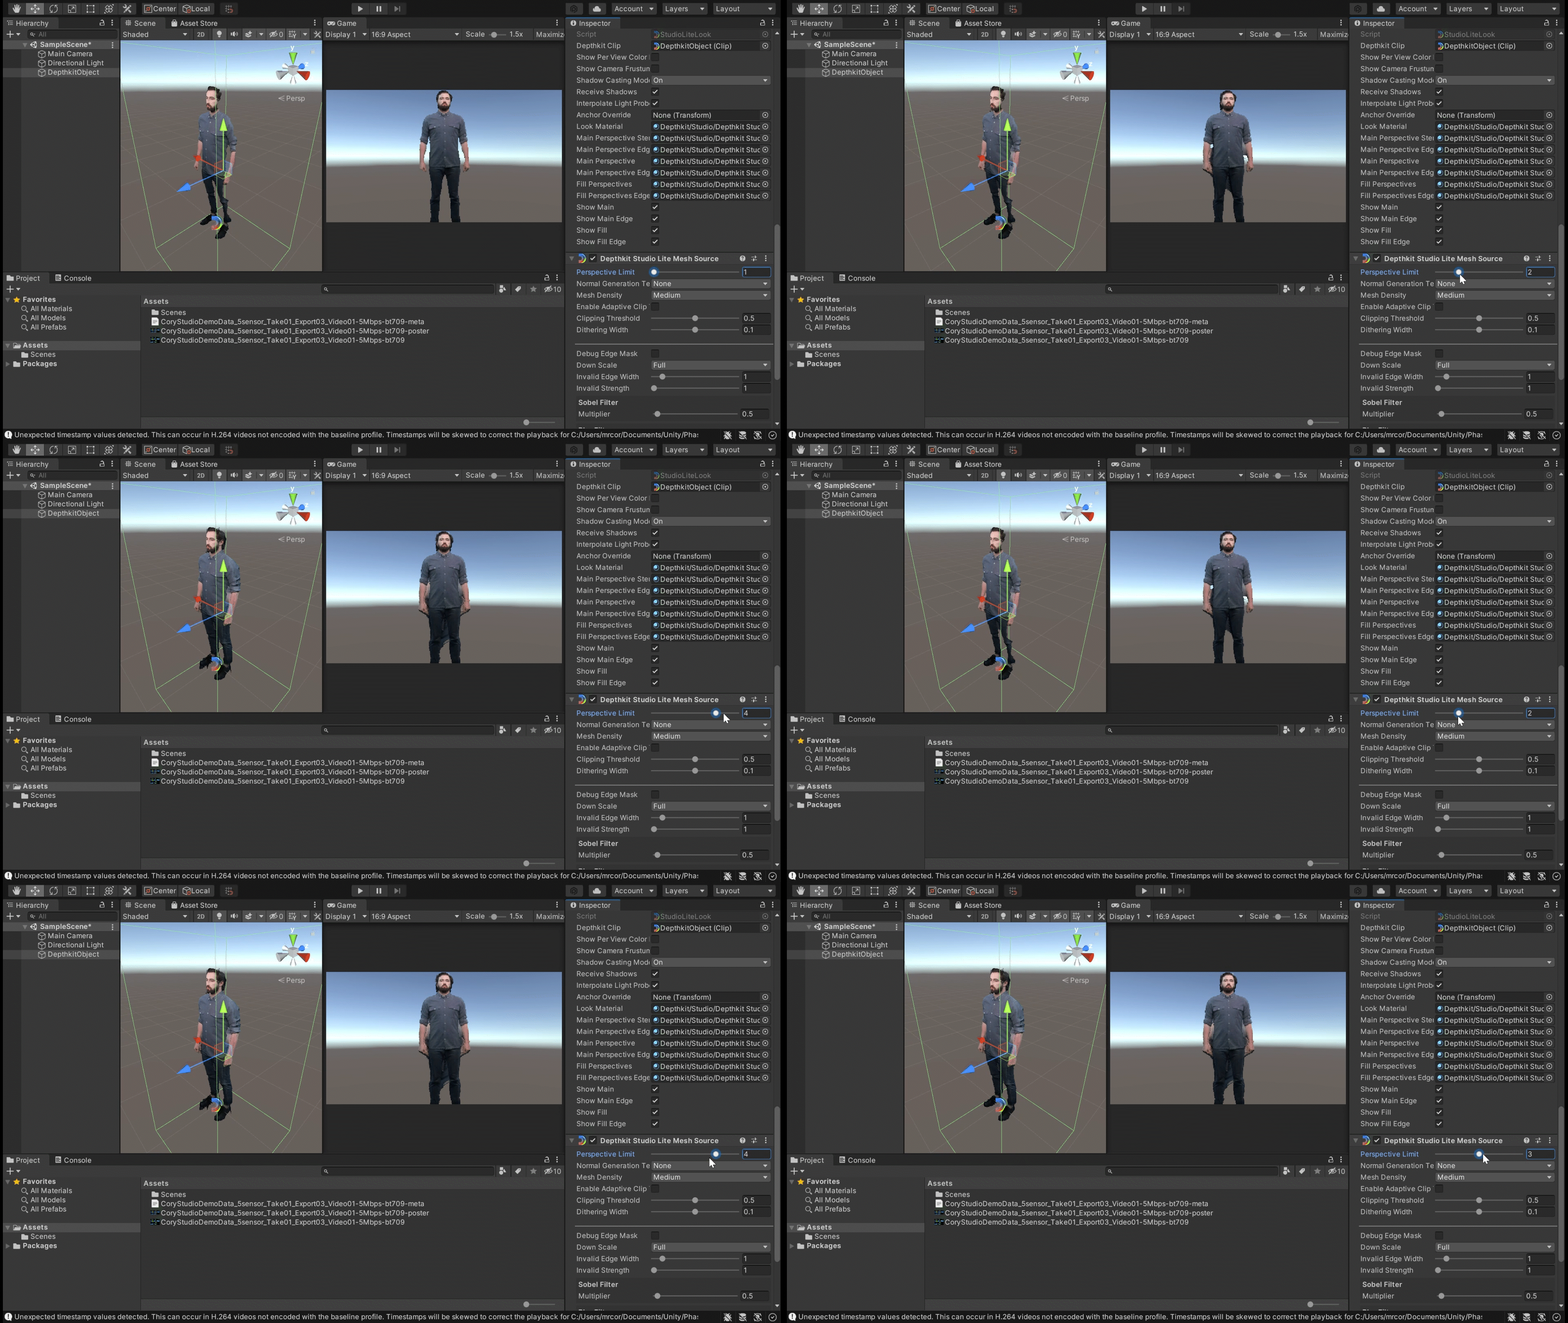
- At first, you'll notice that the the renderer is only drawing one of your sensors. In the Depthkit Studio Lite Mesh Source Component, raise the Perspective Limit to include more sensors - usually just over half the number of sensors you captured with. This will likely add additional unwanted geometry around the edges, but we will handle that in a bit.
- For even higher performance, change the Mesh Density to low; For more detail, change it to a higher value.
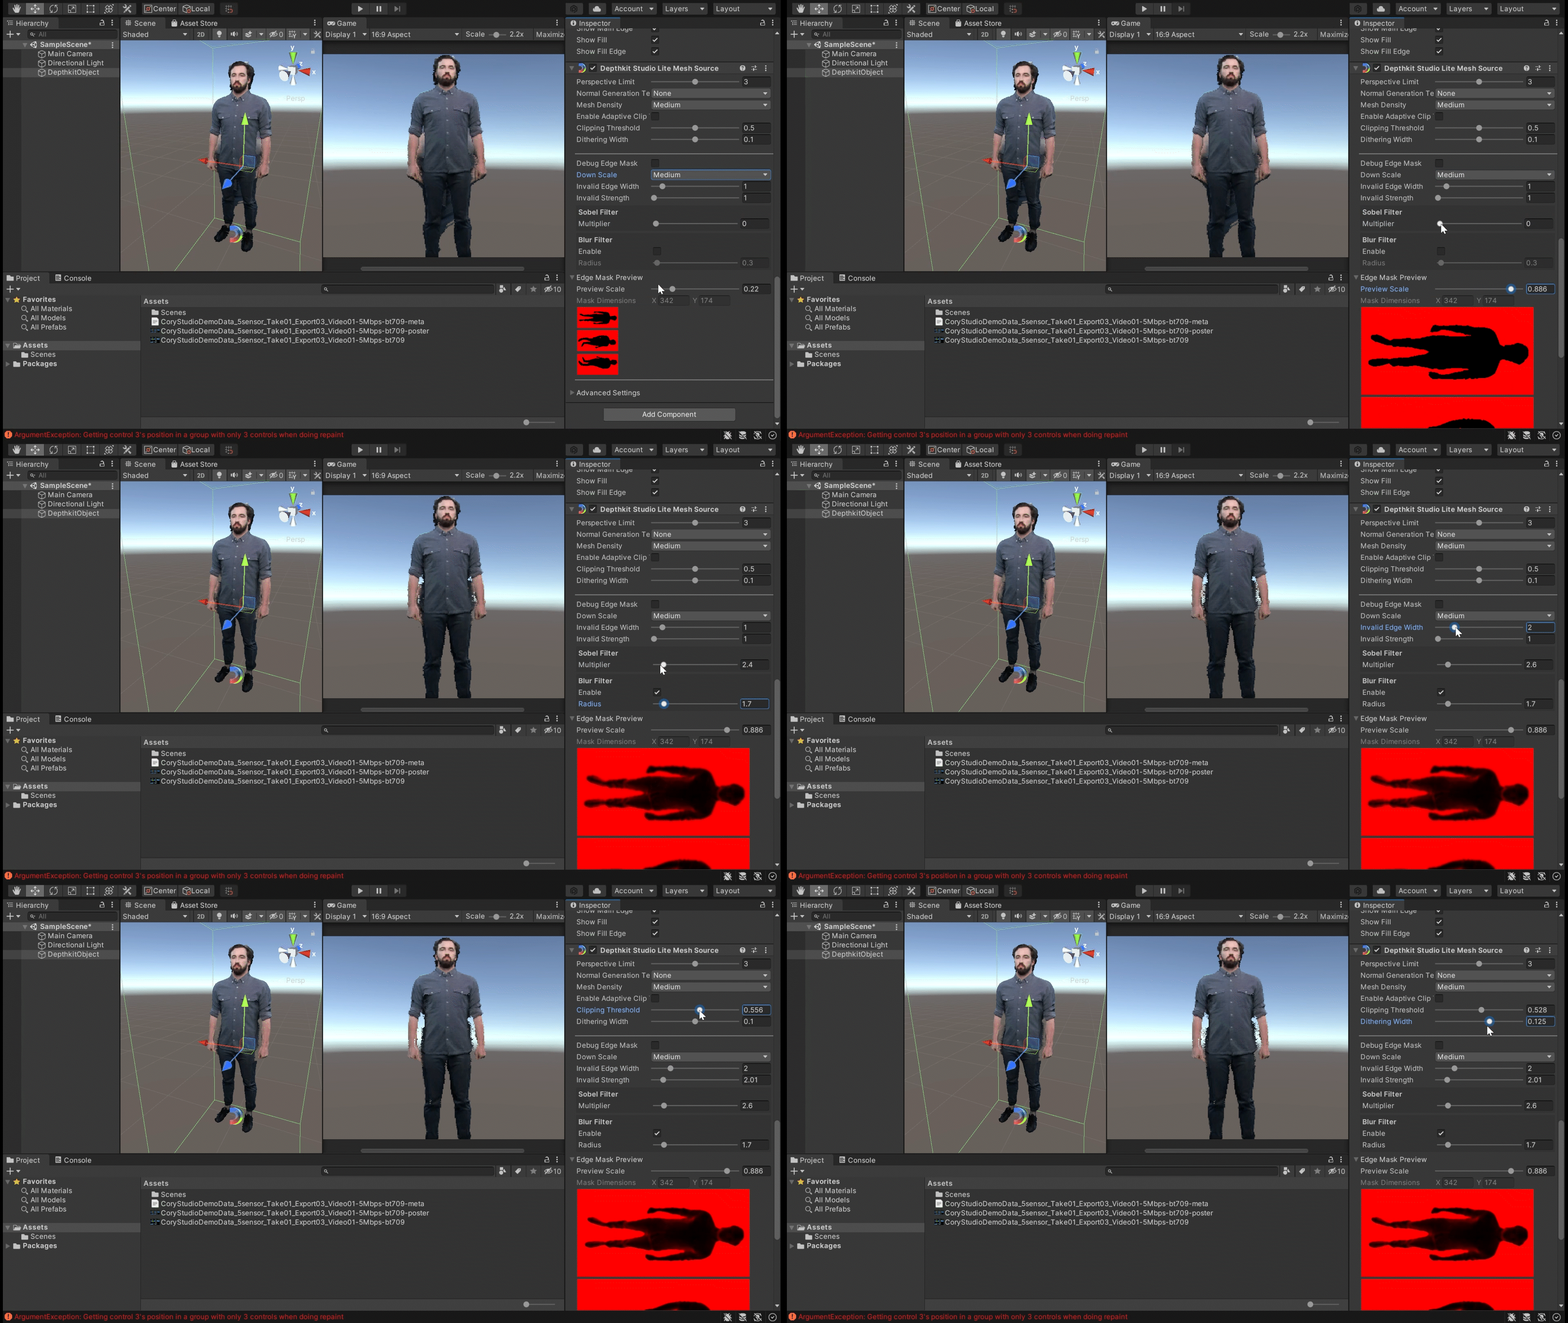
- Adjust the Sobel Filter Multiplier, then Blur Radius, Clipping Threshold, Dithering Width, Invalid Edge Width, and Invalid Edge Strength to reduce the extra geometry added by the oblique sensors. You can learn more about each of these in the Component guide below.
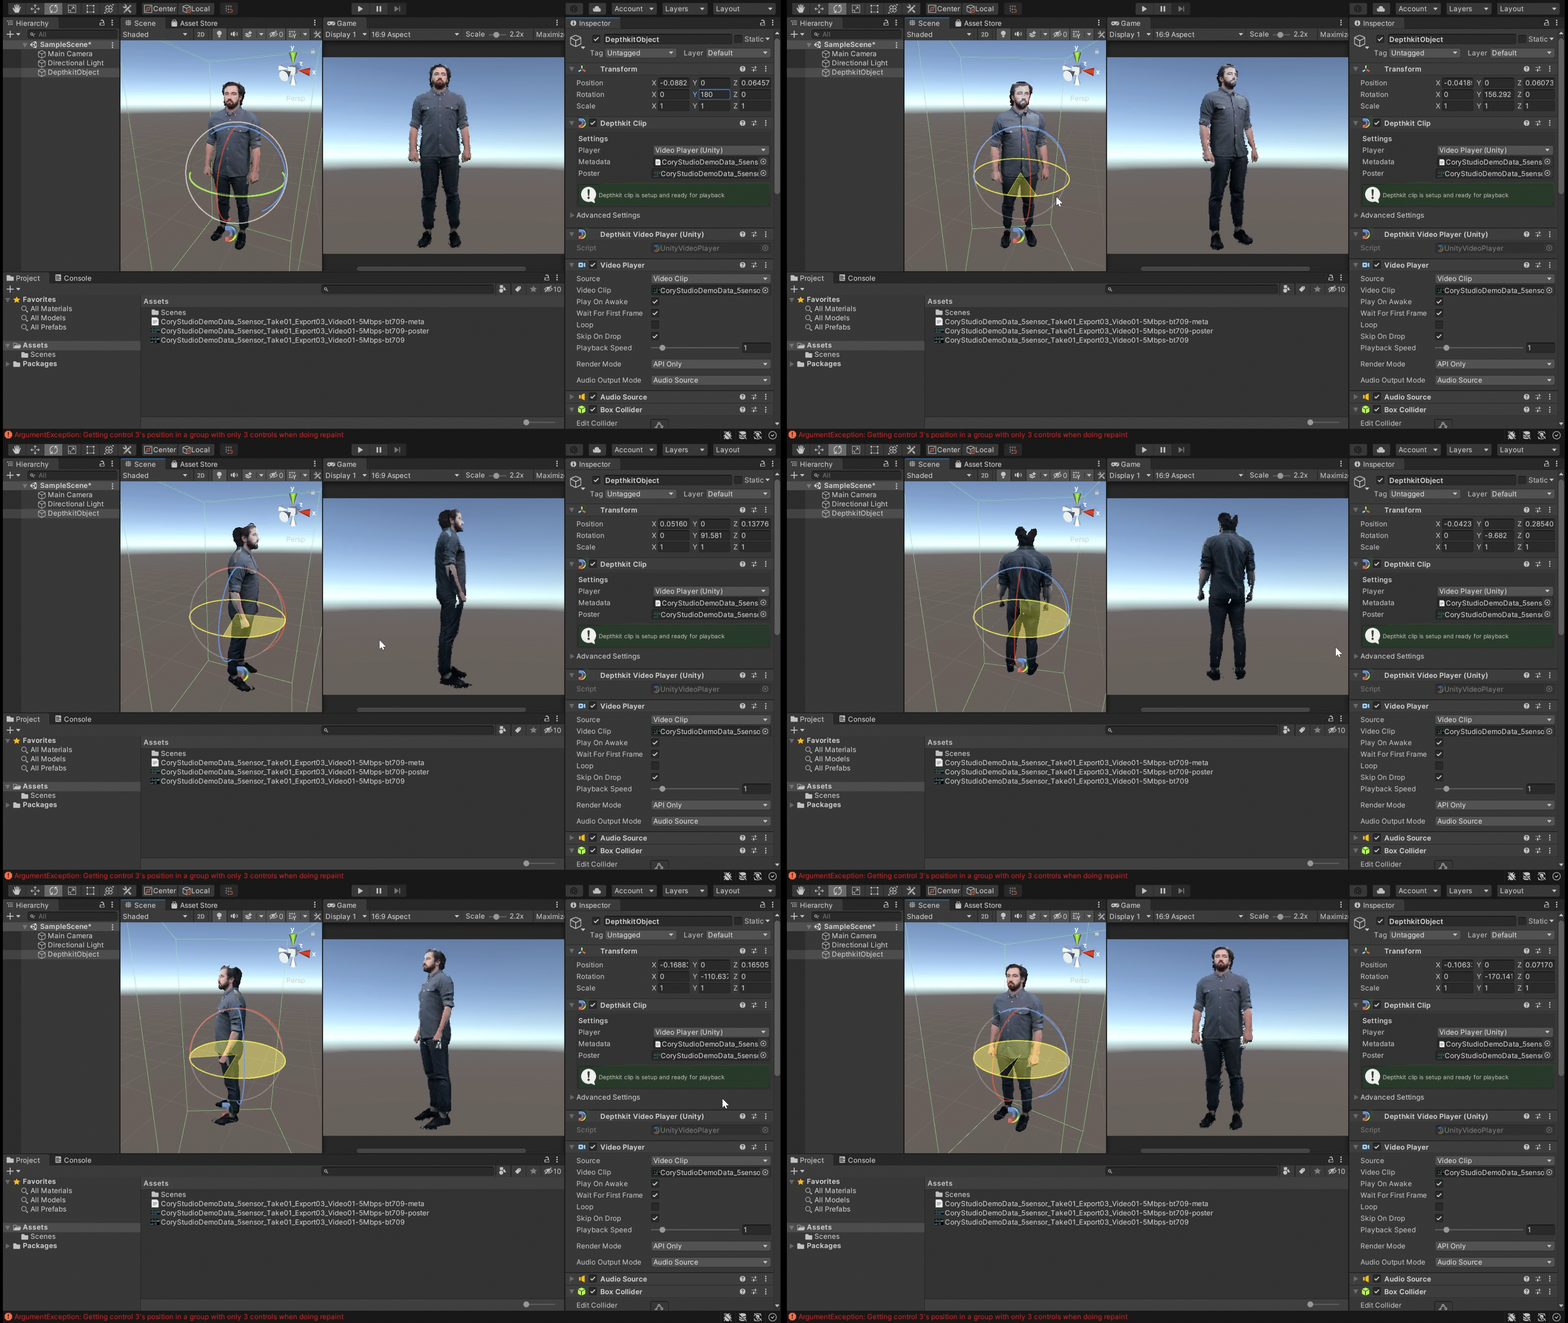
- Inspect your asset from different angles as you adjust settings. Because the renderer optimizes for the Main Camera, select and rotate the Depthkit object while inspecting it in the Game view, rather than orbiting the Scene camera, to make sure you're adjustments are the most effective.
Component reference
Depthkit Studio Lite Built-in Look
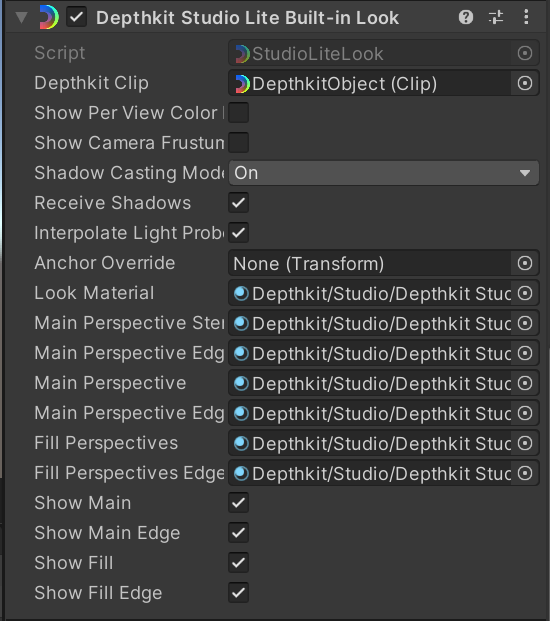
Depthkit Clip: Reference to the Depthkit Clip. This can be used to have a single Clip to drive multiple looks on different game objects
Show Per View Color Debug: Shows a debug view which assigns a color to each depth perspective, illustrating how each contributes to the overall texturing result.
Show Camera Frustums: Draws color-coded frustums for each sensor in the Scene View
Shadow Casting Mode: Controls how the Look casts shadows onto other objects.
Receive Shadows: Enables the Look to receive shadows, including self-shadowing.
Interpolate Light Probes: Enables if the Look receives baked light transferred from light probe arrays.
Anchor Override: An optional transform that adjusts where the light probe array is sampled.
Depthkit Studio Lite Mesh Source
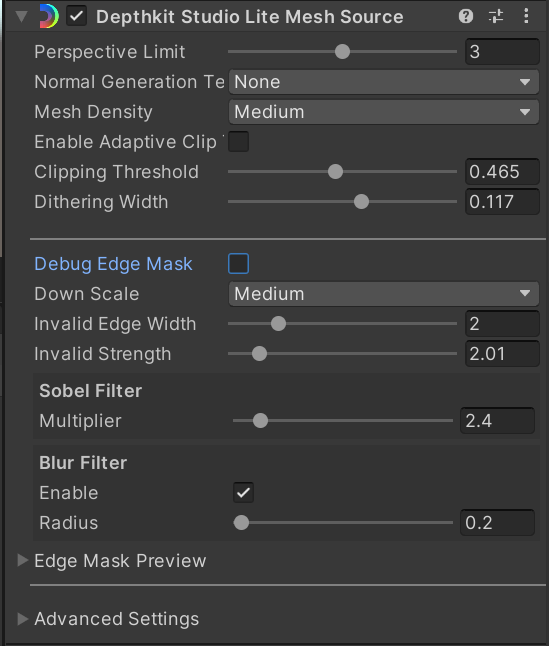
Perspective Limit: This controls the number of perspectives drawn at any time. The ideal perspectives displayed are chosen dynamically based on the Main camera's position relative to the capture center. Fewer perspectives will result in better performance, but with the drawback of artifacts such as holes and visible popping as perspectives turn on and off dynamically.
Normal Slope: Adjusts the slope of the normal to artificially flatten or sharpen surface normals.
Mesh Density: Adjust the density of the Depthkit mesh. Higher values capture more detail and have cleaner edges at the cost of performance.
Enable Adaptive Clip Thresholding: Enables view dependent control of the Clipping Threshold and Dithering Width. This is useful when addressing artifacts from stretched geometry between large depth disparities. When the capture is viewed close to the original capture angle, the lower of the range values is used for Clipping Threshold and Dither Width. As the viewing angle approaches Max View Angle Threshold, the higher of the ranges are used, allowing the stretched geometry to be eroded.
Updated 10 months ago
