Exporting Cinema captures
Once you have edited your Depthkit Cinema assets, you are ready to export. Learn more about the various export formats and settings below to choose the correct format and settings for your workflow.
In this page
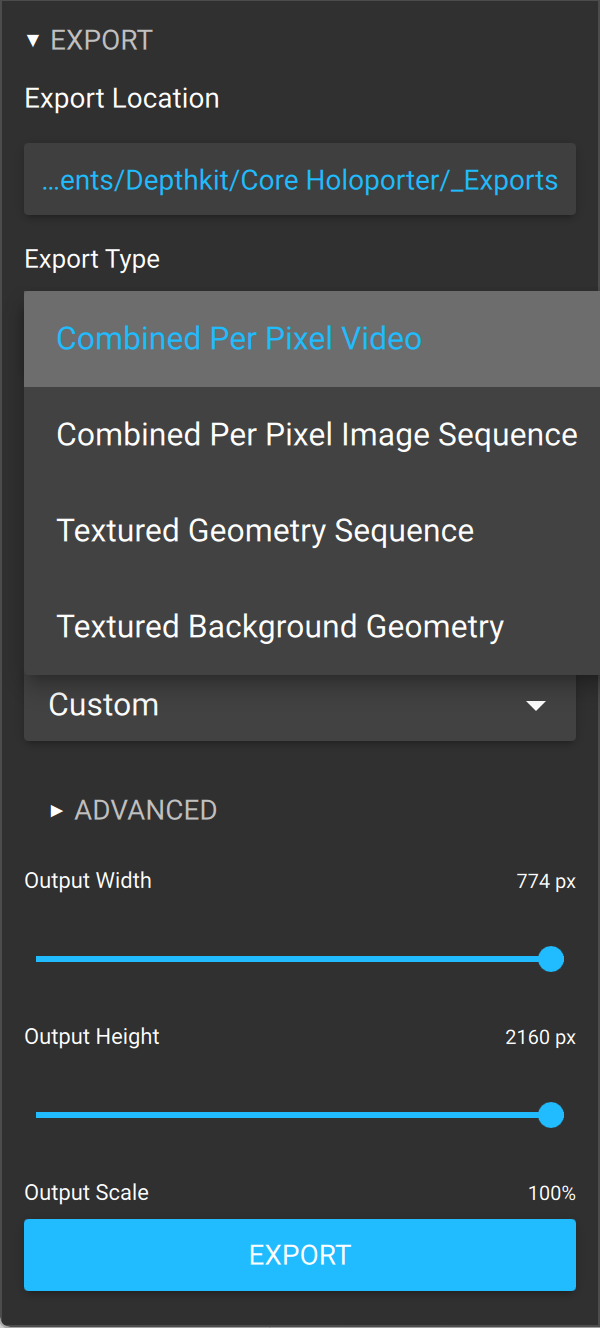
Export location →\ Export formats →\ - Combined Per Pixel Video for Unity →\ - Combined Per Pixel Image Sequences for custom encoding →\ - Textured Geometry Sequences for visual effects and WebXR →\ - Textured Background Geometry →\ Combined Per Pixel Video export settings →\ Combined Per Pixel Image Sequence export settings →\ Textured Geometry Sequence export settings →\ Background Textured Geometry export settings →\ Exporting →\ Next steps →

See the Textured Geometry Sequence export settings section below for more information.
Textured Background Geometry
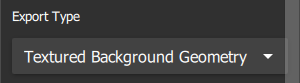
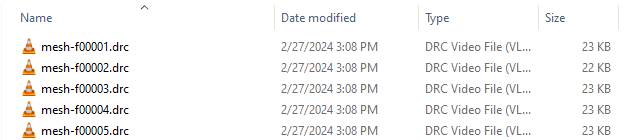
Textured Background Geometry exports a single mesh that can be ideal for averaged or smoothed environments and static backgrounds. Similar to the Textured Geometry Sequence format, Textured Background Geometry can be decimated in order to reduce the triangle count for a lighter file.
This format produces multiple files just like Textured Geometry sequences described above, but only exports a single averaged frame, rather than a sequence.
See the release notes and known issues for OBJ Background Plates.
See the Background Textured Geometry export settings section below for more information.
Combined Per Pixel Video export settings
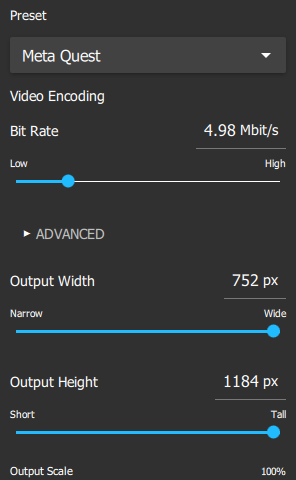
Bitrate: Set the target bitrate of your Combined Per Pixel Video. Lower bitrates will result in smaller files, but may introduce artifacts in the color and/or depth of your captures.
Preset: There are several advanced settings that have an impact on playback compatibility, quality and performance. Presets allow users to configure the advanced settings based on a known settings that work best for a given device.
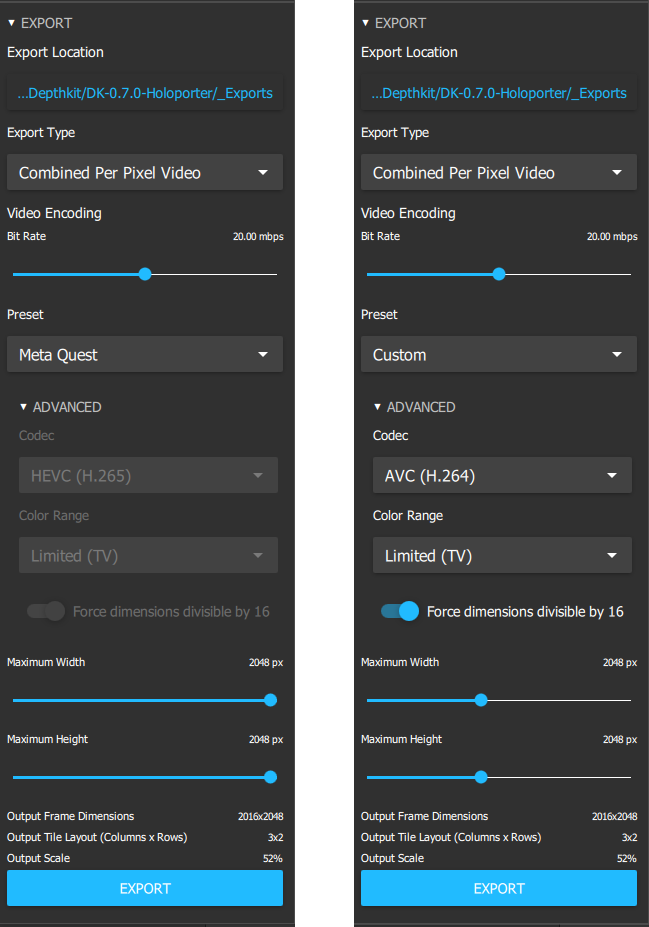
- Meta Quest applies to both Quest 2 and Quest Pro native playback through Unity.
- Apple Vision Pro sets codec and resolution constraints for performant playback when building a native application Apple Vision Pro in Unity.
- Custom allows the user to set custom advanced settings.
Maximum Resolution: These controls independently constrain the horizontal and vertical resolution of the exported Combined Per Pixel Video or Image Sequence. The maximum values can be reduced to accommodate different playback platforms and devices.
Advanced Settings
When Custom preset is selected, the following advanced options are available:
Codec: Choose the codec which best suits your publishing platform:
- AVC (H.264) provides the greatest compatibility for playback across various devices, but constrains the resolution and quality.
- HEVC (H.265) is a higher-efficiency codec which supports higher resolution, but is not universally supported for playback.
🚧
Windows 11 has HEVC support built in. However, on Windows 10, H.265 exports requires installation of the HEVC Videos Extension Plugin from the Windows Store
Color Range is a compatibility setting for some H.264 files to playback without distortion.
- Full (PC) is used in most playback scenarios, including desktop.
- Limited (TV) is required by some playback devices, including mobile devices like Meta Quest.
Force dimension divisible by 16 addresses an issue of visual errors on non-divisible by 16 frame dimensions on some Android devices, such as Meta Quest.
Once all of your settings are selected, proceed to the exporting section below to finalize the export.
Combined Per Pixel Image Sequence export settings
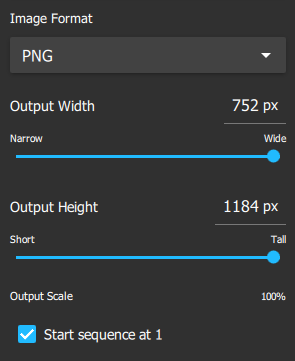
Image Format: Select between PNG files for higher quality, and JPG files for smaller file sizes.
Maximum Resolution: These controls independently constrain the horizontal and vertical resolution of the exported Combined Per Pixel Video or Image Sequence. The maximum values can be reduced to accommodate different playback platforms and devices.
Start sequence at 1: For image sequences, each exported file adopts the frame number from the source recording. Alternatively, you can override this and start the exported sequence at 1, depending on what's best for your workflow.
Once all of your settings are selected, proceed to the exporting section below to finalize the export.
Textured Geometry Sequence export settings
There a handful of settings which are available to tailor textured geometry exports for different workflows and pipelines.
Mesh Export Presets
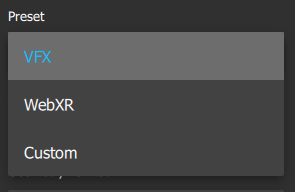
Depthkit offers presets to quickly load settings optimized for different workflows.
VFX: This preset is great for creating PLY sequences for visual effects tools (Houdini, C4D, etc.) which preserve lots of detail while keeping file sizes manageable.
WebXR: This preset is creates lightweight streaming-optimized Draco sequences which are great for sending over the internet and rendering on mobile devices.
Custom: This allows you to customize the format, mesh simplification, and texture settings yourself.
Custom Geometry Export Options
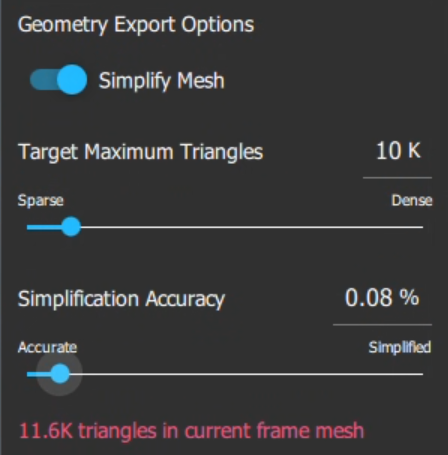
Simplify Mesh: Enabling this setting reduces the number of triangles of each frame of your geometry sequence, resulting in smaller files which play back more performantly. If this is disabled, the number and size of the triangles in the mesh will primarily be determined by the Mesh Density setting in the Surface Reconstruction Pane.

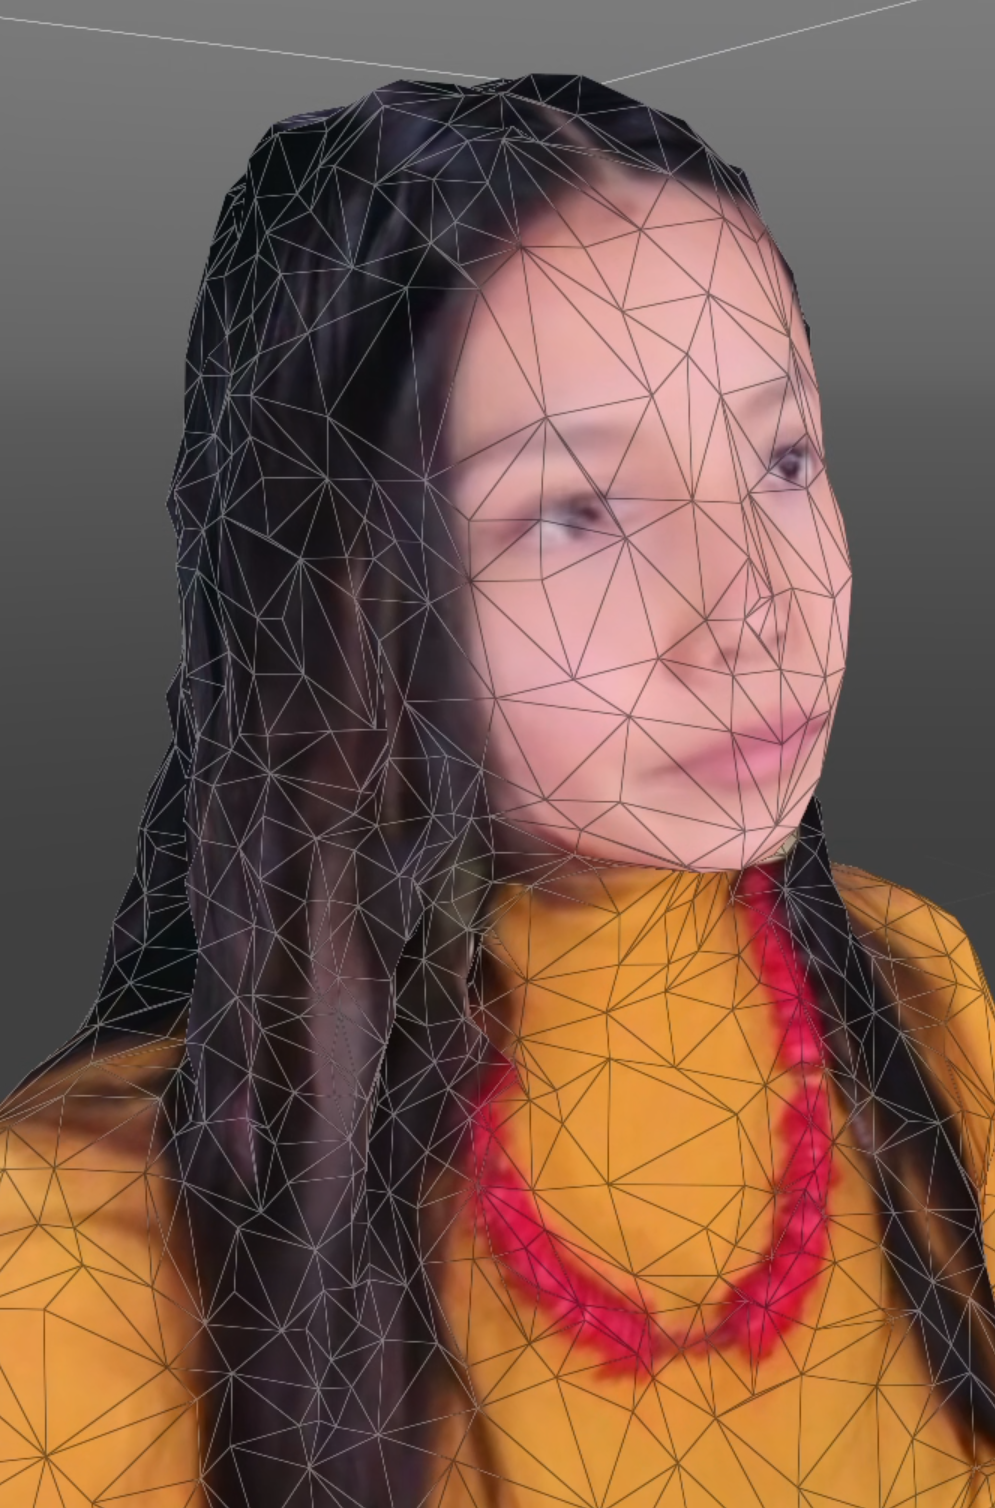
Target Maximum Triangles: This setting assigns a target number of triangles for mesh simplification to aim for. A setting of 10,000 (10k) triangles is usually appropriate for playback on mobile devices & headsets, but you can set this higher if your playback platform is more performant. Adjusting toward ‘Sparse’ will reduce the number of triangles and file size of the export; Adjusting toward ‘Dense’ will increase the detail and fidelity of the geometry.
Simplification Accuracy: This setting determines how much mesh simplification is allowed to deviate from the Max Triangles setting in order to preserve accuracy. Adjusting toward ‘Accurate’ increases the number of triangles above the target threshold; Adjusting toward ‘Simplified’ will optimize the mesh at the expense of detail and fidelity.
Geometry Format: Draco files are the correct format for WebXR, but you can also export in PLY or OBJ formats for Visual Effects workflows or for compression through 3rd party players like Arcturus HoloEdit.
Relightable: Enabling this results in the geometry files including per-vertex normals, which results in more realistic lighting in 3D rendering environments, but also makes the files larger.
Texture Type: Determines if the texture is stored as a video or image sequence; Video is the required option for streaming playback through our Web player.
Bit Rate: This determines the bitrate of the video. Lower bitrates will result in a smaller texture video at the expense of compression artifacts.
Advanced > Codec: For video textures, choose between HEVC (H.265) which supports more efficient compression and higher resolutions, or AVC (H.264) which has more universal playback support. For playback on mobile devices and headsets, HEVC (H.265) is recommended.
Advanced > Color Range: is a compatibility setting for some H.264 files to playback without distortion. Full (PC) is used in most playback scenarios, including desktop; Limited (TV) is required by some playback devices, including mobile devices like Meta Quest.
Advanced > Force dimension divisible by 16: Addresses an issue of visual errors on non-divisible by 16 frame dimensions on some Android devices, such as Meta Quest.
Maximum Width/Height: These controls independently constrain the horizontal and vertical resolution of the exported texture video or image sequence. The maximum values can be reduced to accommodate different playback platforms and devices. The WebXR preset constrains these resolutions to 2048x2048 for universal support on mobile devices/headsets.
Maximum Resolution: These controls independently constrain the horizontal and vertical resolution of the exported Combined Per Pixel Video or Image Sequence. The maximum values can be reduced to accommodate different playback platforms and devices.
Start sequence at 1: When Texture Type is set to Image Sequences, each exported file adopts the frame number from the source recording. Alternatively, you can override this and start the exported sequence at 1, depending on what's best for your workflow.
Once all of your settings are selected, proceed to the exporting section below to finalize the export.
Background Textured Geometry export settings
Background Textured Geometry settings are almost identical to the Textured Geometry Sequence export settings listed above. Exceptions include the omission of Texture Type as well as settings relating to video exports, as the texture for this is always exported as a single image.
Once all of your settings are selected, proceed to the following exporting section to finalize the export.
Exporting
Once you have selected your export location and format, then click the Export button and watch the blue progress bar in the timeline. This will only take a few moments.
Next steps
With your capture exported, you're now ready to publish your Depthkit Cinema assets