Azure Kinect color-depth misalignment
If your Depthkit captures look like the color texture is not aligned with the geometry, or you are getting doubled-up textures in Depthkit Studio captures, this could be the result of a known issue with some Azure Kinects.
🚧 Depthkit Studio Calibration vs. Factory Misalignment
Though misalignment within the Azure Kinect may be the cause for ghosting artifacts and doubled textures for Depthkit Studio captures, be sure to rule out misalignment from a poor Depthkit Studio calibrations by inspecting your calibrations with both the Textured and IR views.
If the calibration looks misaligned in both Textured and Infrared (IR) views, then the issue likely lies with the Depthkit calibration, and may be improved with another pass with a better sampling strategy.
If the calibration looks well aligned in the Infrared (IR) view, but misaligned in the Textured view, this indicates that one or more of the sensors has the factory depth-color misalignment described here.
Some Azure Kinects ship with an inaccurate alignment between the depth and color streams. This can create misaligned results in Depthkit and prevent successful calibrations. The following workflow is designed to help evaluate if your Azure Kinect is misaligned.
📘 There is currently no solution for misaligned hardware aside from returning your sensor to Microsoft for a replacement.
If you'd like to get a device replaced, please contact our support team at support@depthkit.tv first for guidance. We are working closely with Microsoft to address this issue when your hardware is affecting the use of Depthkit.
The goal is to take a simple 2D grid, place it in front of the Azure Kinect, and view the degree of misalignment, using the Azure Kinect Viewer.
To do this you'll create a reference grid on a piece of paper with a hole in it, place it at a six foot distance from the Azure Kinect and observe whether the hole in the paper aligns with the grid.
If it does not, there is misalignment between your depth and color streams. You will make note of that distance as a way of understanding the quality of the onboard calibration for your sensor.
What you'll need:
- Azure Kinect Viewer
- Paper & pen
- Measuring tape
- Scissor or knife
1. Create a reference grid
Create your grid by hand with pen, paper and a ruler or print the grid below. The large increments should be one inch and the smaller increments should be a half inch.
Download Grid [.PDF] ↓\ Print this PDF at 100% scale to create a reference grid.
🚧 Ensure your printer does not alter the scale in the printing settings.
Set custom scale to 100% or select fit to page to ensure that your grid is printed at accurate scale on an 8.5"x11" or Letter sized page. Double check your grid by measuring it.
2. Cut a 2"x2" square in the center
Using a scissor or a knife, cut out a 2"x2" square in your paper matching your grid.
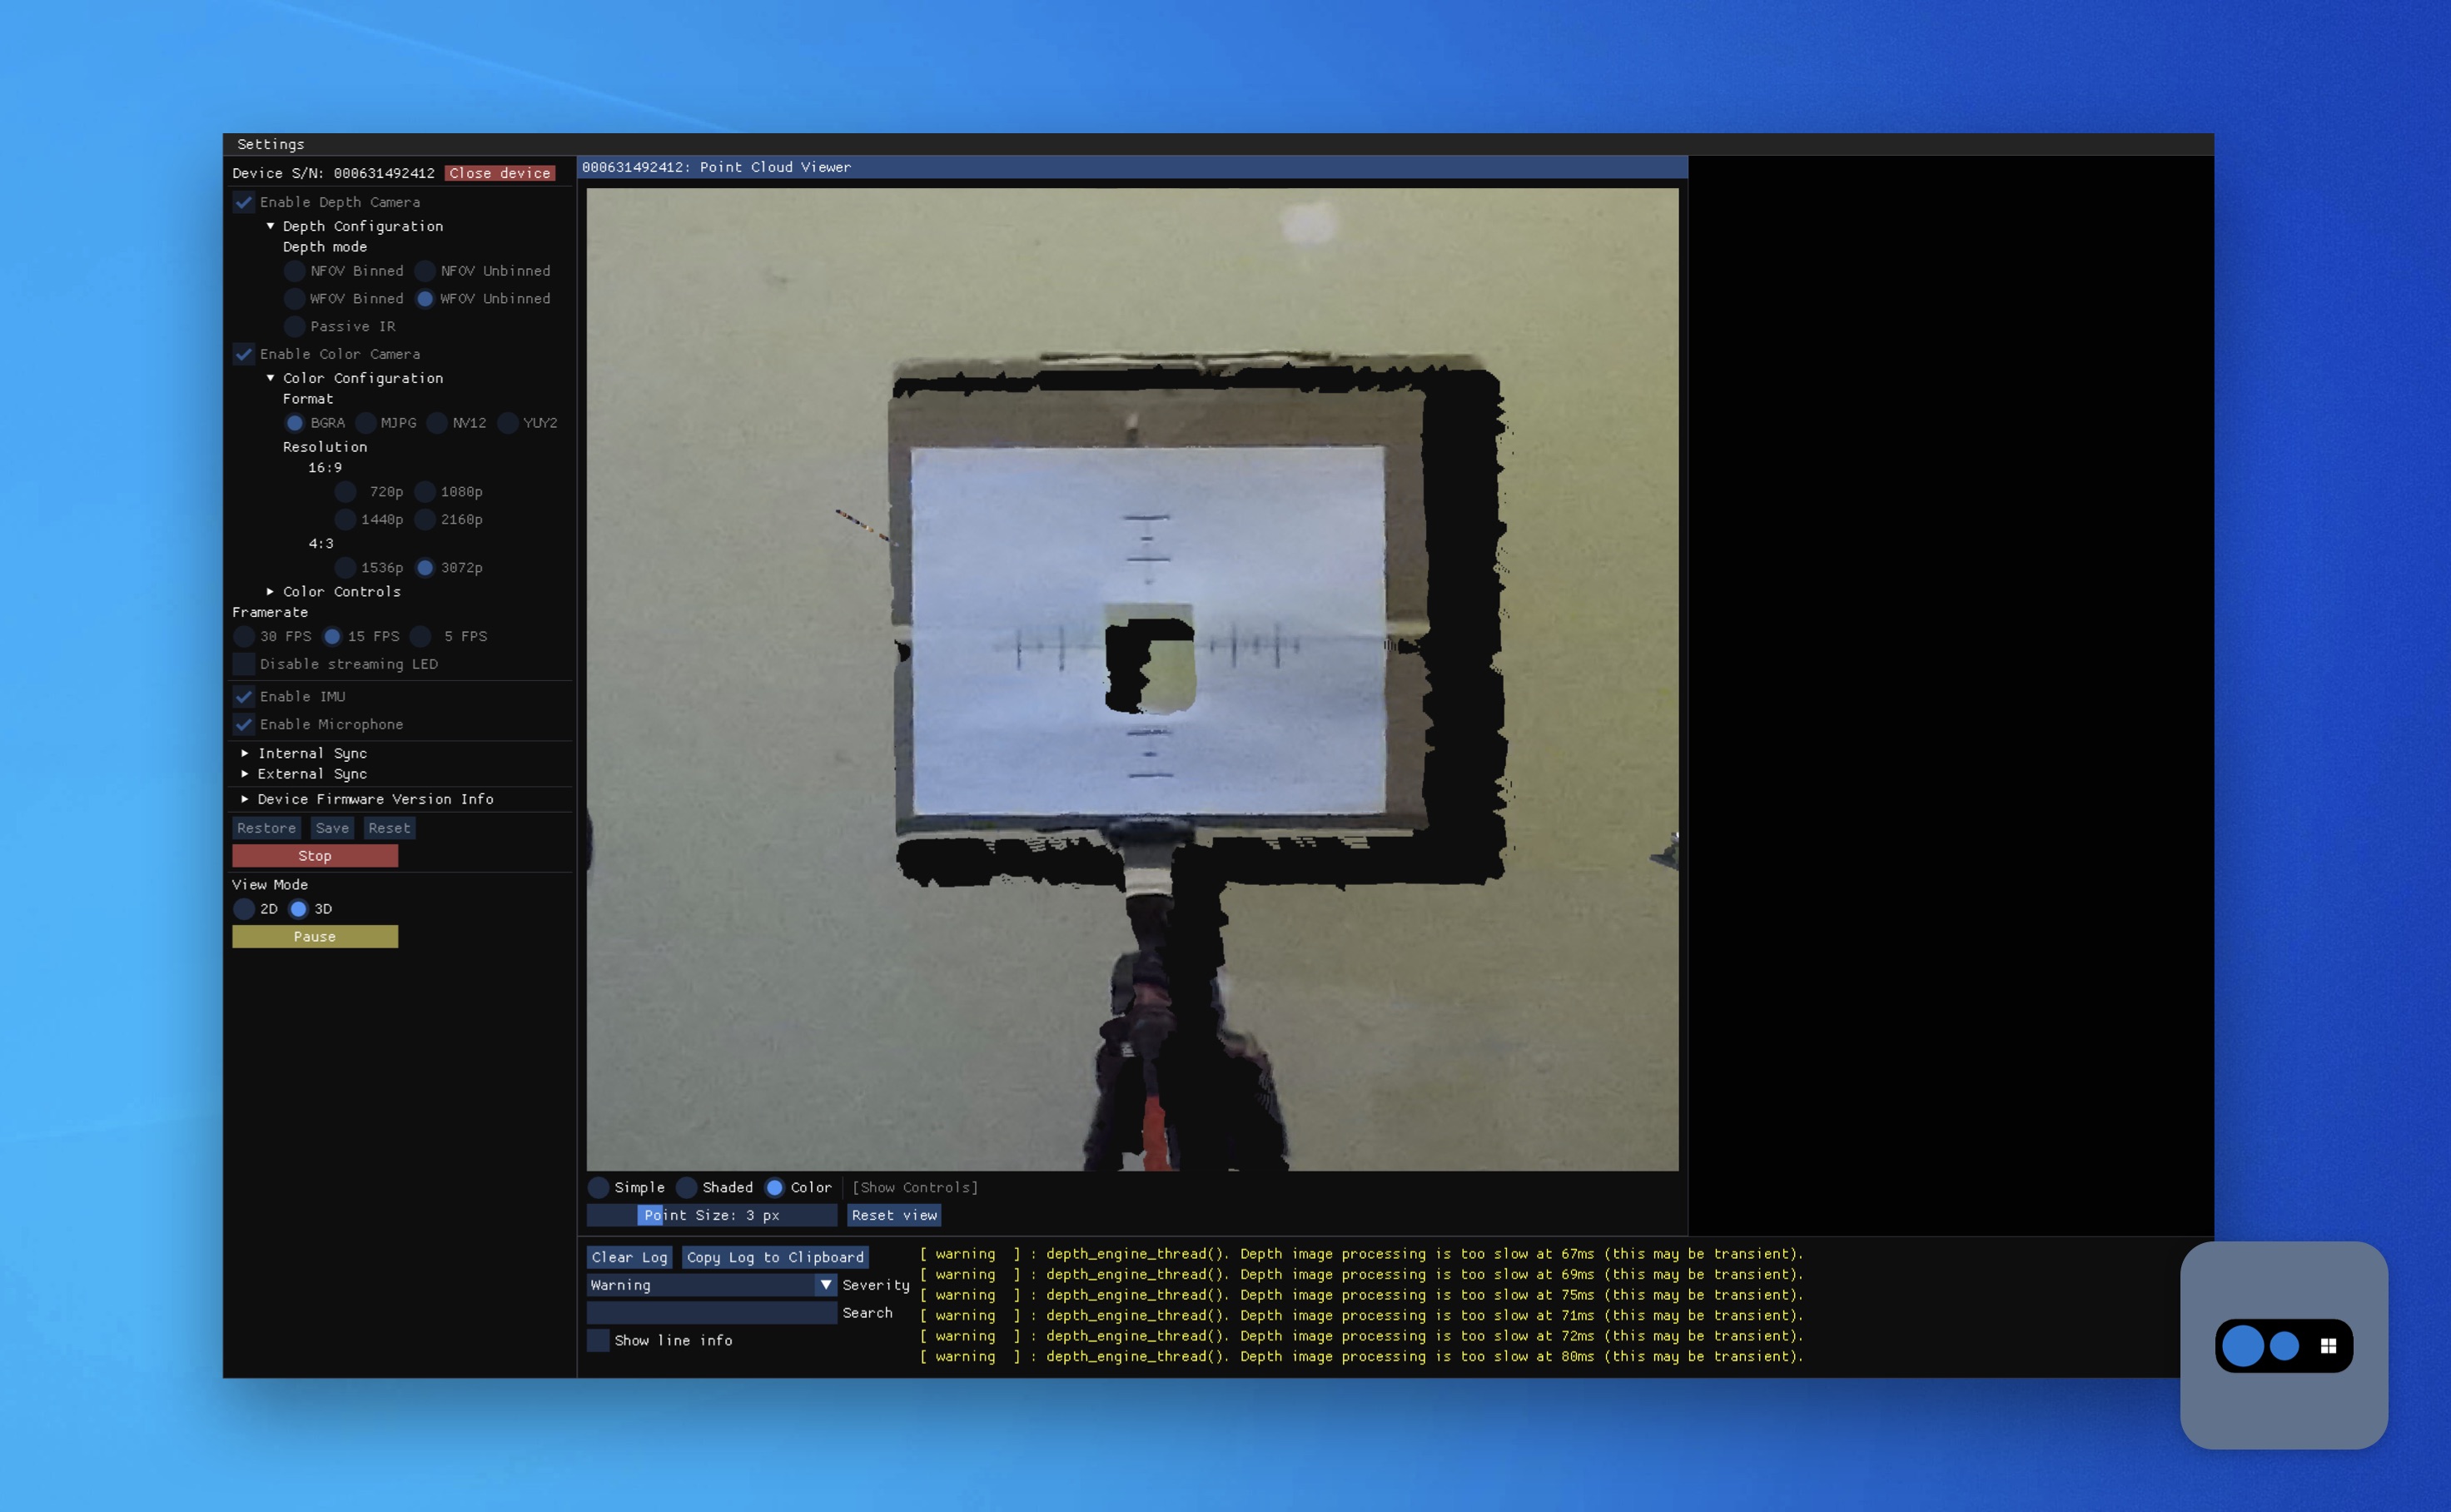
3. Launch & configure Azure Kinect viewer
The Azure Kinect viewer comes bundled with the Azure Kinect SDK. Launch it by pressing the Windows key and typing in "Azure Kinect Viewer" or navigating to C:\Program Files\Azure Kinect SDK v1.4.1\tools\k4aviewer.exe
Click Open Devices
Set your color and depth settings:
- Enable Depth Camera and set to
WFOV Unbinned - Enable Color Camera and set to
3072p - Press
Startat bottom — after the stream starts a menu will appear below. ToggleView Modeto3D
In the bottom left of the 3D Viewport configure your Pointcloud Viewer settings:
- Toggle
Colormode - Set Point Size to 3

Navigate the 3D Viewport to zoom in on the area where you'll place your marker by using your mouse:
- Rotate: [Left Mouse Button] + Drag
- Pan: [Right Mouse Button] + Drag
- Zoom: Mouse Wheel
🚧 Make sure you position your target in the centered in the frame of the Azure Kinect at the location you identified at a distance of six feet from the sensor.
4. Measure a six foot distance from your sensor
Measure a six foot distance from your sensor. Note that distance, this is where you'll place your marker. Hold the target 6 inches from the background.
5. Create a screen recording of your grid
Create a screen recording of you holding your marker at six feet from the sensor. Ensure that the boundaries of the hole in the center of the grid is visible in both depth and color.

📘 To easily identify any degree of misalignment, place the marker at a distance from your background, ideally using a dark, flat surface.
To start a screen recording press Alt + Windows Key + R or launch the Windows Game Bar by pressing Windows Key + G and starting a recording view the menu.
How to capture video clips in Windows 10 →
6. Analyze your alignment
Analyze your results by identifying whether the sensed edges of the hole you cut in the paper line up with the marked edges on the paper. If the hole detected by the depth sensor and the marks on the page do not align, use the grid to identify the scale of the misalignment.
When analyzing your alignment ignore any artifacts where color information from the foreground appears projected onto the background.
This is a known reprojection phenomenon that projects a sliver of sensor-left side of a foreground onto the background.

Make note of your results in terms of inches in the vertical and horizontal dimensions. For example, you may have a sensor that is +1" up and 0.5" to the left.
- Good Result, Usable Sensor — Less than .5" misalignment or not noticeable.
- Moderate Result, Consider Replacing Sensor — Between .5"-1" misalignment.
- Bad Result, Do Not Use — 1" of misalignment.
🚧 Our standards listed here are intended for production sensors, requiring a high degree of accuracy.
This does not guarantee that Microsoft or your vendor will replace your sensor if they do not match this specification.
Workaround for sensor-only recordings
With a Depthkit Studio Pilot or Depthkit Cinema license, you can manually compensate for factory misalignment in each Azure Kinect by using Depthkit Cinema's Alignment tools to adjust the color-depth alignment of your recording.
If your recordings are sensor-only, see the guide below to modify your project to enable these tools:\ Texture alignment adjustment for sensor-only recordings in Depthkit →