Depthkit Studio asset not appearing
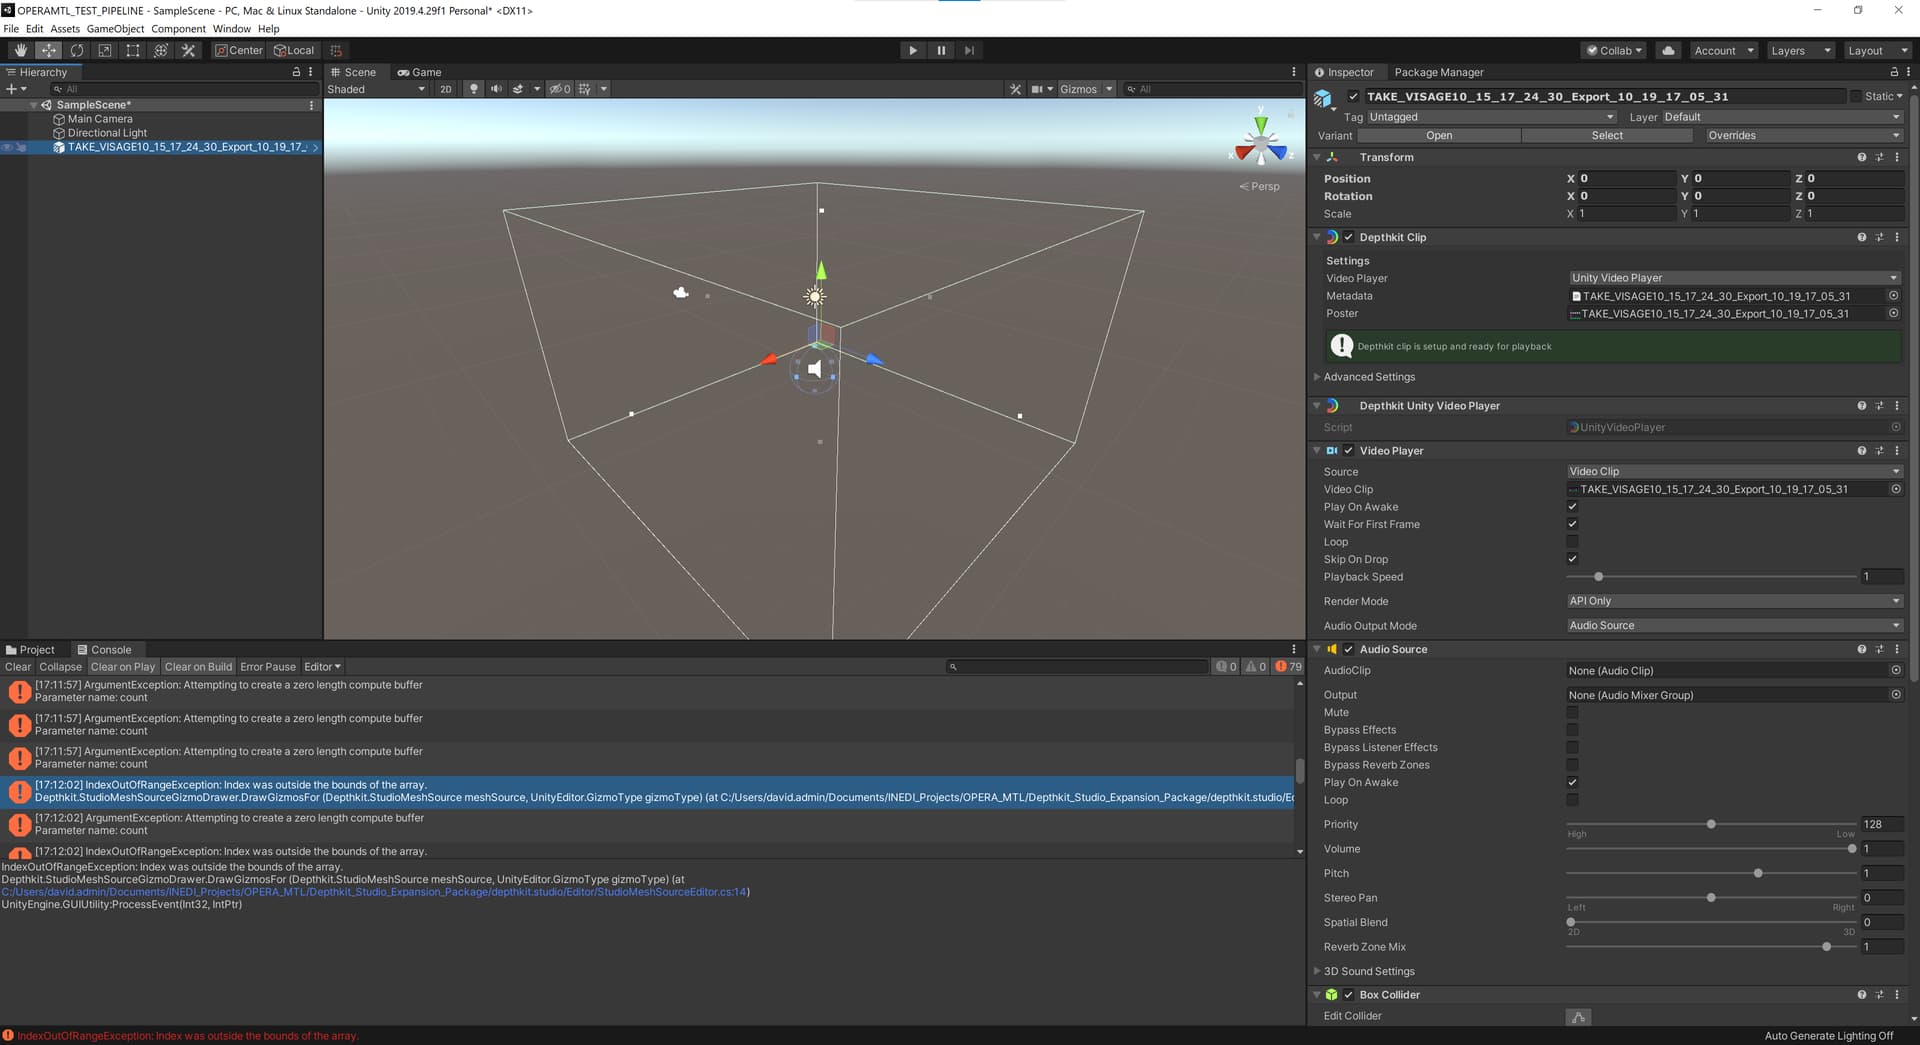
When loading and configuring your Depthkit Studio asset into Unity, it may not initially appear, instead showing just an empty bounding box, and reporting an error in the Unity console: IndexOutOfRangeException: Index was outside of the bounds of the array

This is often the result of the default bounding box being too large.
Reduce Bounding Box size
- In Unity's Hierarchy, select your Depthkit object.
- In the 3D scene view, you should see the bounding box of the object outlined in white. (If you don't, be sure Gizmos are enabled.)
- Grab the handle in the center of each of the bounding box's faces, and pull it in toward the center of the volume.
- Reset the Depthkit object's surface buffer with the Depthkit Studio Mesh Source component's 'Set Surface Buffer Capacity' button.
Adjust Near- and Far-planes in Depthkit, then re-export
The default bounding box is determined by the Near- and Far-plane positions set in Depthkit. To ensure your asset loads with a smaller default bounding box:
- Go back into Depthkit's Editor context.
- Adjust the near- and far-planes so that they are closer to your subject.
- Repeat this adjustment for each sensor.
- Re-export your asset as a Multiperspective CPP.
- Replace the asset in Unity with the new version.
- Reset the Depthkit object's surface buffer with the Depthkit Studio Mesh Source component's 'Set Surface Buffer Capacity' button.
Updated 10 months ago
