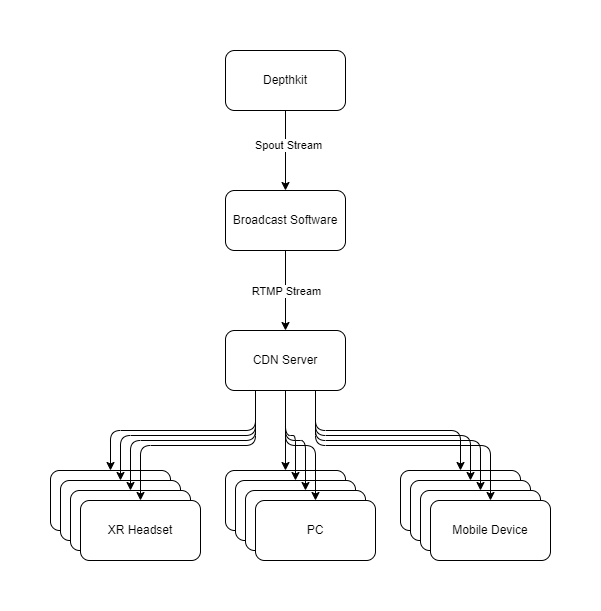
Broadcasting Depthkit live via CDN
In this page
What You'll Need → Setting up Depthkit → Setting up AWS MediPackage & MediaLive → Setting up OBS → Adding audio to the stream → Starting a broadcast → Setting up a receiver in Unity → Tips and troubleshooting →
🚧 An earlier version of this guide used Amazon AWS Elemental MediaStore, which is deprecated as of November 2025 . The guide below has been updated to use Amazon AWS Elemental MediaPackage instead.
When broadcasting a Depthkit Livestream over the internet to many recipient devices, methods of video transmission like P2P or WebRTC become unsuitable. Generic video livestreaming workflows use content delivery networks or content distribution networks (CDN) to reliably deliver these livestreams thousands of recipients or more. Depthkit can integrate into this video distribution infrastructure to enable the same number of recipients to remotely receive and reconstruct a Depthkit asset in real-time. This is useful in broadcast applications like volumetric musical performances, keynotes, and other forms of addressing large audiences remotely.
There are currently many options for broadcasting tools and CDNs:
| CDN Services |
|---|
| Amazon AWS MediaLive & MediaPackage |
| Microsoft Azure CDN |
| Cloudflare |
| Google Cloud CDN |
| Broadcasting Software |
|---|
| OBS (requires 3rd-Party OBS-Spout plugin) |
| vMix (requires commercial license) |
| Derivative TouchDesigner (requires commercial license) |
For this guide, we’ll be using OBS and AWS MediaLive.
You’ll Need
- A PC to run Depthkit and broadcast the Depthkit stream to the CDN - See hardware requirements forDepthkit Core and Depthkit Studio.
- A PC to receive and render the Depthkit stream - For best performance, we recommend using a separate PC for configuring/building your Unity project and receiving/rendering the Depthkit livestream.
- The Depthkit PC app
- An active Depthkit license which includes Livestreaming, like Depthkit Studio - See
.
- Sensor(s) and necessary accessories like data and power cables. If using multiple sensors with Depthkit Studio, you’ll also need sync cables and a calibration chart.
- Stable internet connection
- AWS account
- OBS - an open-source broadcasting tool
- OBS-Spout plugin - enables OBS to receive Spout streams
- Unity - See theRelease Notes of the latest Depthkit Expansion Package for the correct version number to use.
- Depthkit Expansion Package for Unity
- AVPro Video Player for Unity
Setup Depthkit
- Launch Depthkit and ensure you are logged in with a license which supports live streaming, like Depthkit Studio.
- Create a new project.
- If using multiple sensors with Depthkit Studio, create a Studio Calibration.
- Configure the sensors’ options, including resolution, exposure, and white balance.
- Start Streaming
- For Depthkit Core livestreams using a single sensor, enter the Record context, and the sensor stream will begin automatically.
- For Depthkit Studio livestreams using multiple sensors, enter the Studio Calibration & Recording context, and click Start Streaming.
- Set Near and Far clipping planes to remove unwanted geometry and increase the fidelity of the depth data. Get these planes as close to your subject as possible without cropping away any part of your subject. These clipping plane positions will not affect any recordings you make, but they will affect the live stream.
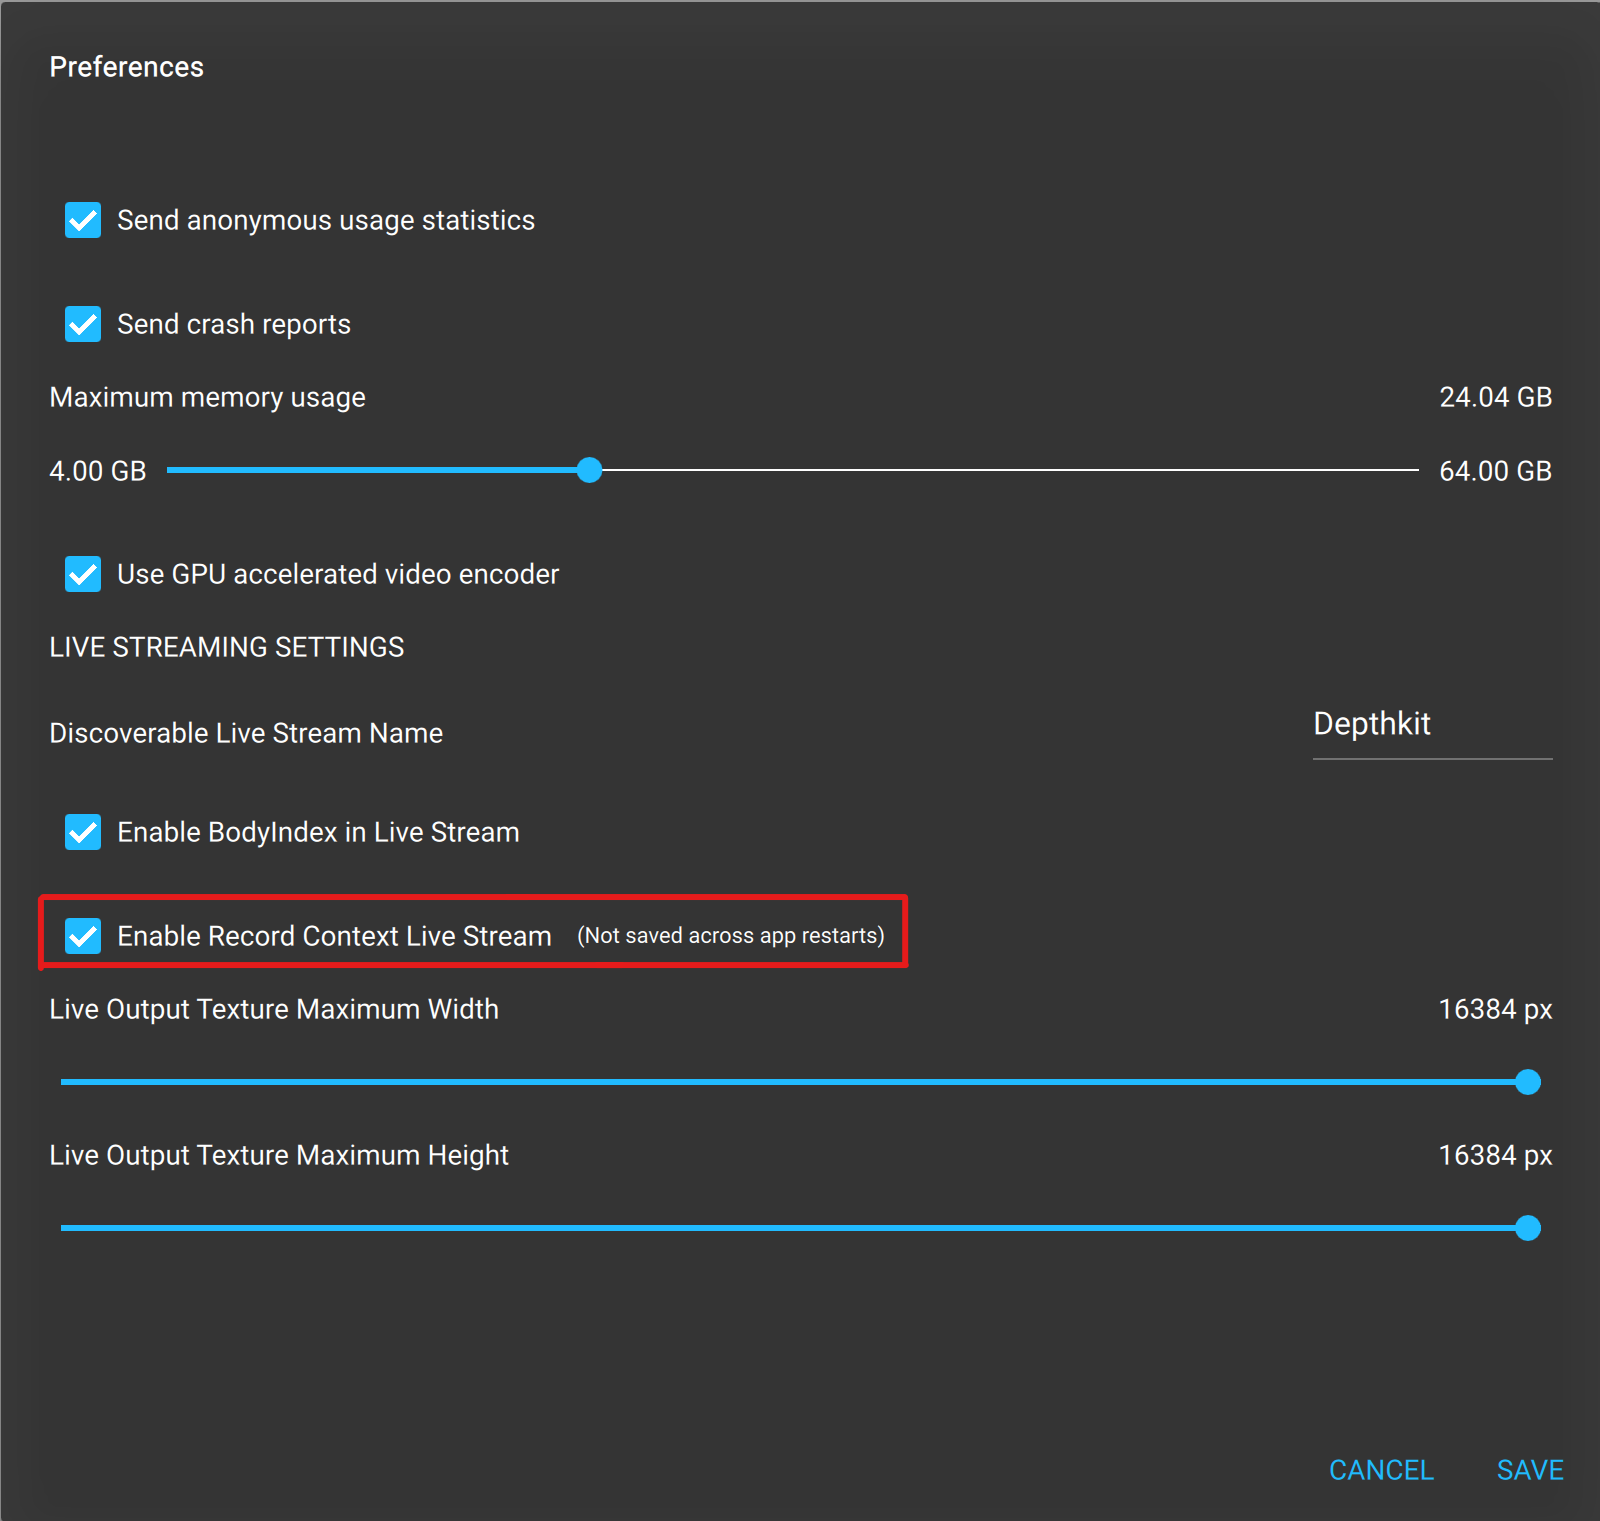
- In Edit > Preferences, check the Enable Record Context Live Stream box.
🚧 When you have Livestreaming enabled, you cannot edit the depth range in Depthkit.
To modify the depth range of any of the sensors, disable Livestreaming and make the adjustments, then re-enable it. You'll need to replace your metadata in Unity after modifying the depth range for correct rendering.
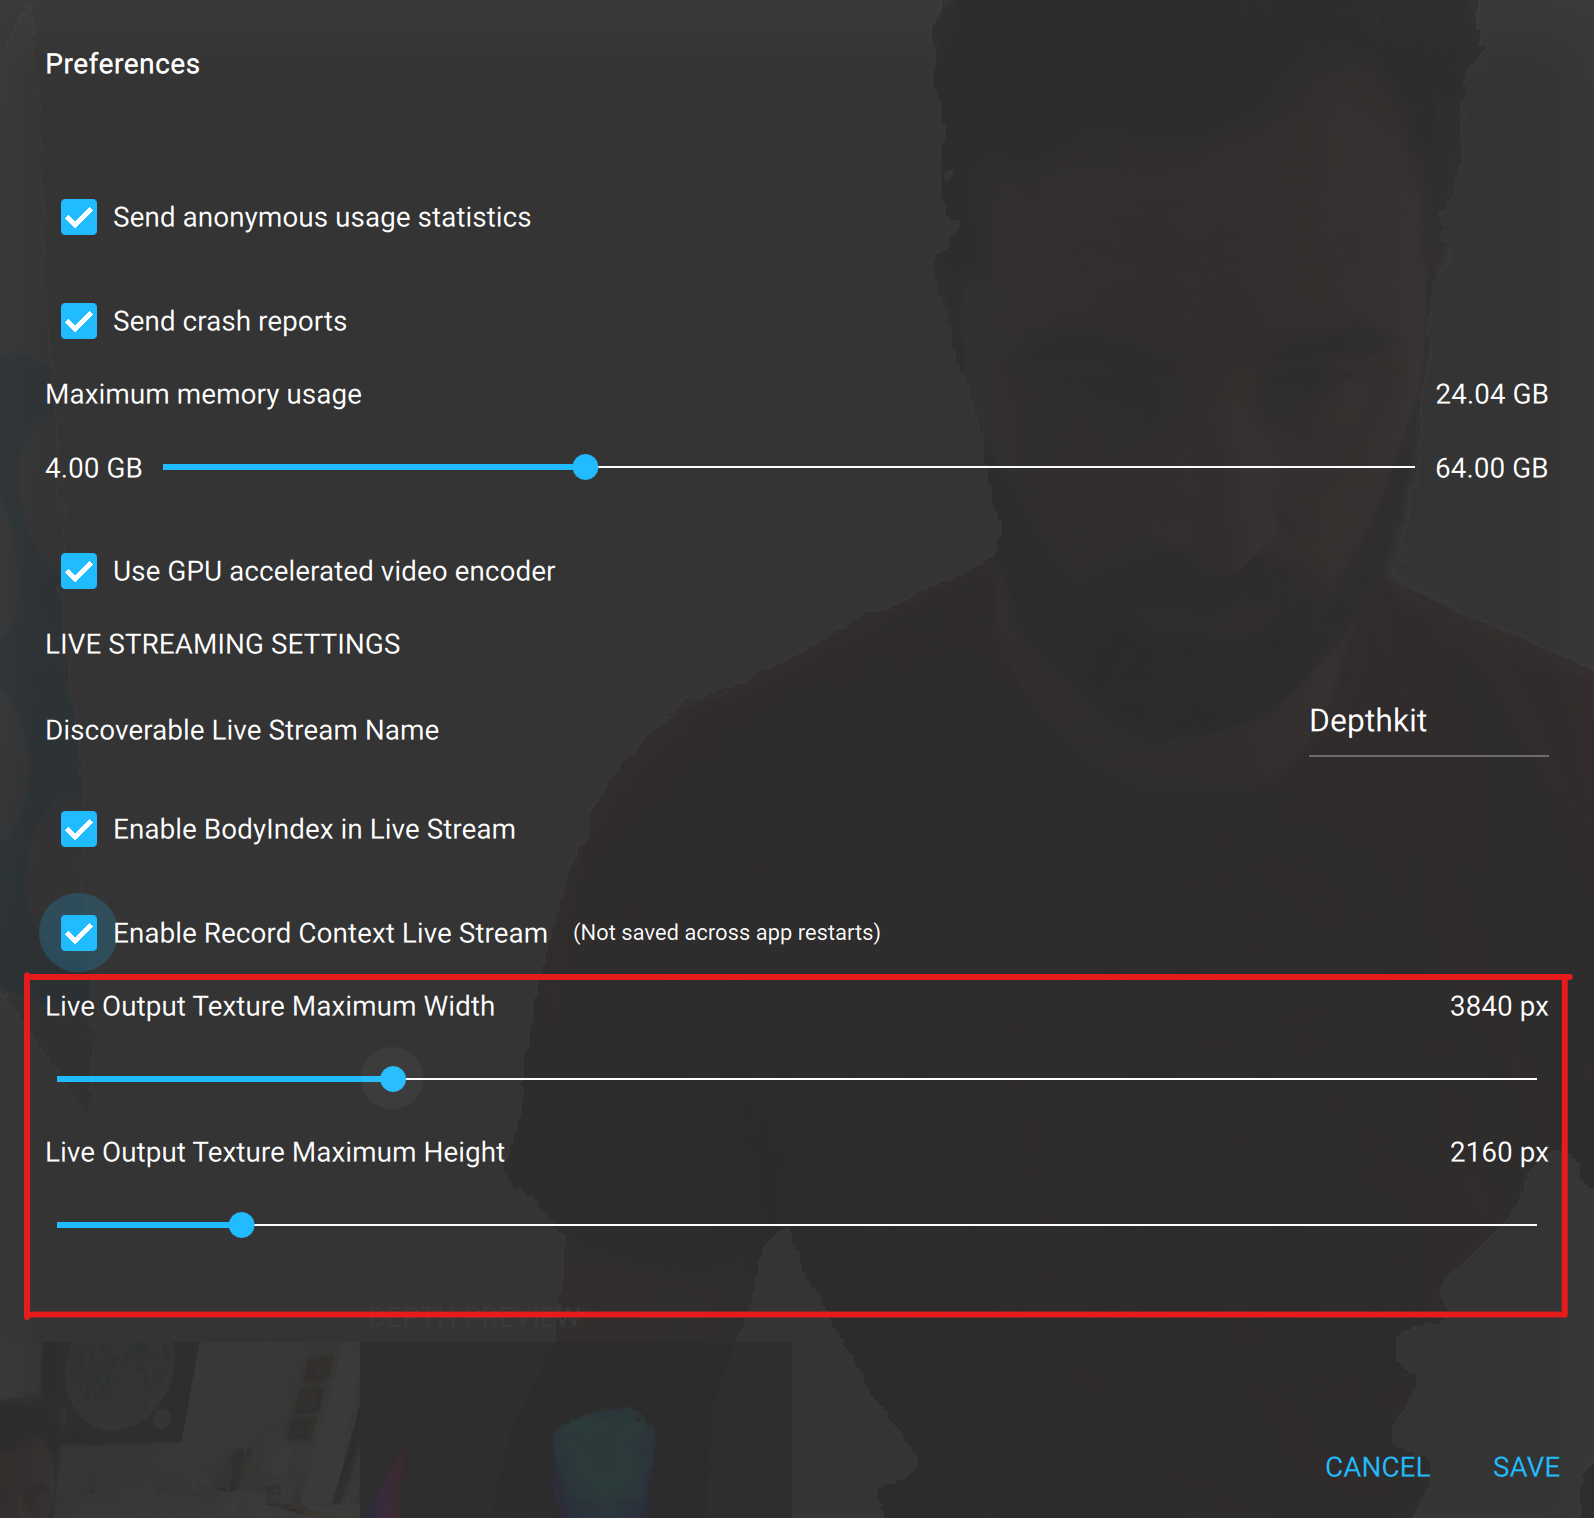
📘 Some broadcast software and CDN services only permit standard video resolutions like 1920x1080 and 3840x2160. In this case, set the Live Output Texture Maximum Width and Height to the highest values that your pipeline supports.
- Start streaming again.
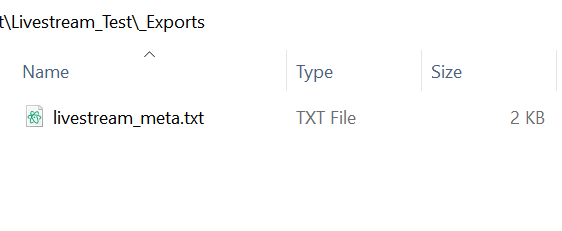
- A Live Streaming indicator will now appear in Depthkit’s 3D Viewport, and you will find a livestream metadata file in your Depthkit project bin’s “_Export” folder.

Setup AWS Elemental MediaLive and MediaPackage CDN
MediaPackage Setup
- Navigate to the MediaPackage dashboard.
- Click 'Create a new channel'.
- Enter a unique name, and leave all other settings set to their defaults.
- Click 'Create' to save.
- In the Origin Endpoints section, click 'Manage endpoints'. This will open a form to create a new endpoint.
- Give it a unique ID. We recommend leaving all other settings at their defaults.
- Click Save.
- Once the Endpoint is created, click into it and take note of the Endpoint URL - This will be used later in your Unity project as the source of the livestream feed.
MediaLive Setup
Inputs
- In the AWS Elemental MediaLive Console > Inputs, click Create Input.
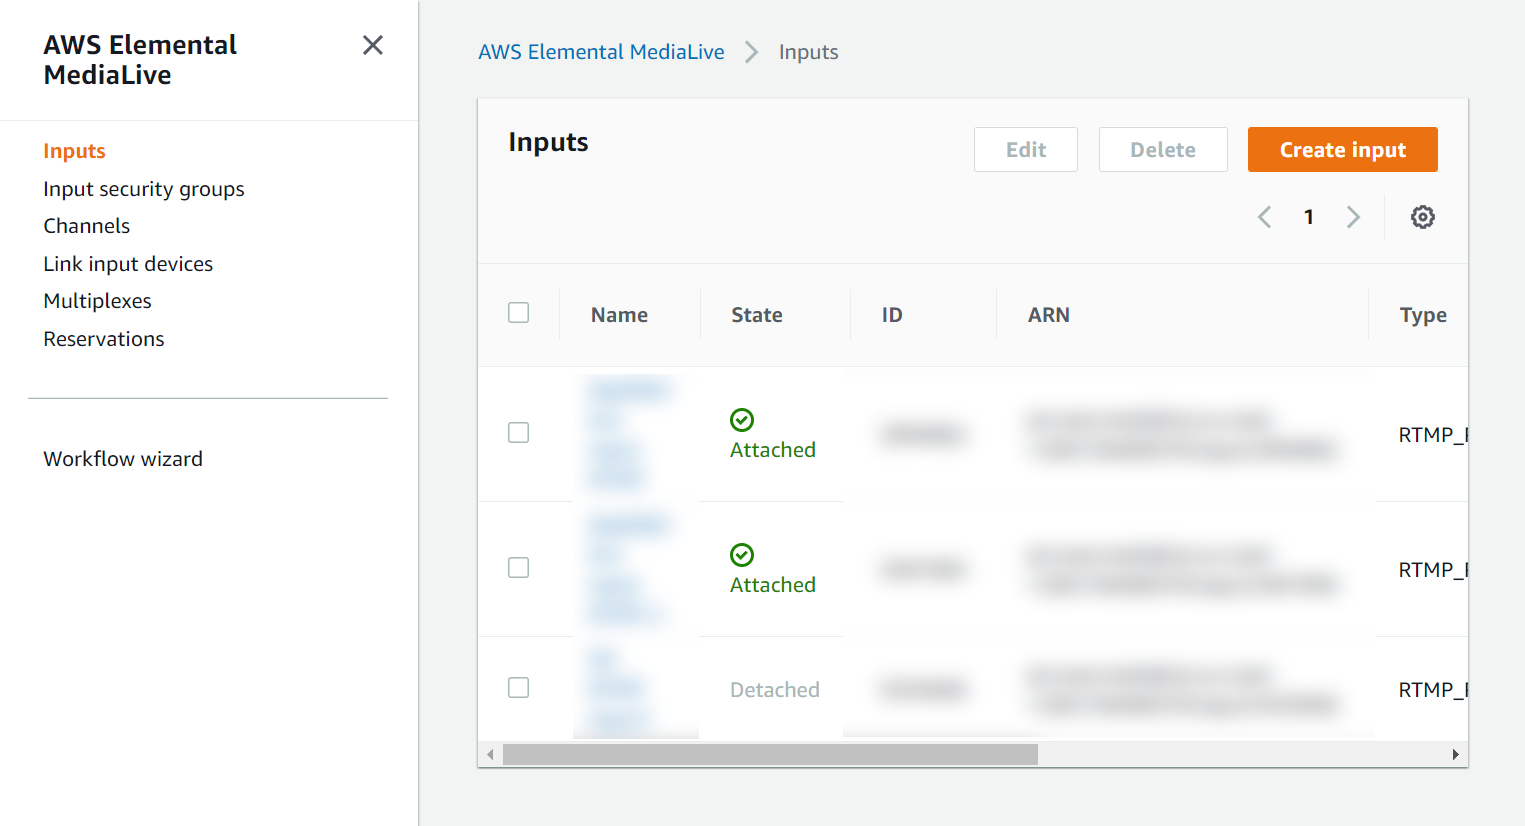
- Configure these settings:
Input name: Give the input a unique name.
Input Type: RTMP (push)
Input network location: AWS
Network mode: Public
Input security group: Either use an existing policy to only accept streams from a particular IP address, or select Create, and enter the public IP address of your Depthkit PC followed by
/32(CIDR format) to create one. To accept streams from any IP address, enter0.0.0.0/0Input destinations: SINGLE_INPUT Destination A > Application name: Generate an application name. Later when you configure OBS, this will be the end of the server path. Destination A > Application instance Generate an application instance. Later when you configure OBS, this will be the stream key. - Click Create.
- Under Endpoints, click into the Input you made and copy the RTMP URL (e.g. rtmp://55.5.55.55:5555/path/streamkey) and keep it handy for setting up OBS.
Channels
- In the AWS Elemental MediaLive Console > Channels, click Create Channel.
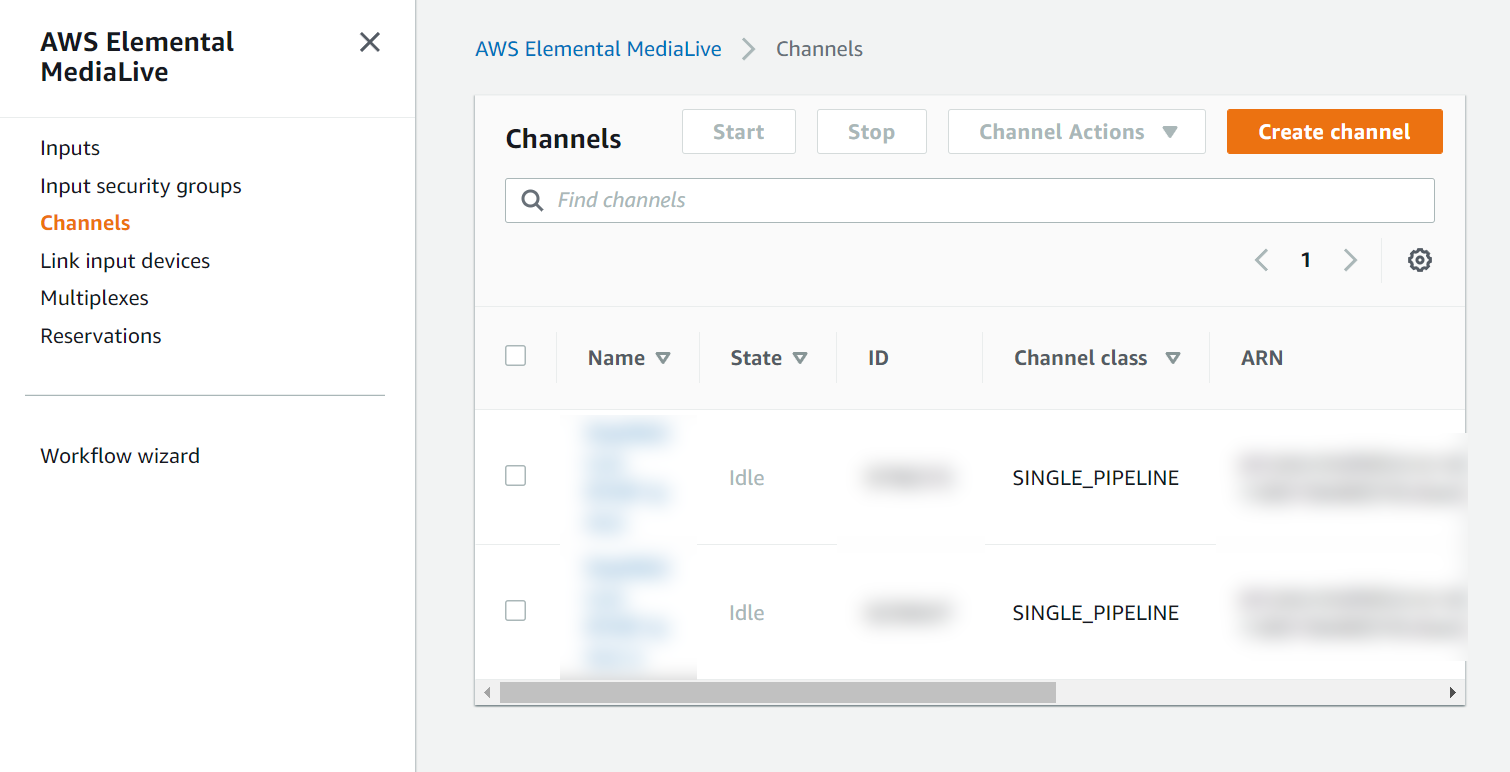
- Generate a unique channel name.
- For IAM role, use an existing MediaLiveAccess role, or create one from the template.
- For Channel Class, select SINGLE_PIPELINE.
- For Input specifications, select:
- Input codec: AVC
- Input resolution: UHD
- Maximum Input Bitrate: MAX_20_MBPS
- In the left panel, under Input Attachments, click Add.
- For input, select the MediaLive input you set up earlier.
- Click confirm.
- In the left panel, under Output Groups, click Add.
- Select MediaPackage, and click Confirm.
- In the MediaPackage group configuration section:
- Under MediaPackage destination, select the Use HLS output option then select your MediaPackage channel ID from the dropdown.
- Under Output Groups, click Output 1’s Settings.
- Under Stream Settings, enter the Width and Height of your Depthkit Livestream (found in the livestream_meta.txt).
- If your broadcast software requires a standard resolution like 3840x2160, enter those values instead, and stretch the Depthkit Livestream once setup in OBS.
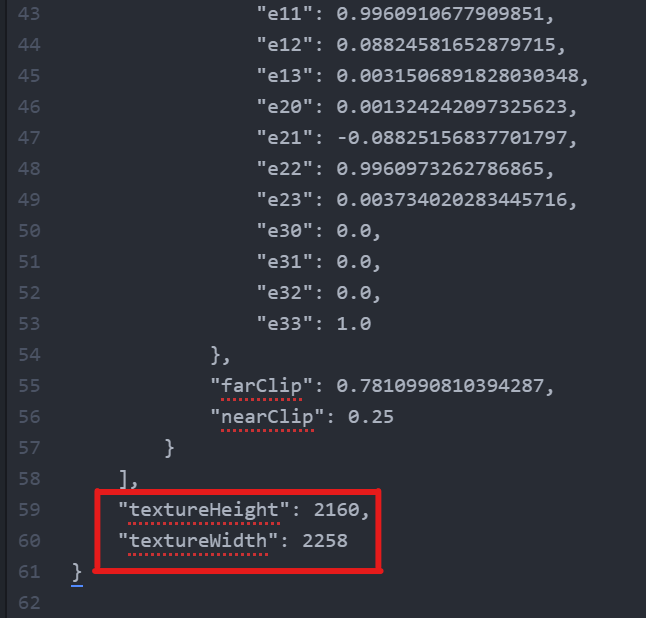
- Under Stream Settings > Video, enter the Width and Height of your Depthkit Livestream (found in the livestream_meta.txt)
- Under Codec Settings, select H264. This will reveal additional settings:
- Aspect Ratio > PAR Control: SPECIFIED
- Aspect Ratio > PAR Numerator: 1
- Aspect Ratio > PAR Denominator: 1
- Frame Rate > Framerate Control: SPECIFIED
- Frame Rate > Framerate Numerator: 30
- Frame Rate > Framerate Denominator: 1
- In the left panel, click Create Channel.
Setup OBS
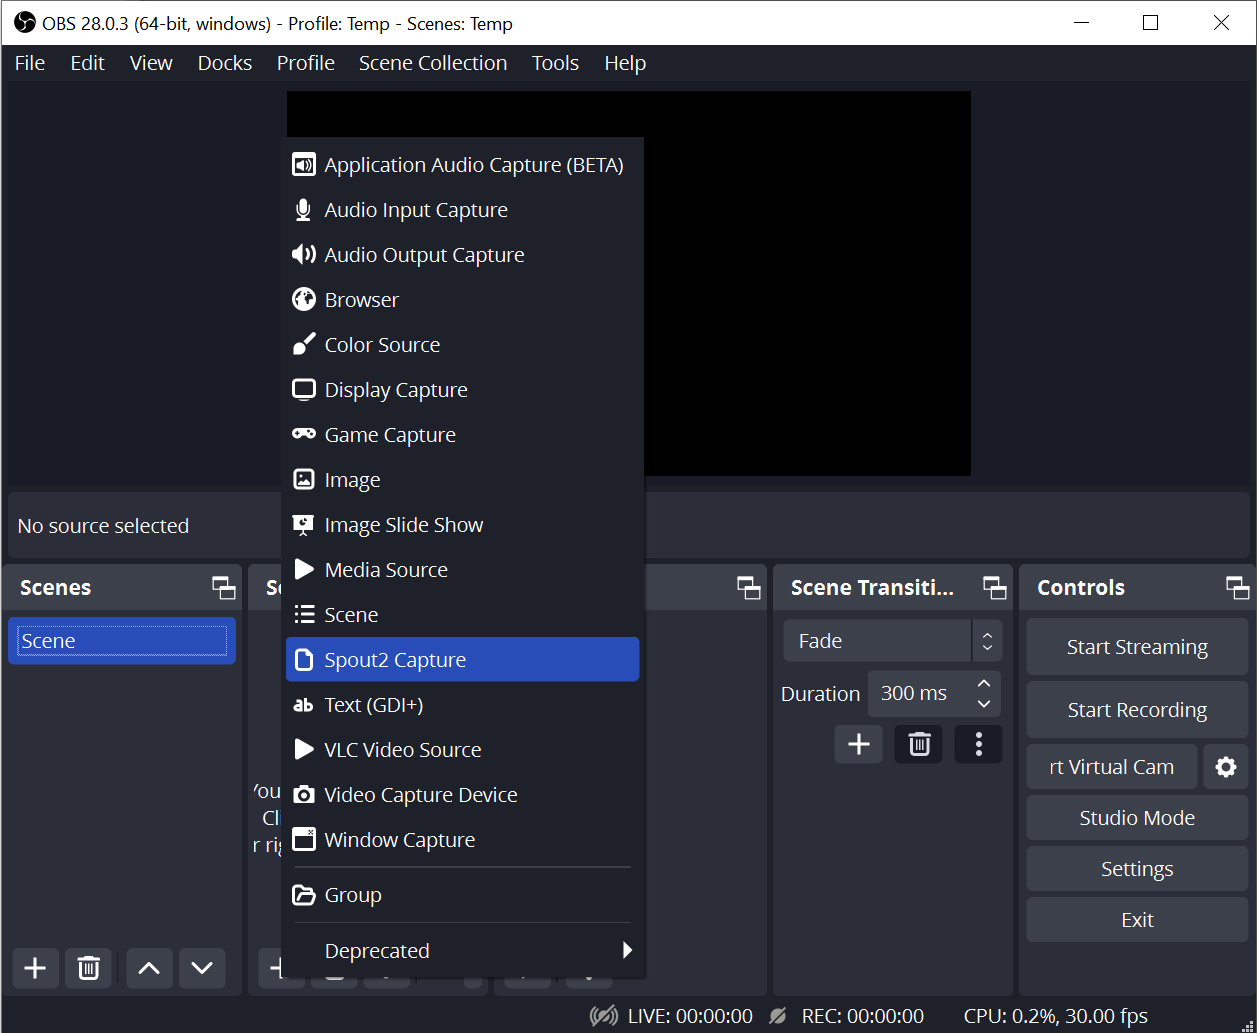
- Install OBS and the OBS-Spout Plugin on the Depthkit PC.
- Open OBS, and verify that the OBS-Spout Plugin is installed by confirming that Spout2 Capture is an available option for Sources.
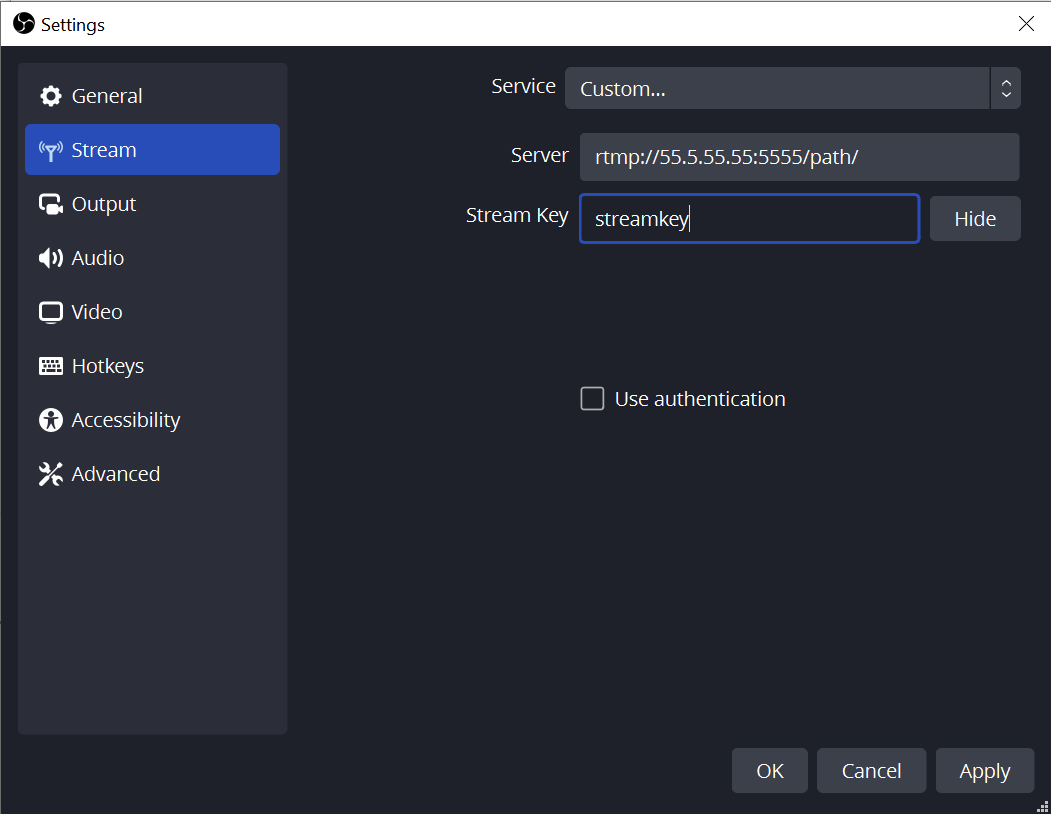
- In OBS’s Settings > Stream, service to Custom, and the Server and Stream Key from the RTMP URL saved earlier (e.g. rtmp://55.5.55.55:5555/path/streamkey).
- Parse the path without the instance/stream key, and paste it in the Server field.
- Parse just the instance from the end, and paste it in the Stream Key field.
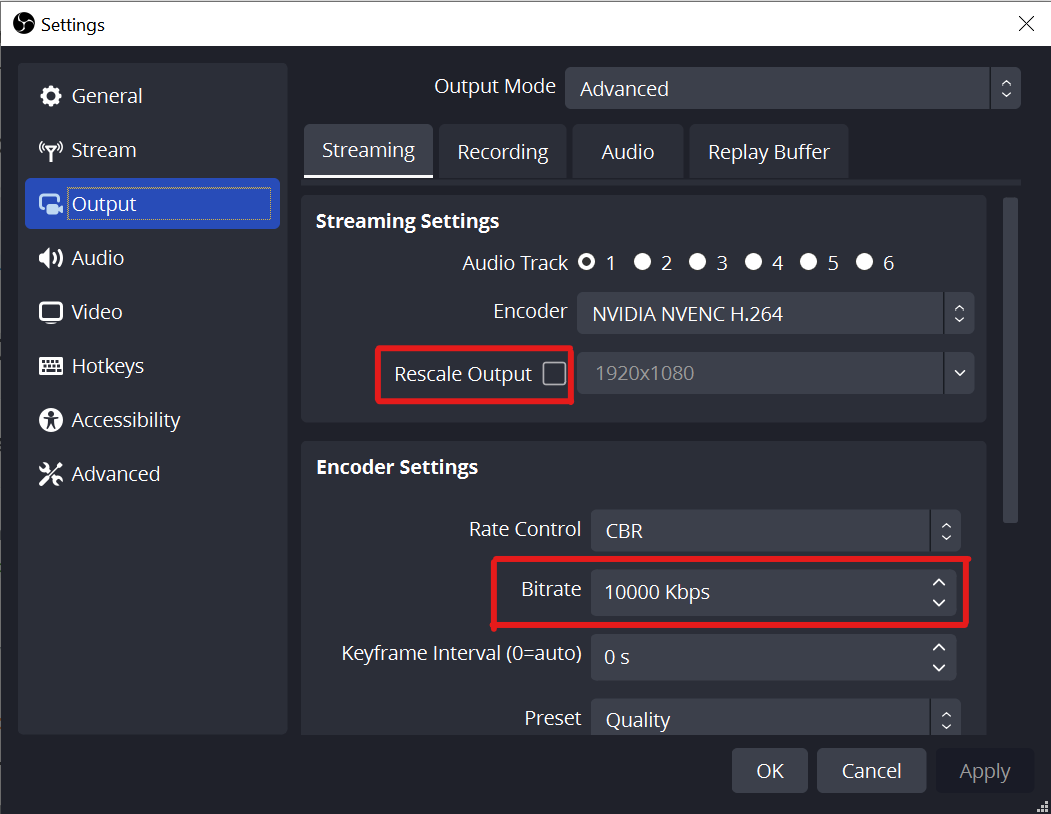
- In OBS’s Settings > Output, select Output Mode: Advanced.
- Ensure Rescale output is unchecked.
- Change the bitrate to 10000 to 15000 Kbps
- In OBS’s Settings > Video, change the Base (Canvas) Resolution and Output (Scaled) Resolution to match the resolution of your MediaLive Channel output, and the framerate to 30.
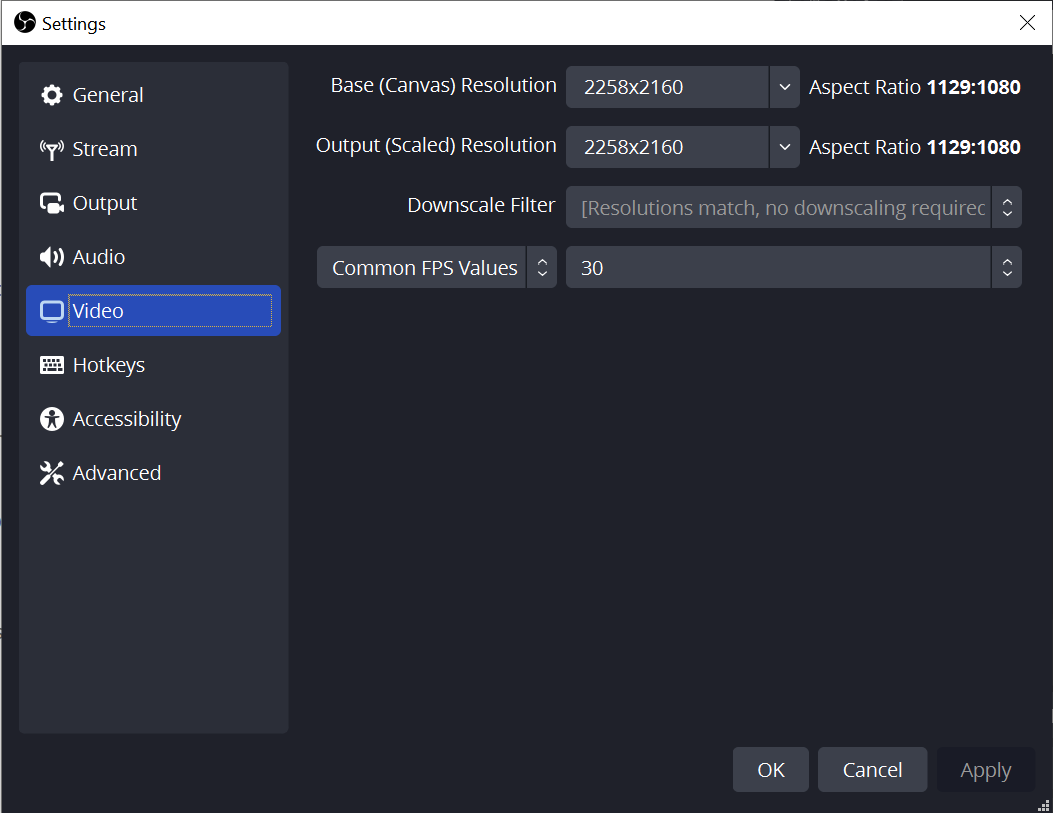
📘 Some broadcast software and CDN services only permit standard video aspect ratios like 16:9. In this case, set the Base and Output resolutions to a resolution with the required aspect ratio.
-
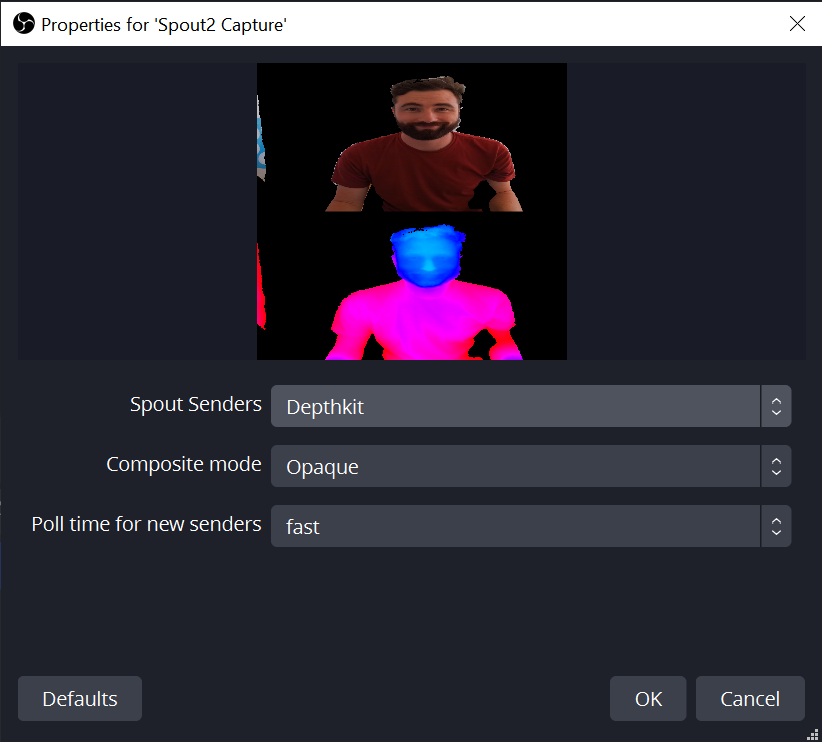
Add Spout source, and select the Depthkit Spout sender. If the Depthkit Spout sender is not available, confirm that on the same PC, Depthkit displays 'Live streaming is enabled', and check that Depthkit and OBS are using the same graphics pipeline in the Livestream issues guide.
-
You should now see a combined-per-pixel stream in the preview window.
If the Depthkit Livestream’s resolution/aspect ratio doesn’t match your OBS Base resolution, stretch the source to fill the frame, then modify the metadata file’s textureWidth and textureHeight values to match the OBS Base resolution.


Add Audio
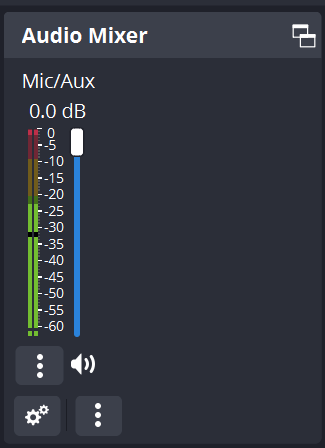
Depthkit does not pass audio from the sensors or any other audio source, so if you want to include audio in your live stream, embed it into the OBS broadcast.
- Add an Audio Input capture source to your OBS scene.
❗️ Although the Azure Kinect Mic Array shows up as an available audio device, do not use it, as doing so may interfere with Depthkit's access to the sensors. Instead, use a separate audio source connected to the Depthkit PC, such as the computer's built-in audio interface and a microphone.
- This audio will automatically be embedded in your Depthkit live stream all the way through the CDN and the player on the remote end.
Start Broadcast
- In AWS Elemental MediaLive Console, navigate to your channel, and click Start.
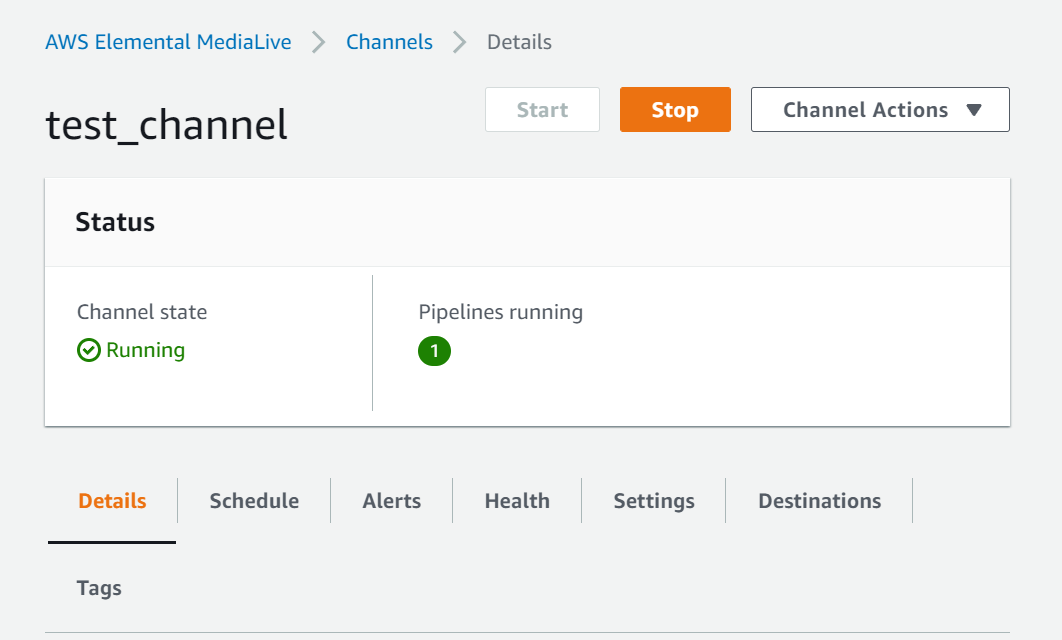
- Wait until the Channel State reports that the channel is running.
- In OBS, click Start Streaming.
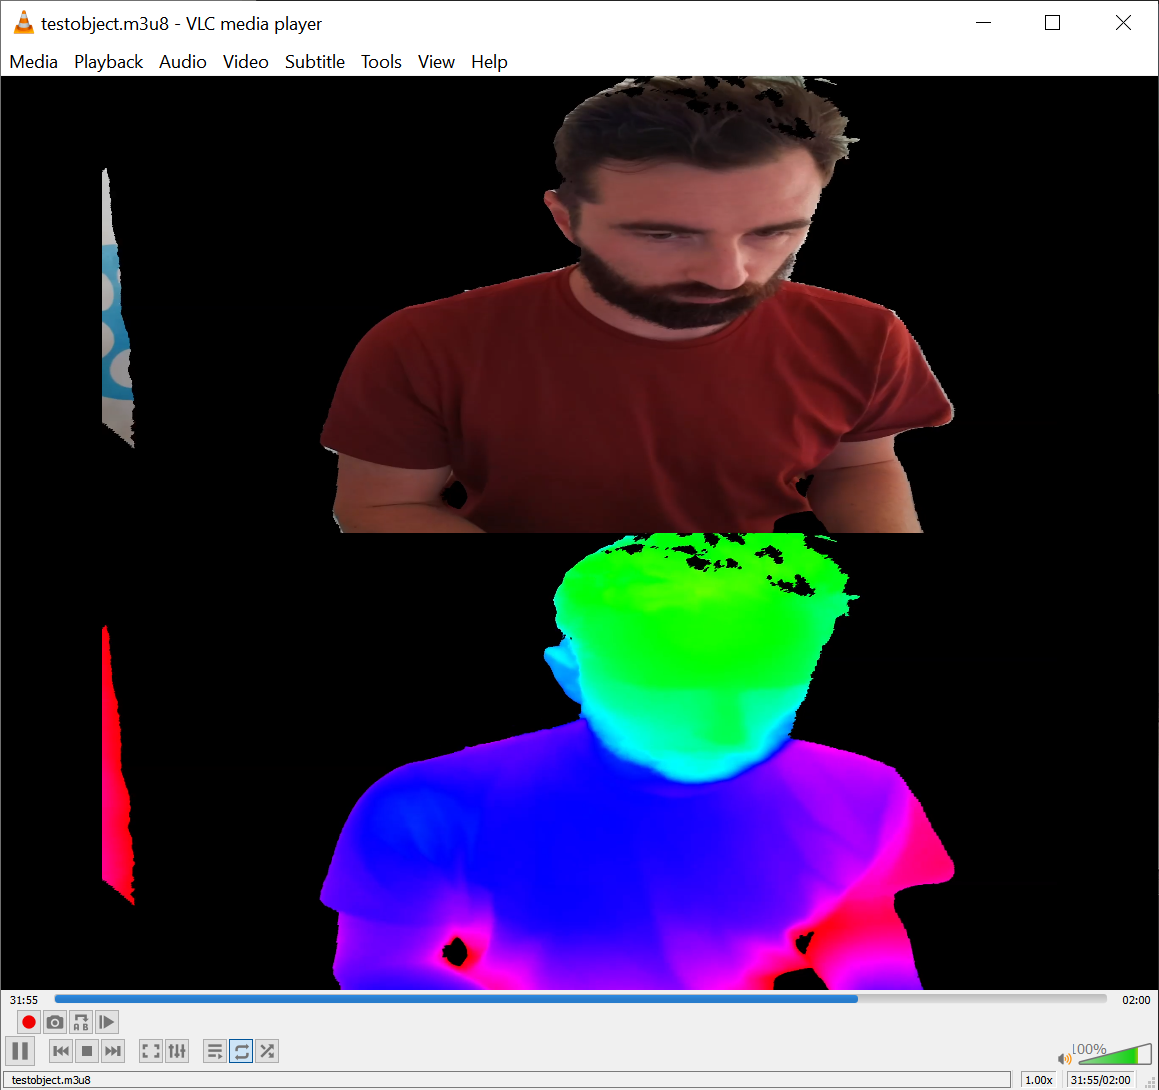
- To verify that the broadcast is working, open the stream in a media player like VLC by clicking Media > Open Network Stream… and pasting in the object URL.
Setup Livestream Receiver in Unity
- Open a Unity project on the PC which will be receiving the stream. For best performance, this should be a separate PC from the Depthkit PC.
- Add AVPro to the project.
- Add the Depthkit Expansion Packages in the following order:
- depthkit.core
- depthkit.avpro
- If using Depthkit Studio assets, add depthkit.studio or depthkit.studio.lite.
- If using URP/HDRP, add Depthkit Core (and Studio) Shader Graph and/or VFX Graph plugins.
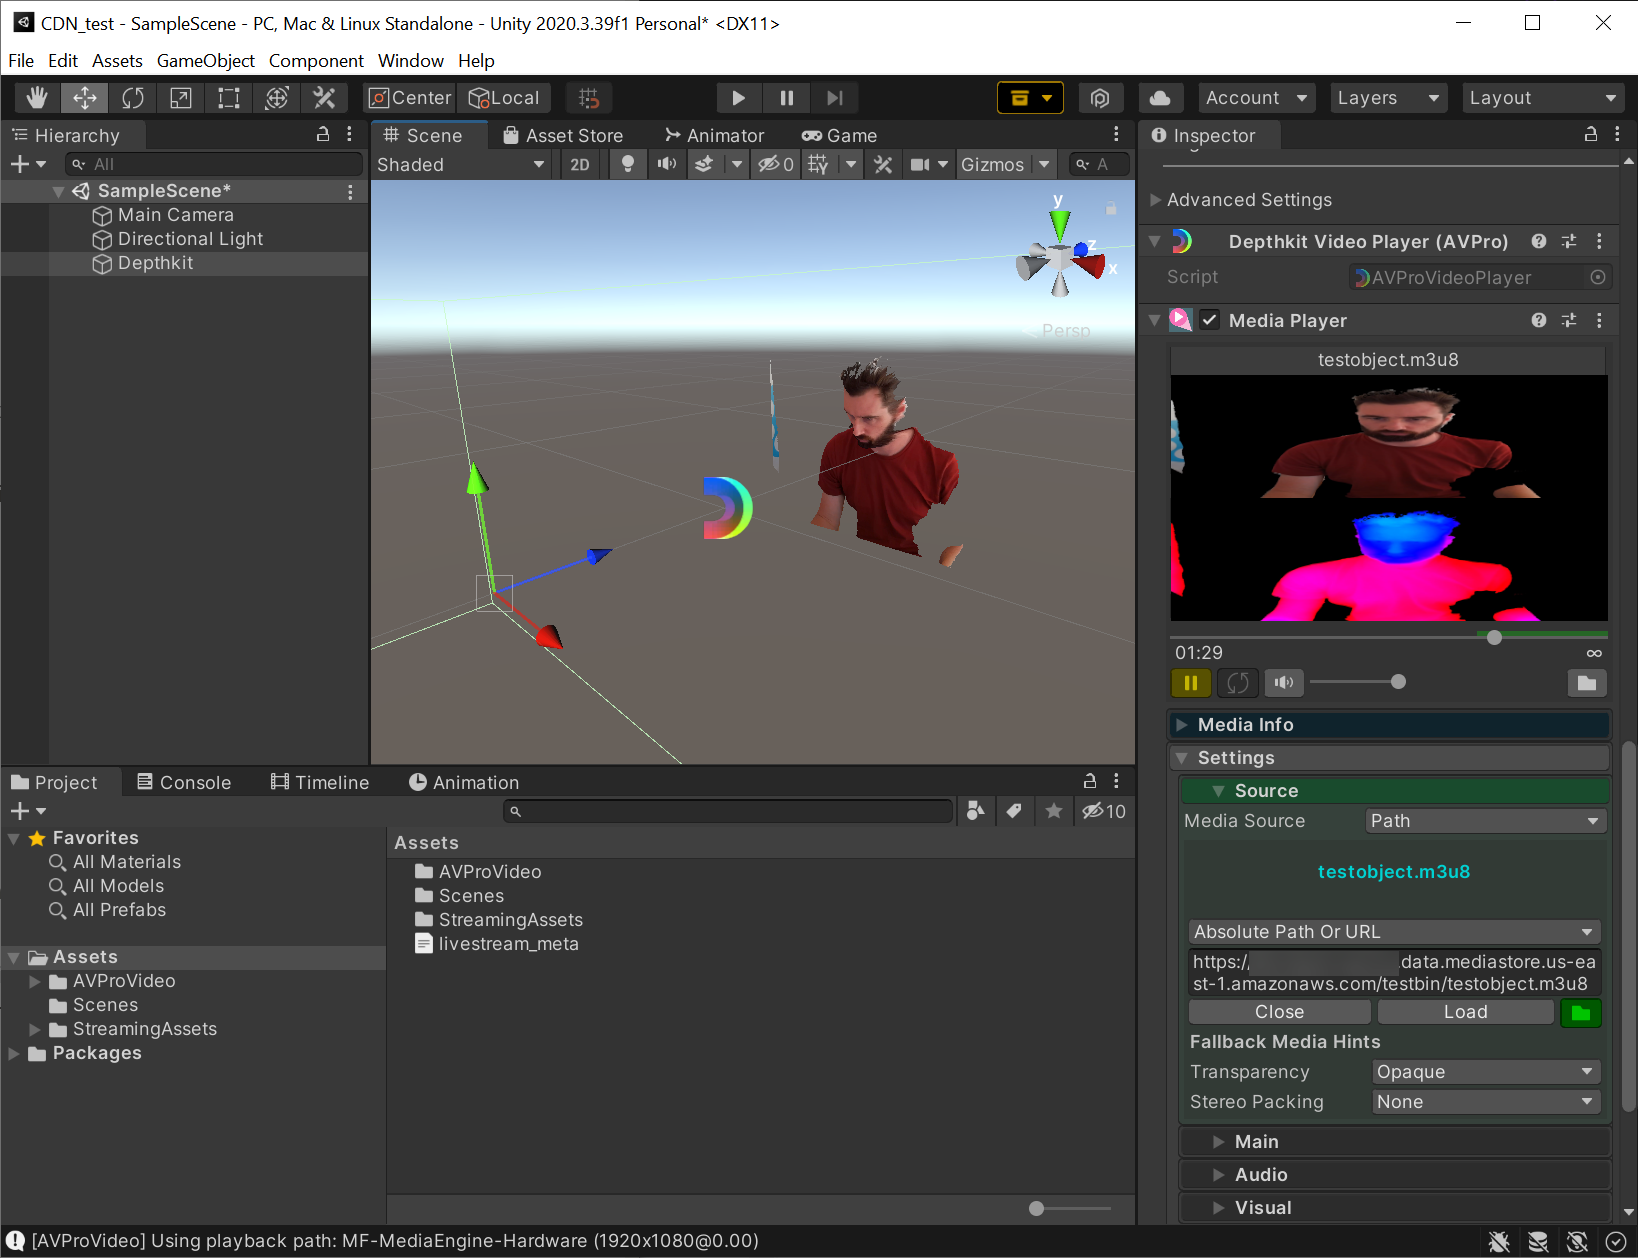
- Create a Depthkit Core or Depthkit Studio object from scratch, or import a Depthkit Core or Depthkit Studio prefab from the Package Manager, and add it to your scene.
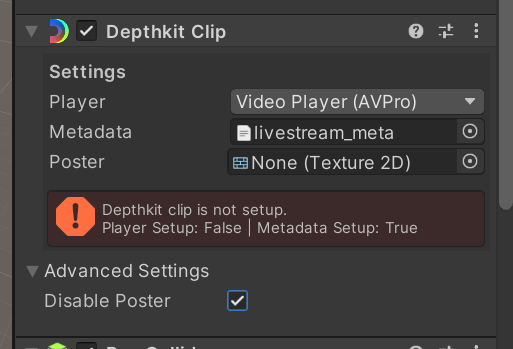
- Setup the Depthkit Clip component.
- Change Player to AVPro.
- Add the livestream_metadata.txt file to your Unity project’s Assets folder, and link it to your Depthkit object’s Metadata field.
- Under Advanced Settings, check the box to Disable Poster.
- Setup the AVPro Media Player component.
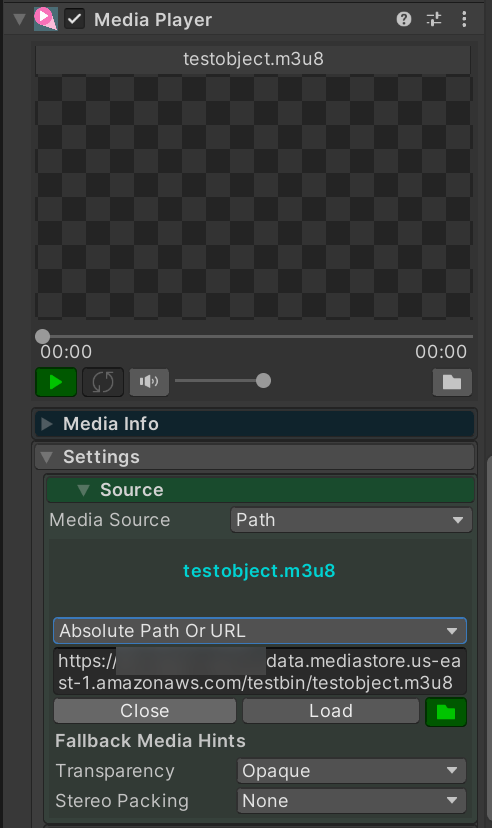
- Under Settings > Source, change Media Source to Path. Change the next dropdown to Absolute Path or URL.
- Paste in the URL from the HLS (M3U8) object in your MediaStore container.
- Click Load.
Depthkit asset should now be visible!
- For Depthkit Studio assets, adjust bounding box and set surface buffer capacity.
- Configure other mesh reconstruction and texture settings for your Depthkit Core or Depthkit Studio asset.
Tips and Troubleshooting
- Dynamically loading metadata - If you ever change your sensor settings or update your Depthkit Studio calibration, you’ll need to provide updated metadata to Unity. In order to do this, you must modify the Depthkit Unity plugin to load the metadata dynamically from an external source rather than from the local file in the project.
- AVPro image frozen - AVPro may stop updating the video image if Unity’s game view is not visible in the editor.
For further troubleshooting, check the Livestream issues guide.