These tabbed icons allow you to quickly switch between Depthkit contexts.
Record to capture Depthkit Core recordings.
Editor to edit and export your captures.
If using a license with Depthkit Cinema enabled, Camera Pairing is where you can create a calibration that links your sensor to a camera.
If using a license with Depthkit Studio enabled, Studio Calibration & Recording is where you both capture and calibrate multi-camera data.
Configuration pane
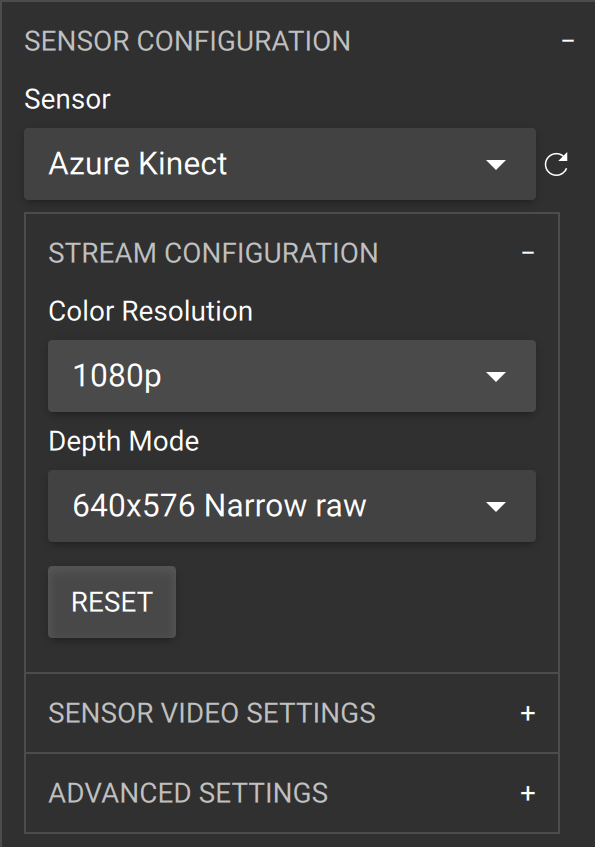
The Configuration Pane is where you can configure settings at various points in Depthkit workflows.
* In the **Record** context, it's where you can change [configure sensor settings](/docs/sensor-configuration/) and adjust the near- and far-planes of the Depth Preview.
* In the **Editor** context, it's where you can change Refinement and export settings.
### Recordings library
The top of the left hand panel contains the Recordings Library. All captures in the project appear in this panel, sorted by the order in which they were captured.
The elements of an entry on the Record Library are:
* Capture sequence number
* Icon indicating Depthkit Studio capture containing multiple sensors
* Recording Name
* Rename Recording Button
* Delete Recording Button
* Open Recording’s Perspectives Button (Studio Only)
> 🚧
>
> Drilling in to see the individual perspectives is only needed for inspecting individual perspective for quality diagnostics, and attaching a Cinema capture for the Studio + Cinema workflow.
* Recording Duration in timecode format (HH:MM:SS)
### Renaming recordings
Renaming recordings in the library enable you to keep your project organized with more recognizable recording names.
> 🚧
>
> **Note:** Renaming a Recording does *not* change its filename on disk.
### Deleting recordings
Deleting recordings let you keep a tidy project and remove media that you know you don’t need.
> 🚧
>
> **Note:** Deleting a Recording removes the media permanently from the hard drive. This cannot be undone.
### 3D Viewport

This is the main area displayed in the Depthkit interface, and allows you to see data from your sensors rendered in interactive 3D.

You can navigate the 3D viewport using the following controls:
| Function | Control |
| :------------------------------------------------ | :---------------------------------------------- |
| Orbit viewing angle around 3D scene. | Click + drag near the center of the 3D viewport |
| Zoom in and out of the 3D scene. | Middle mouse scroll **Or** right-click+drag |
| Translate the viewing angle around your 3D scene. | Middle-mouse-click + drag |
| Reset your view. | Double click in view port |
| Rotate subject in frustum view. | Click + drag near the edge of the 3D viewport |
### Visualization Toolbar
In the top right of the 3D viewport, you can select different combinations of rendering and texturing styles to view a live preview or recorded captures.
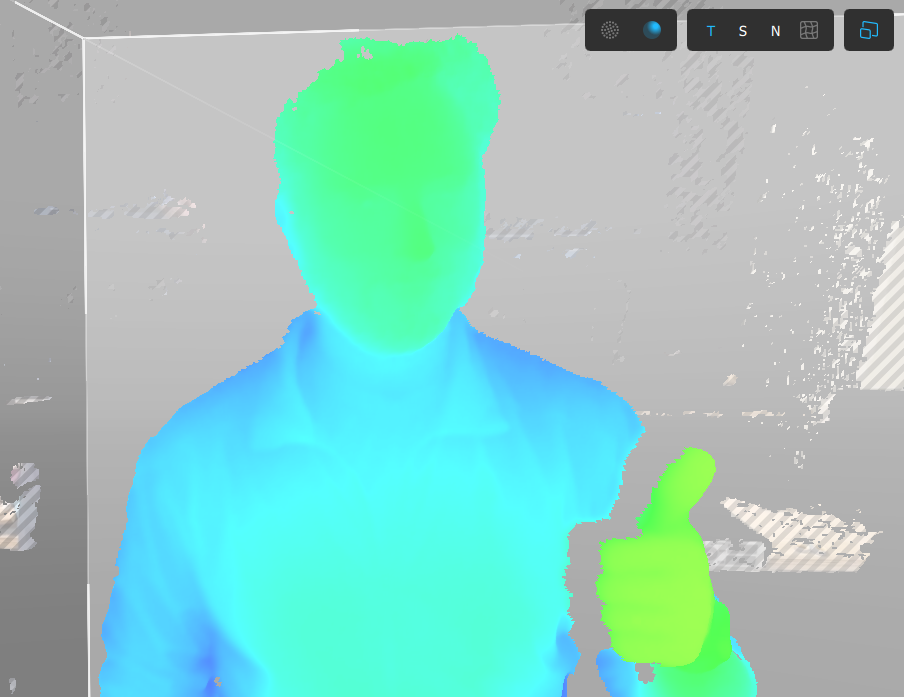
**Pointcloud View**
See each pixel of your capture rendered as points in the 3D viewport. This mode can be combined with any of the Textured (seen here), Shaded, or Normal texturing modes.
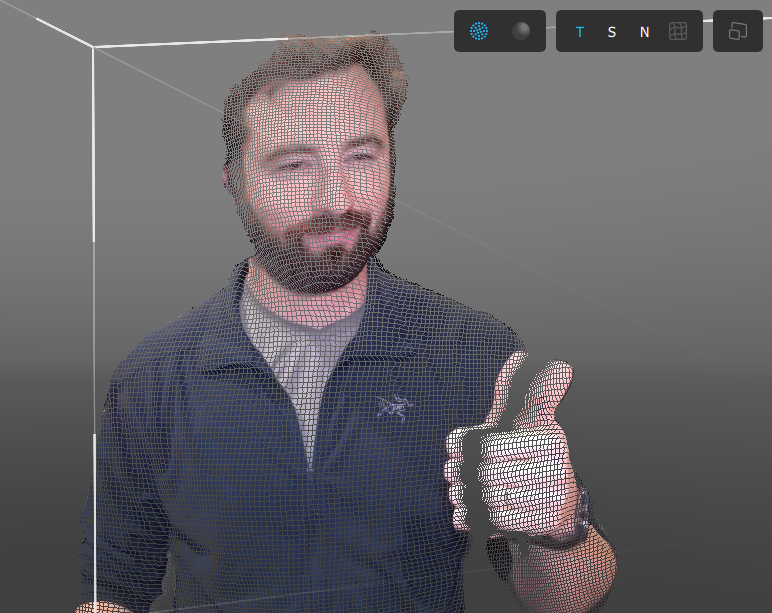
**Mesh view**
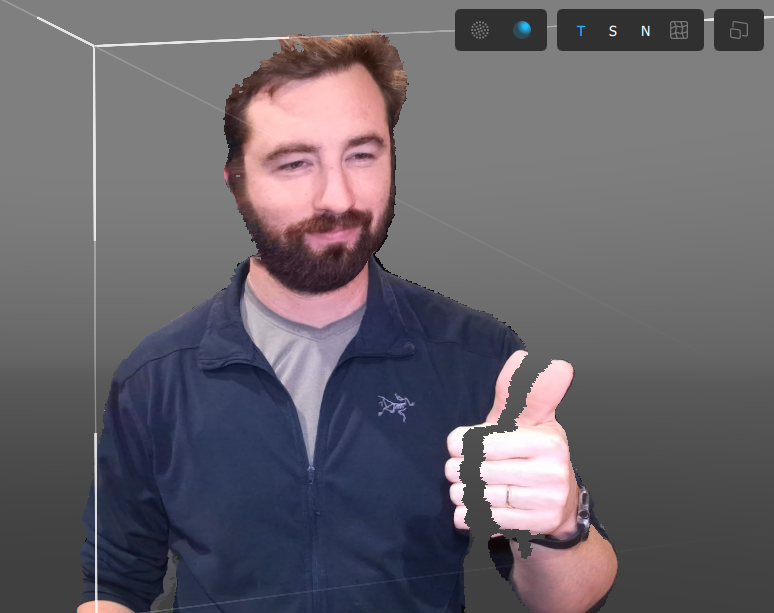
See your capture rendered as a mesh in the 3D viewport. This mode can be combined with any of the Textured (seen here), Shaded, or Normal texturing modes, as well as the Wireframe overlay.
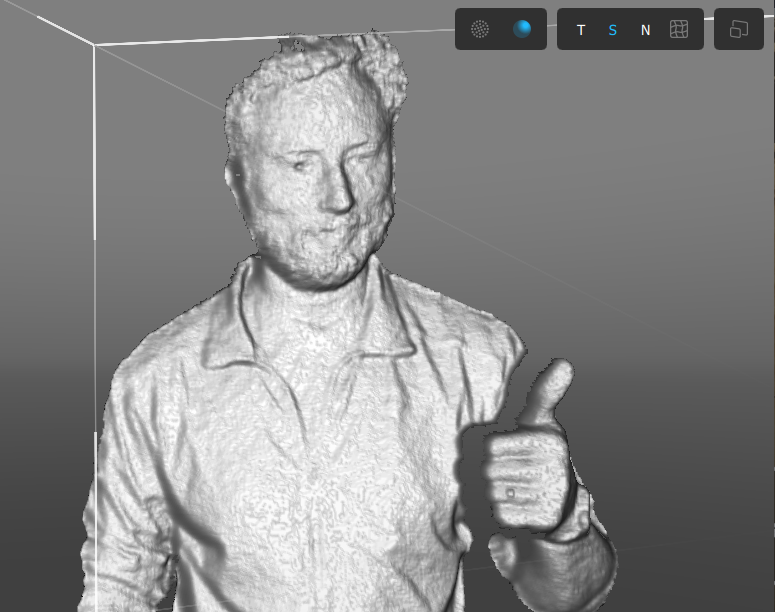
**Shaded view**
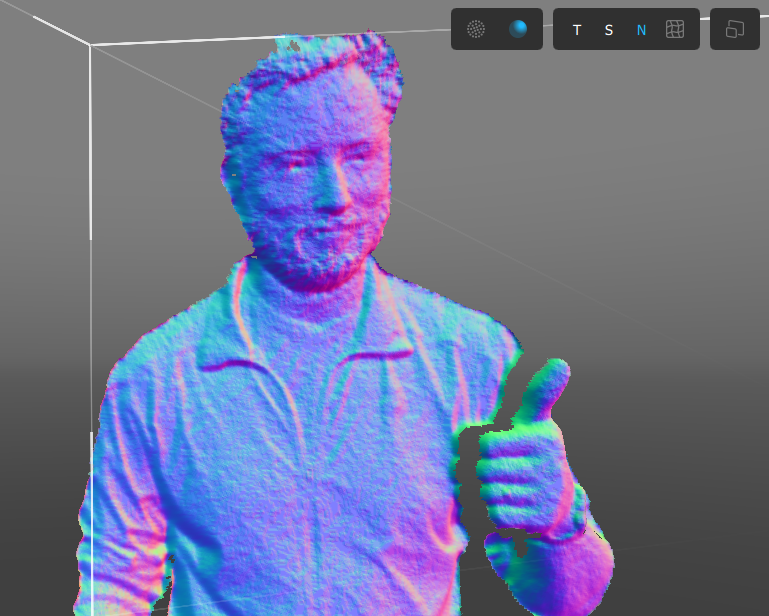
**Normal view**
**Wireframe overlay**

In Mesh view, Wireframe overlay can be toggled to display the boundaries of each triangle in the mesh.
**Depth range editing**
View seen when holding and adjusting either of the clipping planes when 'Toggle depth range editing' is enabled.
Adjusting the depth range will be locked in the 3D viewport until the Depth range editing button is enables. Then you can grab the corners of the frustum to adjust the depth range of your capture.
Color and Depth Previews
These preview windows show you the raw data from the sensor. This is useful for making sure sensor settings like exposure are set correctly, or quickly identifying holes in the depth data.
Timeline and Transport Controls
Curently selected timecode Displays the current frame’s timecode in HH:MM:SS:FF format.
In point handle: Specifies the beginning of the current recording when exported.
Playhead handle : Shows the current position in the timeline. Drag this to scrub through the capture.
Jump to In point: Instantly moves the playhead to the In point.
Frame-step backward: Moves the playhead back one frame.
Play/Pause
Frame-step forward: Moves the playhead forward one frame.
Jump to Out point: Instantly moves the playhead to the In point.
Out poin handle: Specifies the endof the current recording when exported.
Clip duration: Displays the recording's total duration in HH:MM:SS:FF format.