Applying Refinement
For best results, use a Refinement masks . This acts as an input to tell Depthkit what area to apply the algorithm to.
📘 Depthkit Core and Cinema Only
As of v0.7.0, Refinement is no longer used with Depthkit Studio captures.
If you are migrating a project which contains Refinement masks from a previous version, they will be ignored, as they are no longer needed for Depthkit's new mesh reconstruction approach.
With the release of Depthkit v0.5.7, comes Maskless Refinement. This allows the activation of the Refinement algorithm without the requirement of a Refinement mask. This new feature is experimental and actively in development. See Maskless Refinement Best Practices below for details.
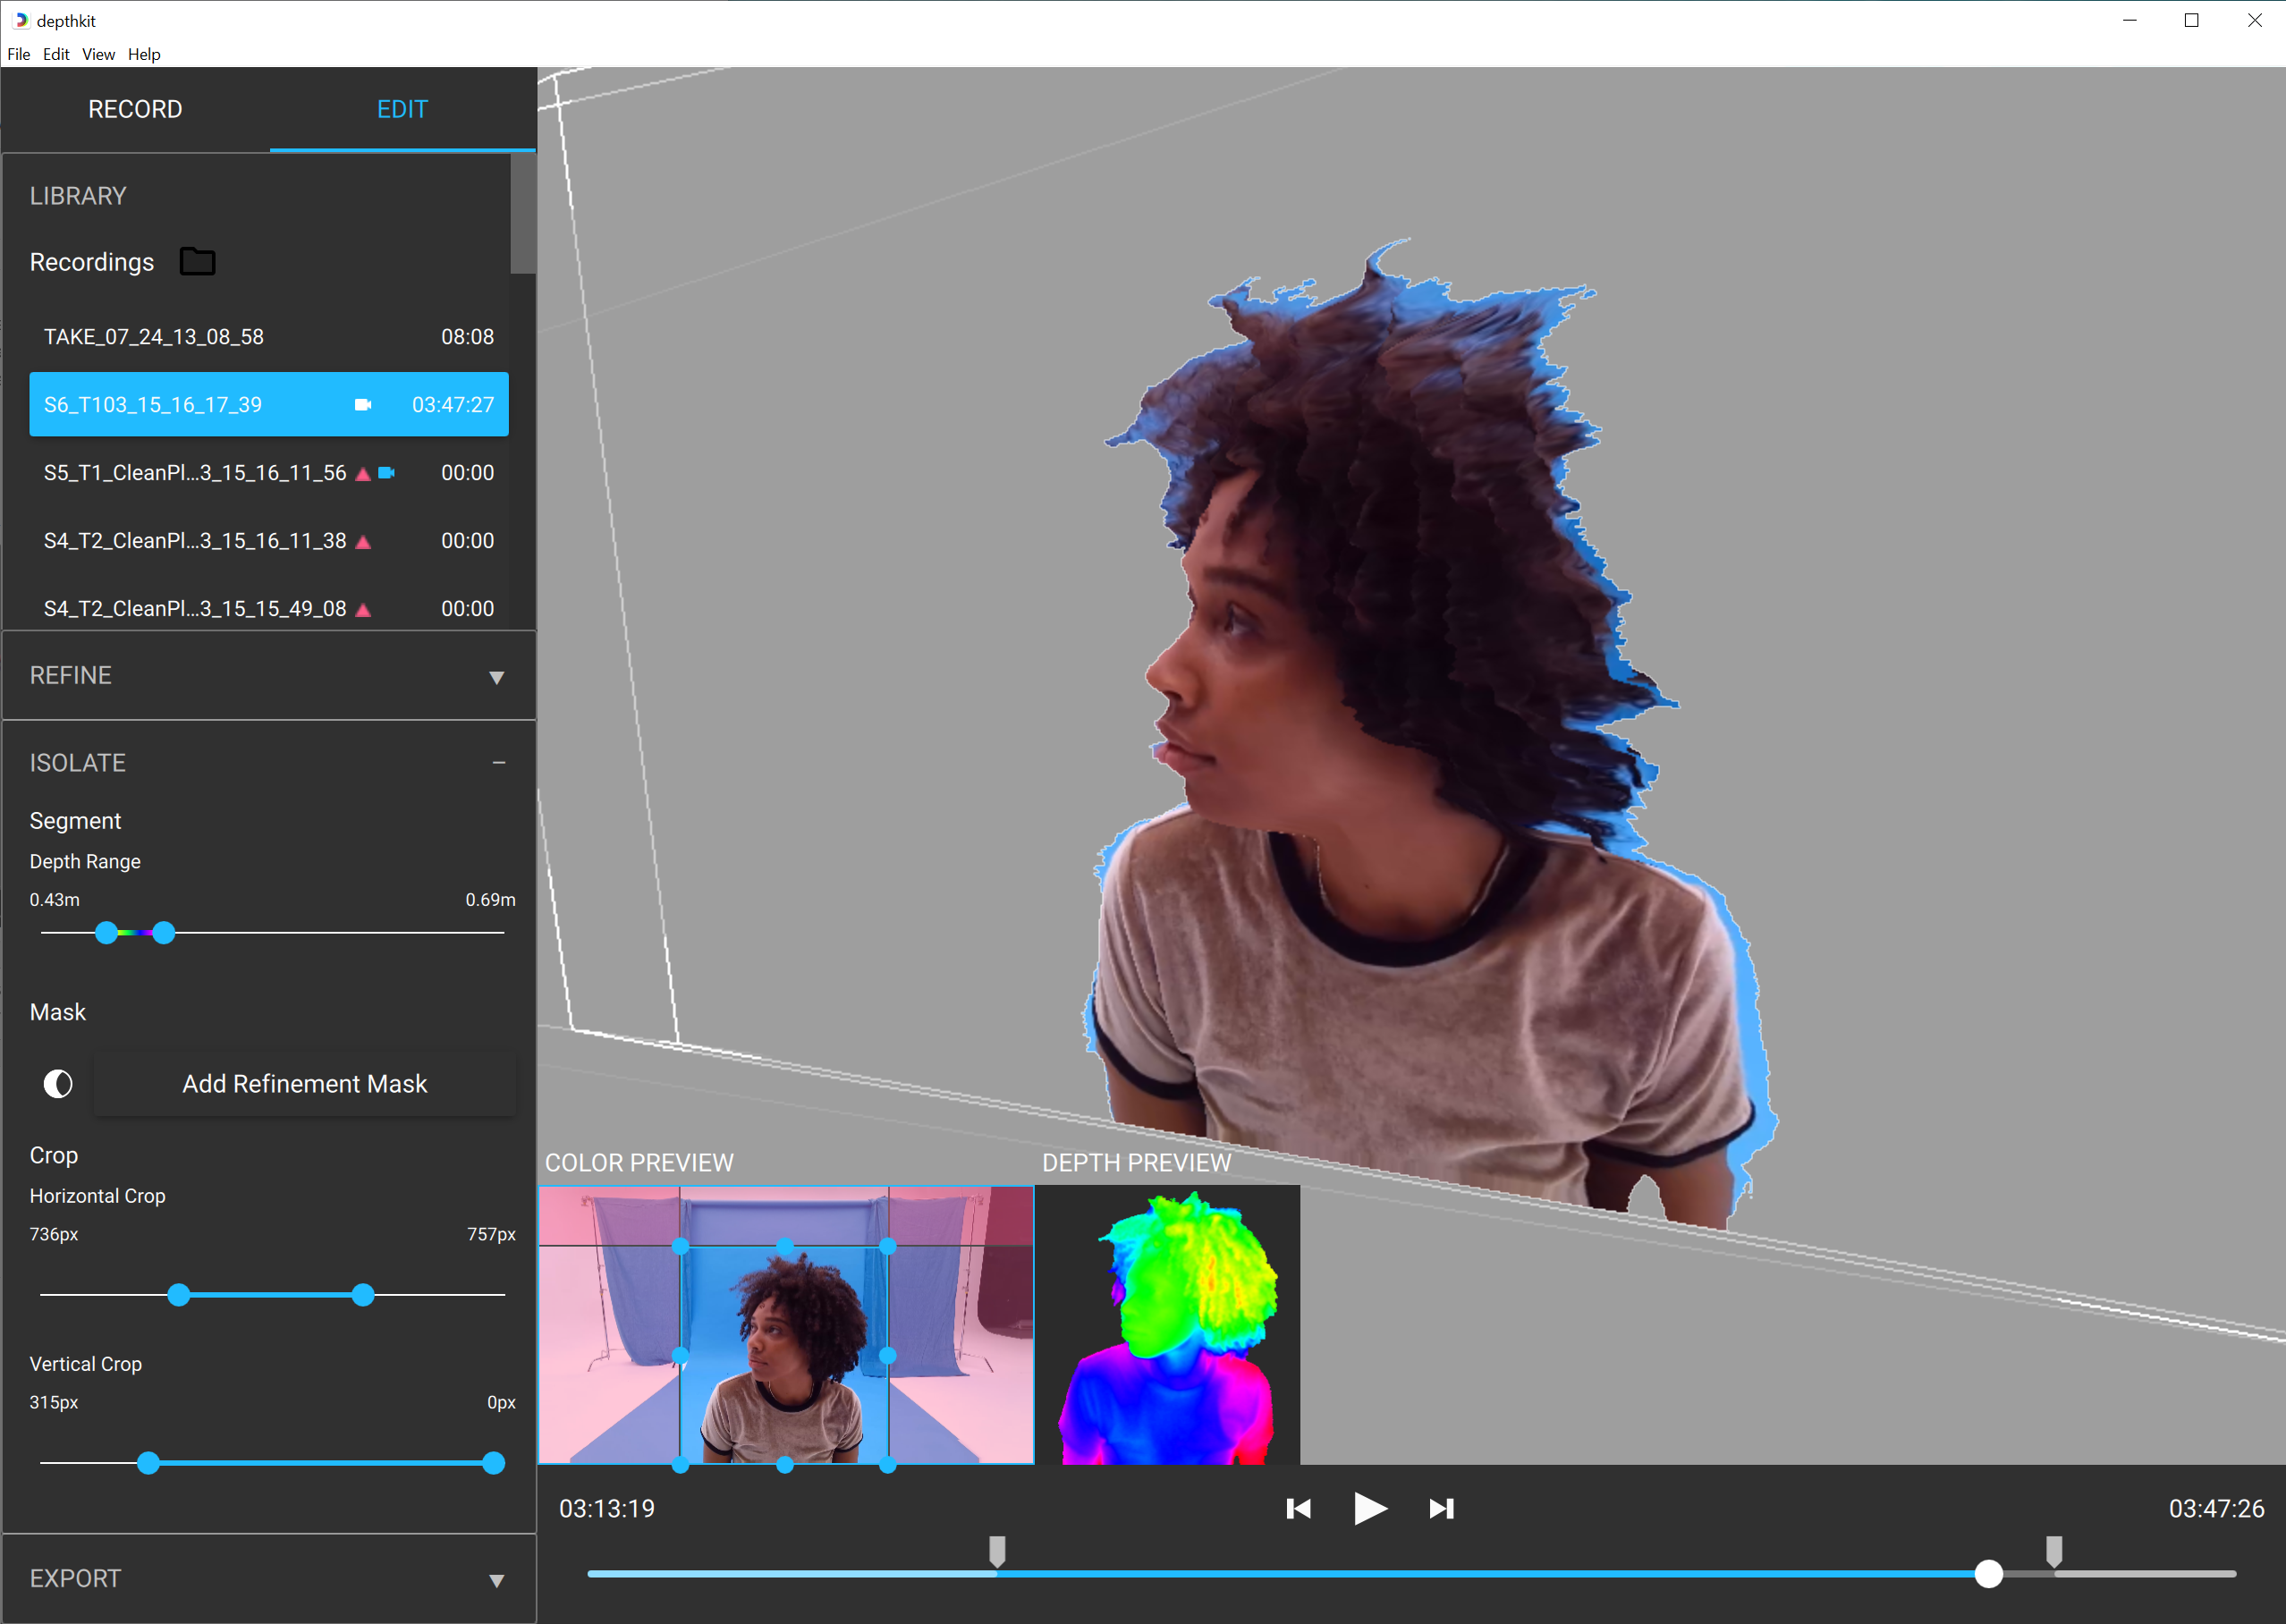
- Set your depth range in the Isolate panel to best suit the range of motion in your clip or select.

- In the Refine panel, select the Enable Refinement Checkbox. This will reveal a selection of parameters to refine your footage.

📘
Refinement slider values will vary based on your choice to apply a Refinement mask or if you intend to export without a linked mask. See Maskless Refinement Best Practices below for details.
- In the Isolate panel, apply your Refinement mask. See our guide for Creating Refinement Masks for details. A Refinement mask is recommended for the highest-quality results from the Refinement workflow, since it defines the area that the algorithm is going to affect.

You will notice that the mask automatically removed all areas in black, allowing for cleaner edges.

Crop
For best results, crop your footage in order to remove excess data. When enhancing data, the crop lets you take advantage of every depth pixel to maximize quality. This is ideal when exporting for Unity to ensure lower pixel dimension in your combined-per-pixel exports for optimal playback performance in the game engine.
*Note that the crop will impact the final export resolution.
Refine
The Refinement Algorithm consists of the following parameters, which are used to refine your footage, reduce depth noise, and remove artifacts.

Refinement parameters include:
-
Filter Size: You can think of this as the pixel size of the enhanced depth. This parameter will fill holes in your depth data and reduce depth noise. Start with a moderate value around 2-4. Increase if you have a lot of depth noise. Decrease if you are losing depth details, most noticeable around facial details. For Maskless Refinement, keep this value low.
-
Sharpness: Adjusts the sharpness of the filter. This adjusts of the sharpness along edges of your capture, with a low value creating a gradual transition between elements at different depths, and a high value severing these transitions. This is most visible when areas of the subject overlap.
-
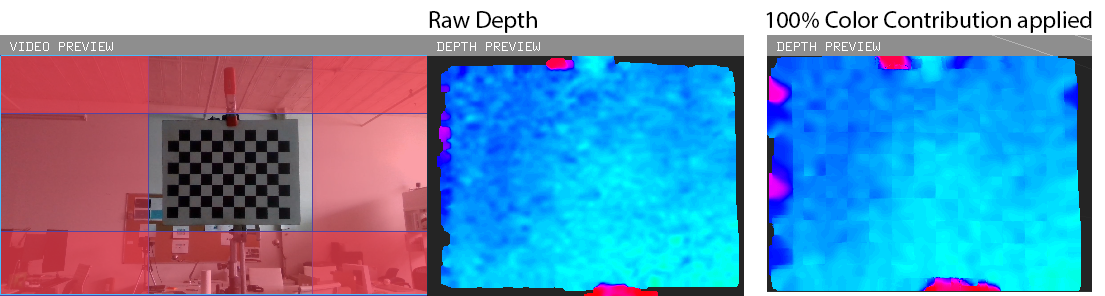
Color Contribution: The percentage of how much the color video with influence the depth data. This is particularly noticable when you have edges well defined in your color video that are not clear in the depth data alone. Increasing the color contribution in this case will allow the refinement algorithm to pull more cues from the color in order to modify the depth. In many cases, this creates a smoothing of your depth data and can almost act as a Gaussian blur.
Please note that when you have a color input with high contrast, increasing the color contribution may be too strong of a cue for the depth and may result in inaccurate depth details. For example, below I have a capture of a black and white checkerboard. By increasing the color contribution to 100%, I am creating a color influence from the black/white contrast that should not actually be represented in the depth.
-
Depth Contribution: The percentage of how much the depth data influences the refinement algorithm. At 100% contribution, your data will reflect the look of raw depth data. Decreasing the value will soften your data, putting more weight onto the other enhancement parameters.
-
Fill Amount: Complements the Filter Size by providing a secondary fill value. Leave at the default value of 4 unless you are dealing with holes or abrupt clipping in your depth. Decrease the value to remove these artifacts. For Maskless Refinement, keep this value low.
Apply automatic Kinect Mask: allows you to remove any background data that still may be available in your custom mask.

What Enhancement Parameters are best for me?
Sometimes it is tricky to determine the ideal settings, especially when depth data can vary based on lighting conditions, materials, etc. When getting started stick with the moderate default values. When you get to adjusting these values, keep in mind that the parameters work with each other. For example, in order to reduce depth noise, you may notice that it is more effective to increase your Filter Size and Color Contribution, but only if your Depth contribution is reduced as well.
📘 Tool Tip
Get a close up on the Enhancement Settings in action by "zooming in" with the crop sliders. Just remember to set the back to the frame crop before exporting!
Maskless Refinement Best Practices
The Refinement parameters will work differently without a Refinement Mask applied. If you are not sure where to start with these settings, try the following:
- Reduce the Filter Size and Hole Filling sliders to the minimum values to remove any visual artifacts. When a mask is not applied, this value should be kept at a minimum. If this value is too high, it may create an unwanted extrusion, or halo, around your subject.
- If you are facing edge artifacts, increase Sharpness and/or Color Contribution to clean up any unwanted edge extrusions or similar artifacts.