Creating Refinement masks
Masked Refinement for Depthkit Core & Cinema Only
This section is only needed in the Masked Refinement workflow, which as of Depthkit version 0.7.0 is only used in Depthkit Core and Depthkit Cinema; Depthkit Studio no longer uses Refinement.
After you have captured for Depthkit Refinement, but before you apply Refinement in Depthkit's editor, you must create Refinement masks.
What is a Refinement mask?
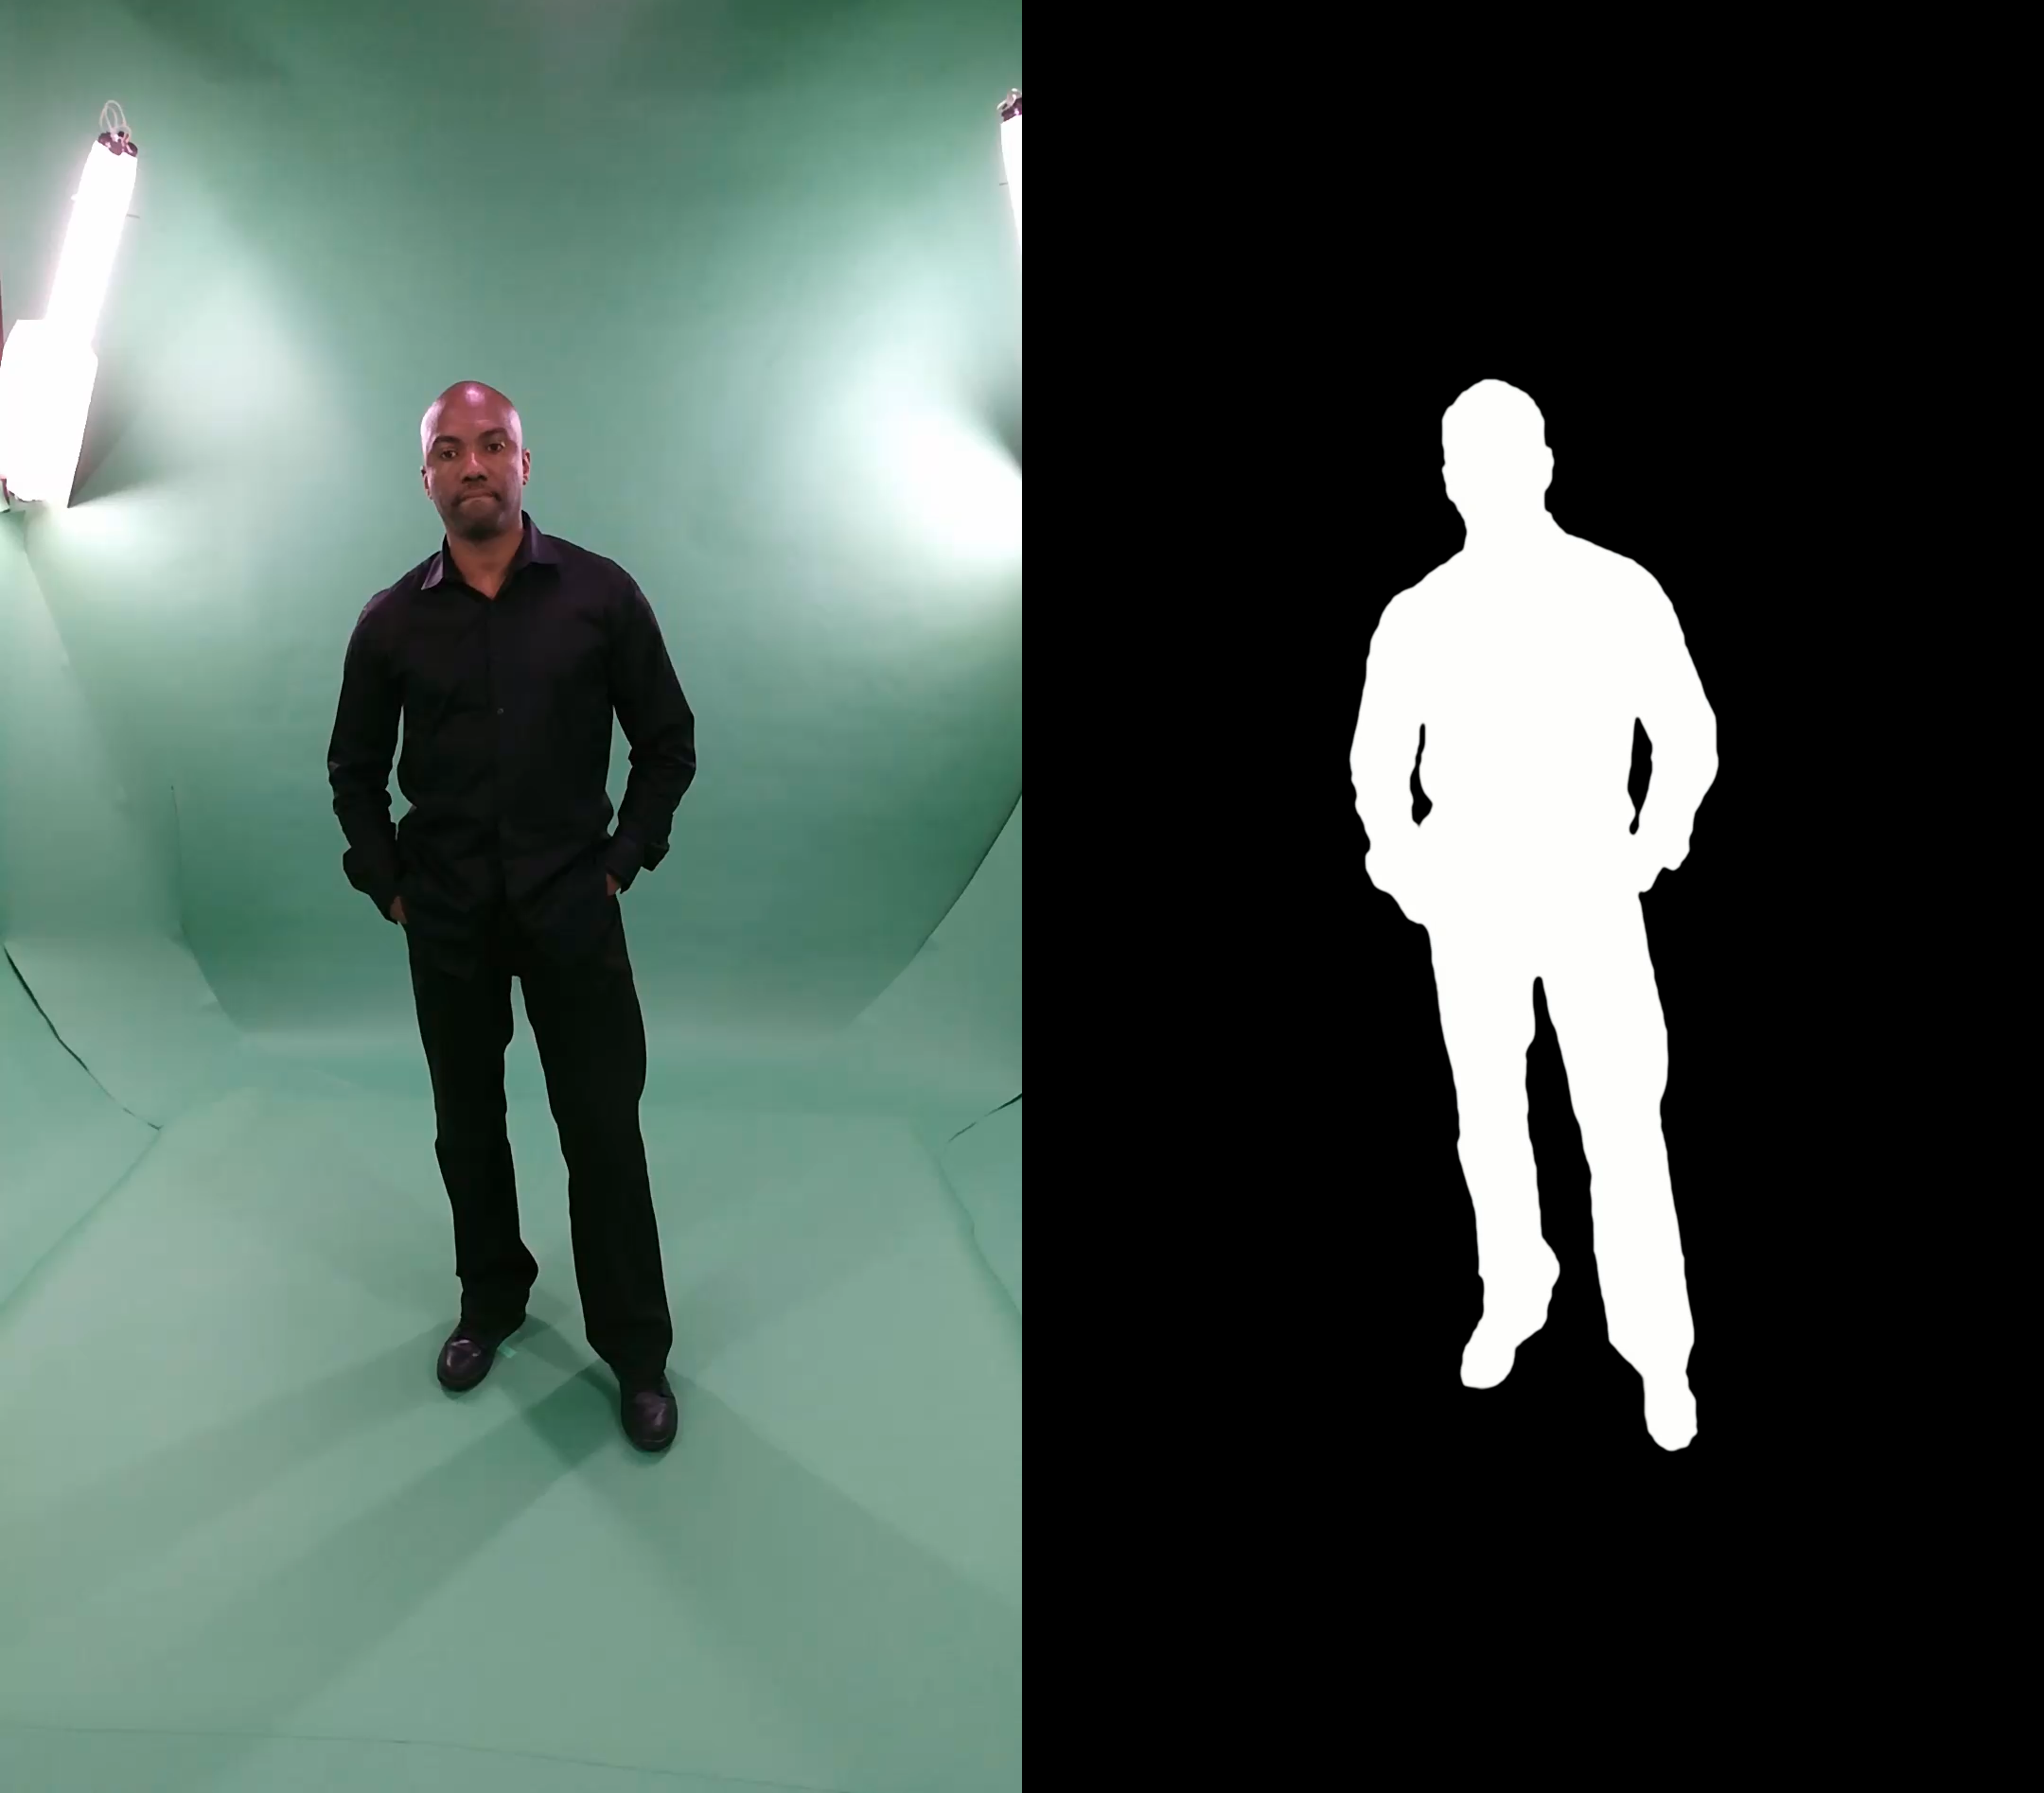
Source RGB video (left), Custom refinement mask (right)
The refinement mask is a black and white matte, where your subject is represented in white, and the background is represented in black. The Refinement Mask informs the Refinement process to keep areas of the frame filled with white, and discard areas filled with black. This assists tools like Hole Filling to more accurately reconstruct missing depth data. For this reason, the quality of the key, rotoscoping, or other forms of background removal and their ability to accurately trace your subject directly affects the quality of the end result.
You can use any method you want to generate this mask.
- Chromakeying techniques are the fastest and easiest, using video compositing tools like Adobe Premiere & After Effects or DaVinci Resolve, though this requires that you record against a keyable background.
- Other techniques widely used in video compositing, like rotoscoping or using difference matte tools, can also work to make your mask. If you have not captured on a keyable background, you can use tools like After Effect's Roto brush, to create a mask without pulling a key.
- Recent developments in machine learning have resulted in semi-automated background segmentation solutions like Scatter's own AutoMatteProcessor. These methods often produce imperfect results, but they can be a fast way to make a rough first pass, needing much less hand-editing than starting from scratch.
Make sure that the result has the same resolution, framerate, and duration as the source video.
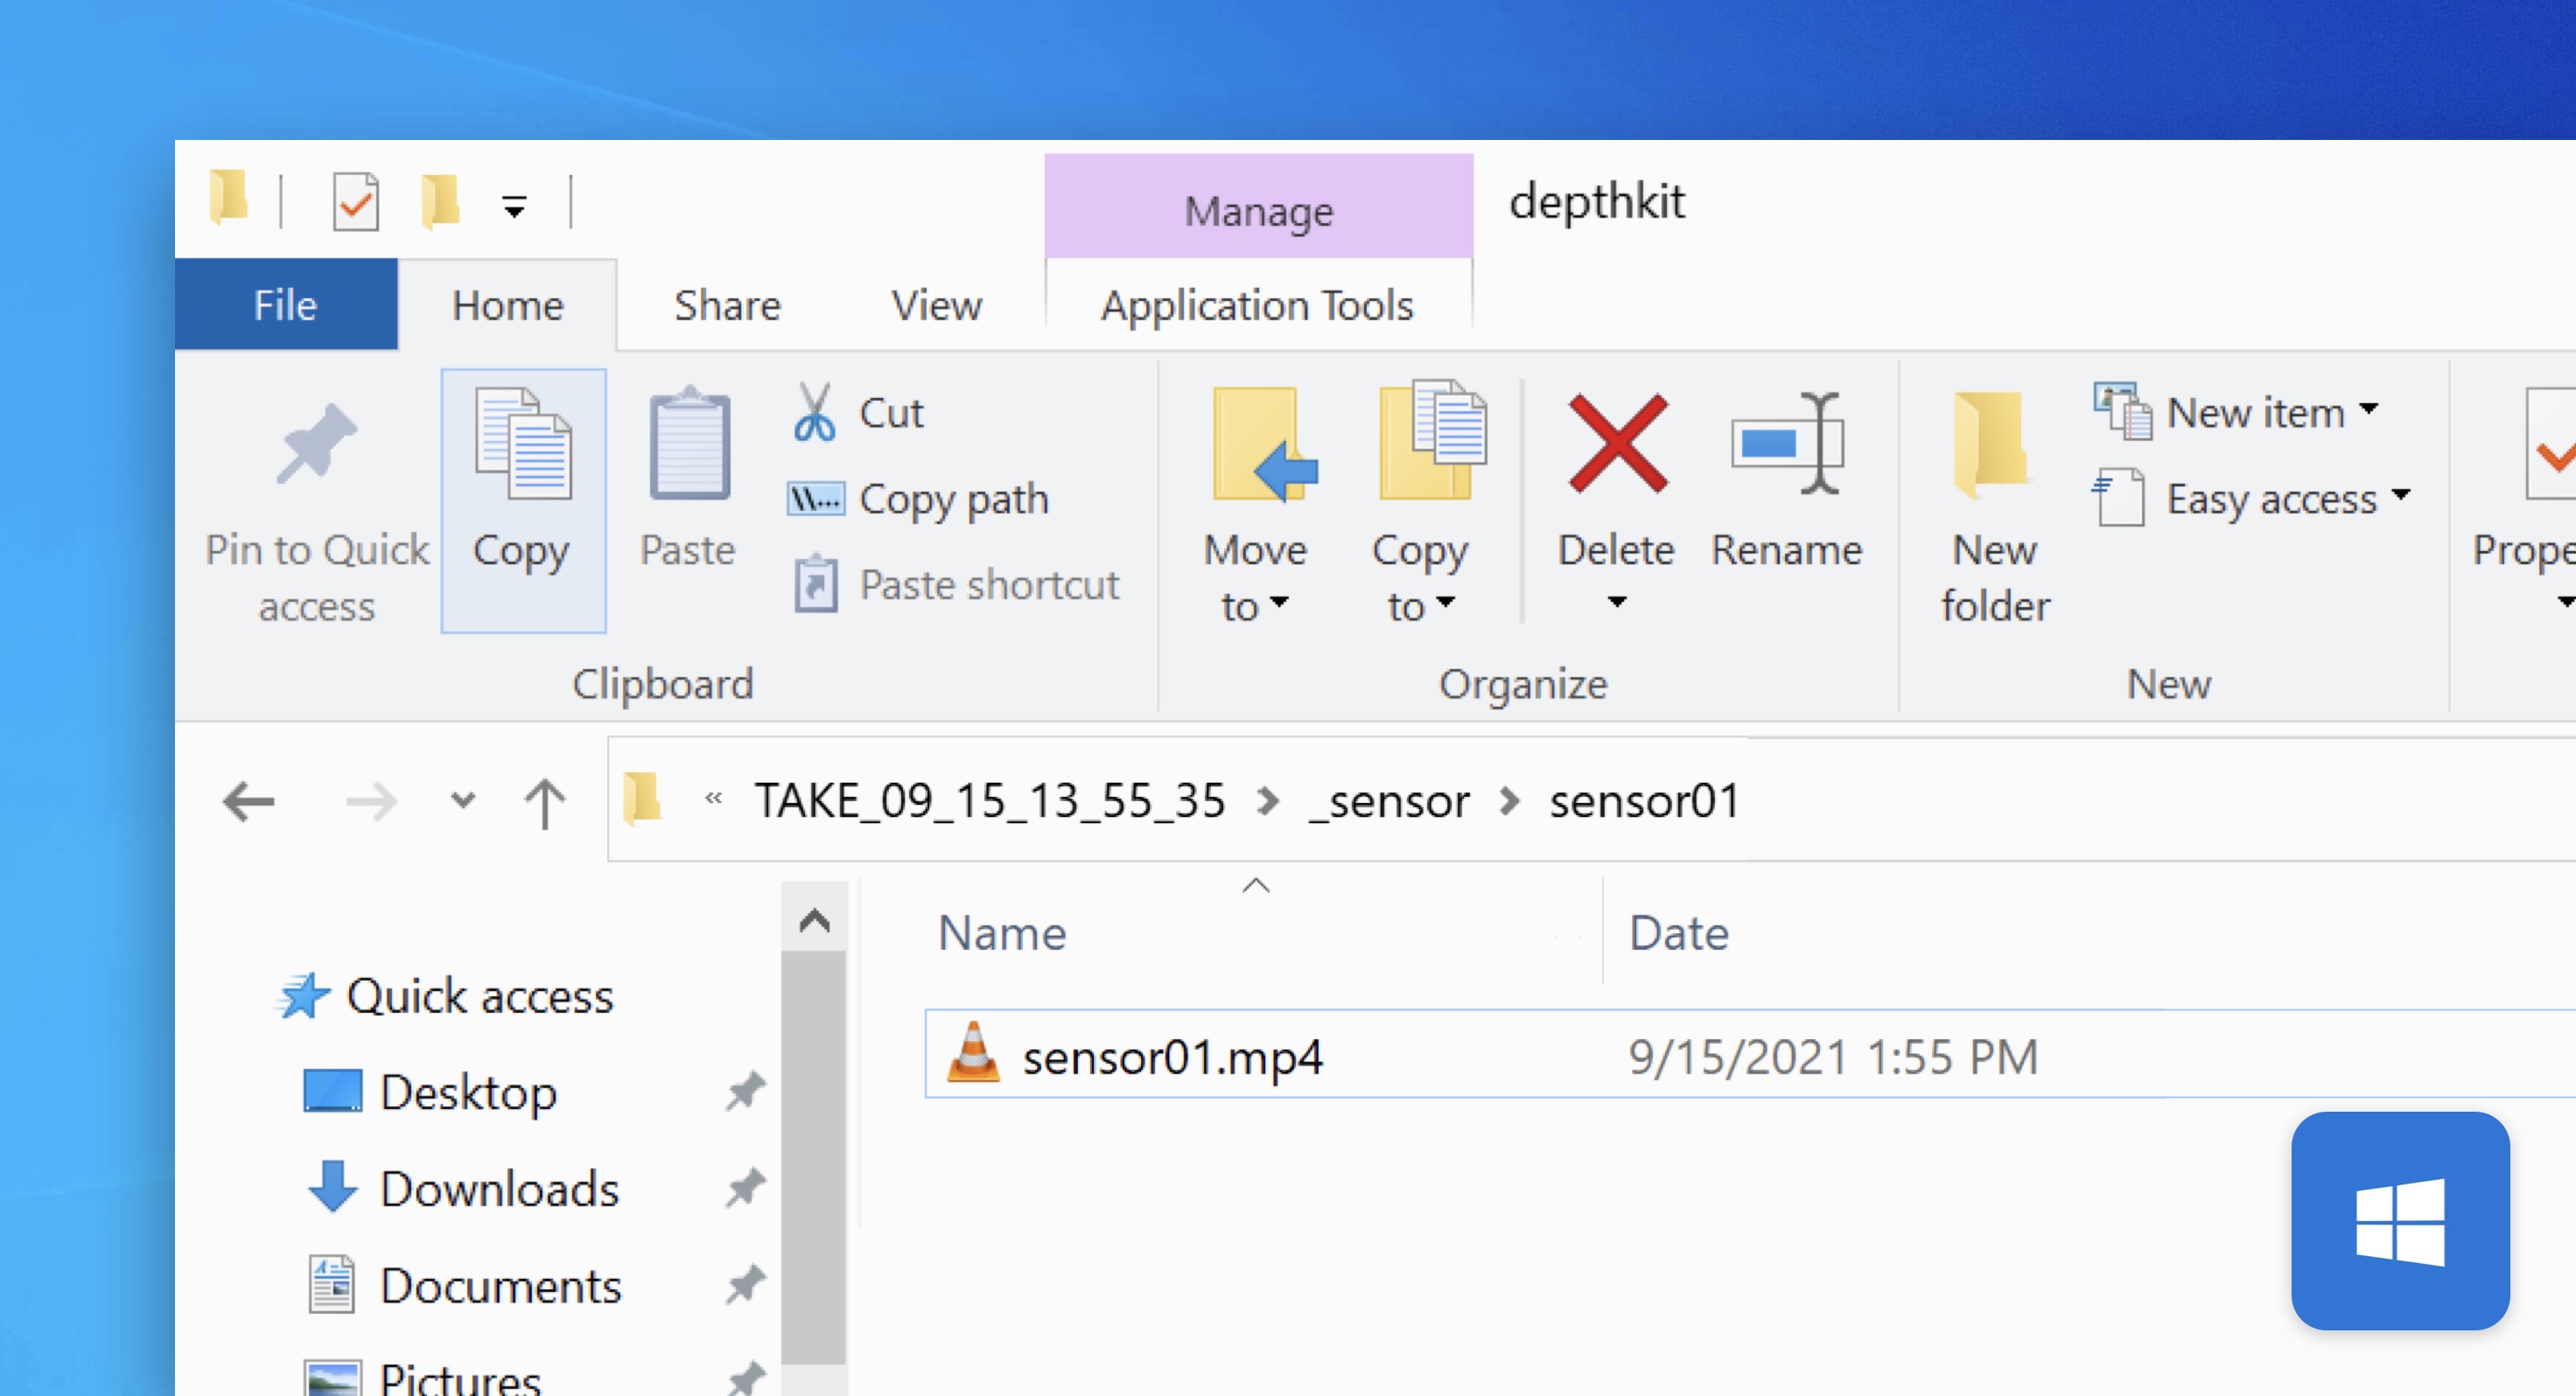
The source of the matte is the RGB video of the Depthkit recording itself. This video file can be found within the take's folder, inside of your Depthkit project bin.
Only RGB data is used to make a Refinement mask.
Because the RGB cameras of the supported depth sensors are higher-resolution than the depth cameras, the RGB data alone is used to make the Refinment mask. The recorded depth data is incorporated at a later stage once the mask is applied to the Depthkit recording in the Edit context.
The refinement mask should be a high contrast mask, meaning it should be 100% black and 100% white. Any grey areas that are included in the mask will be visible in Depthkit in your enhancement export, keep the contrast high and the edges sharp and feather-free.
Creating a Refinement Mask in After Effects with Keylight
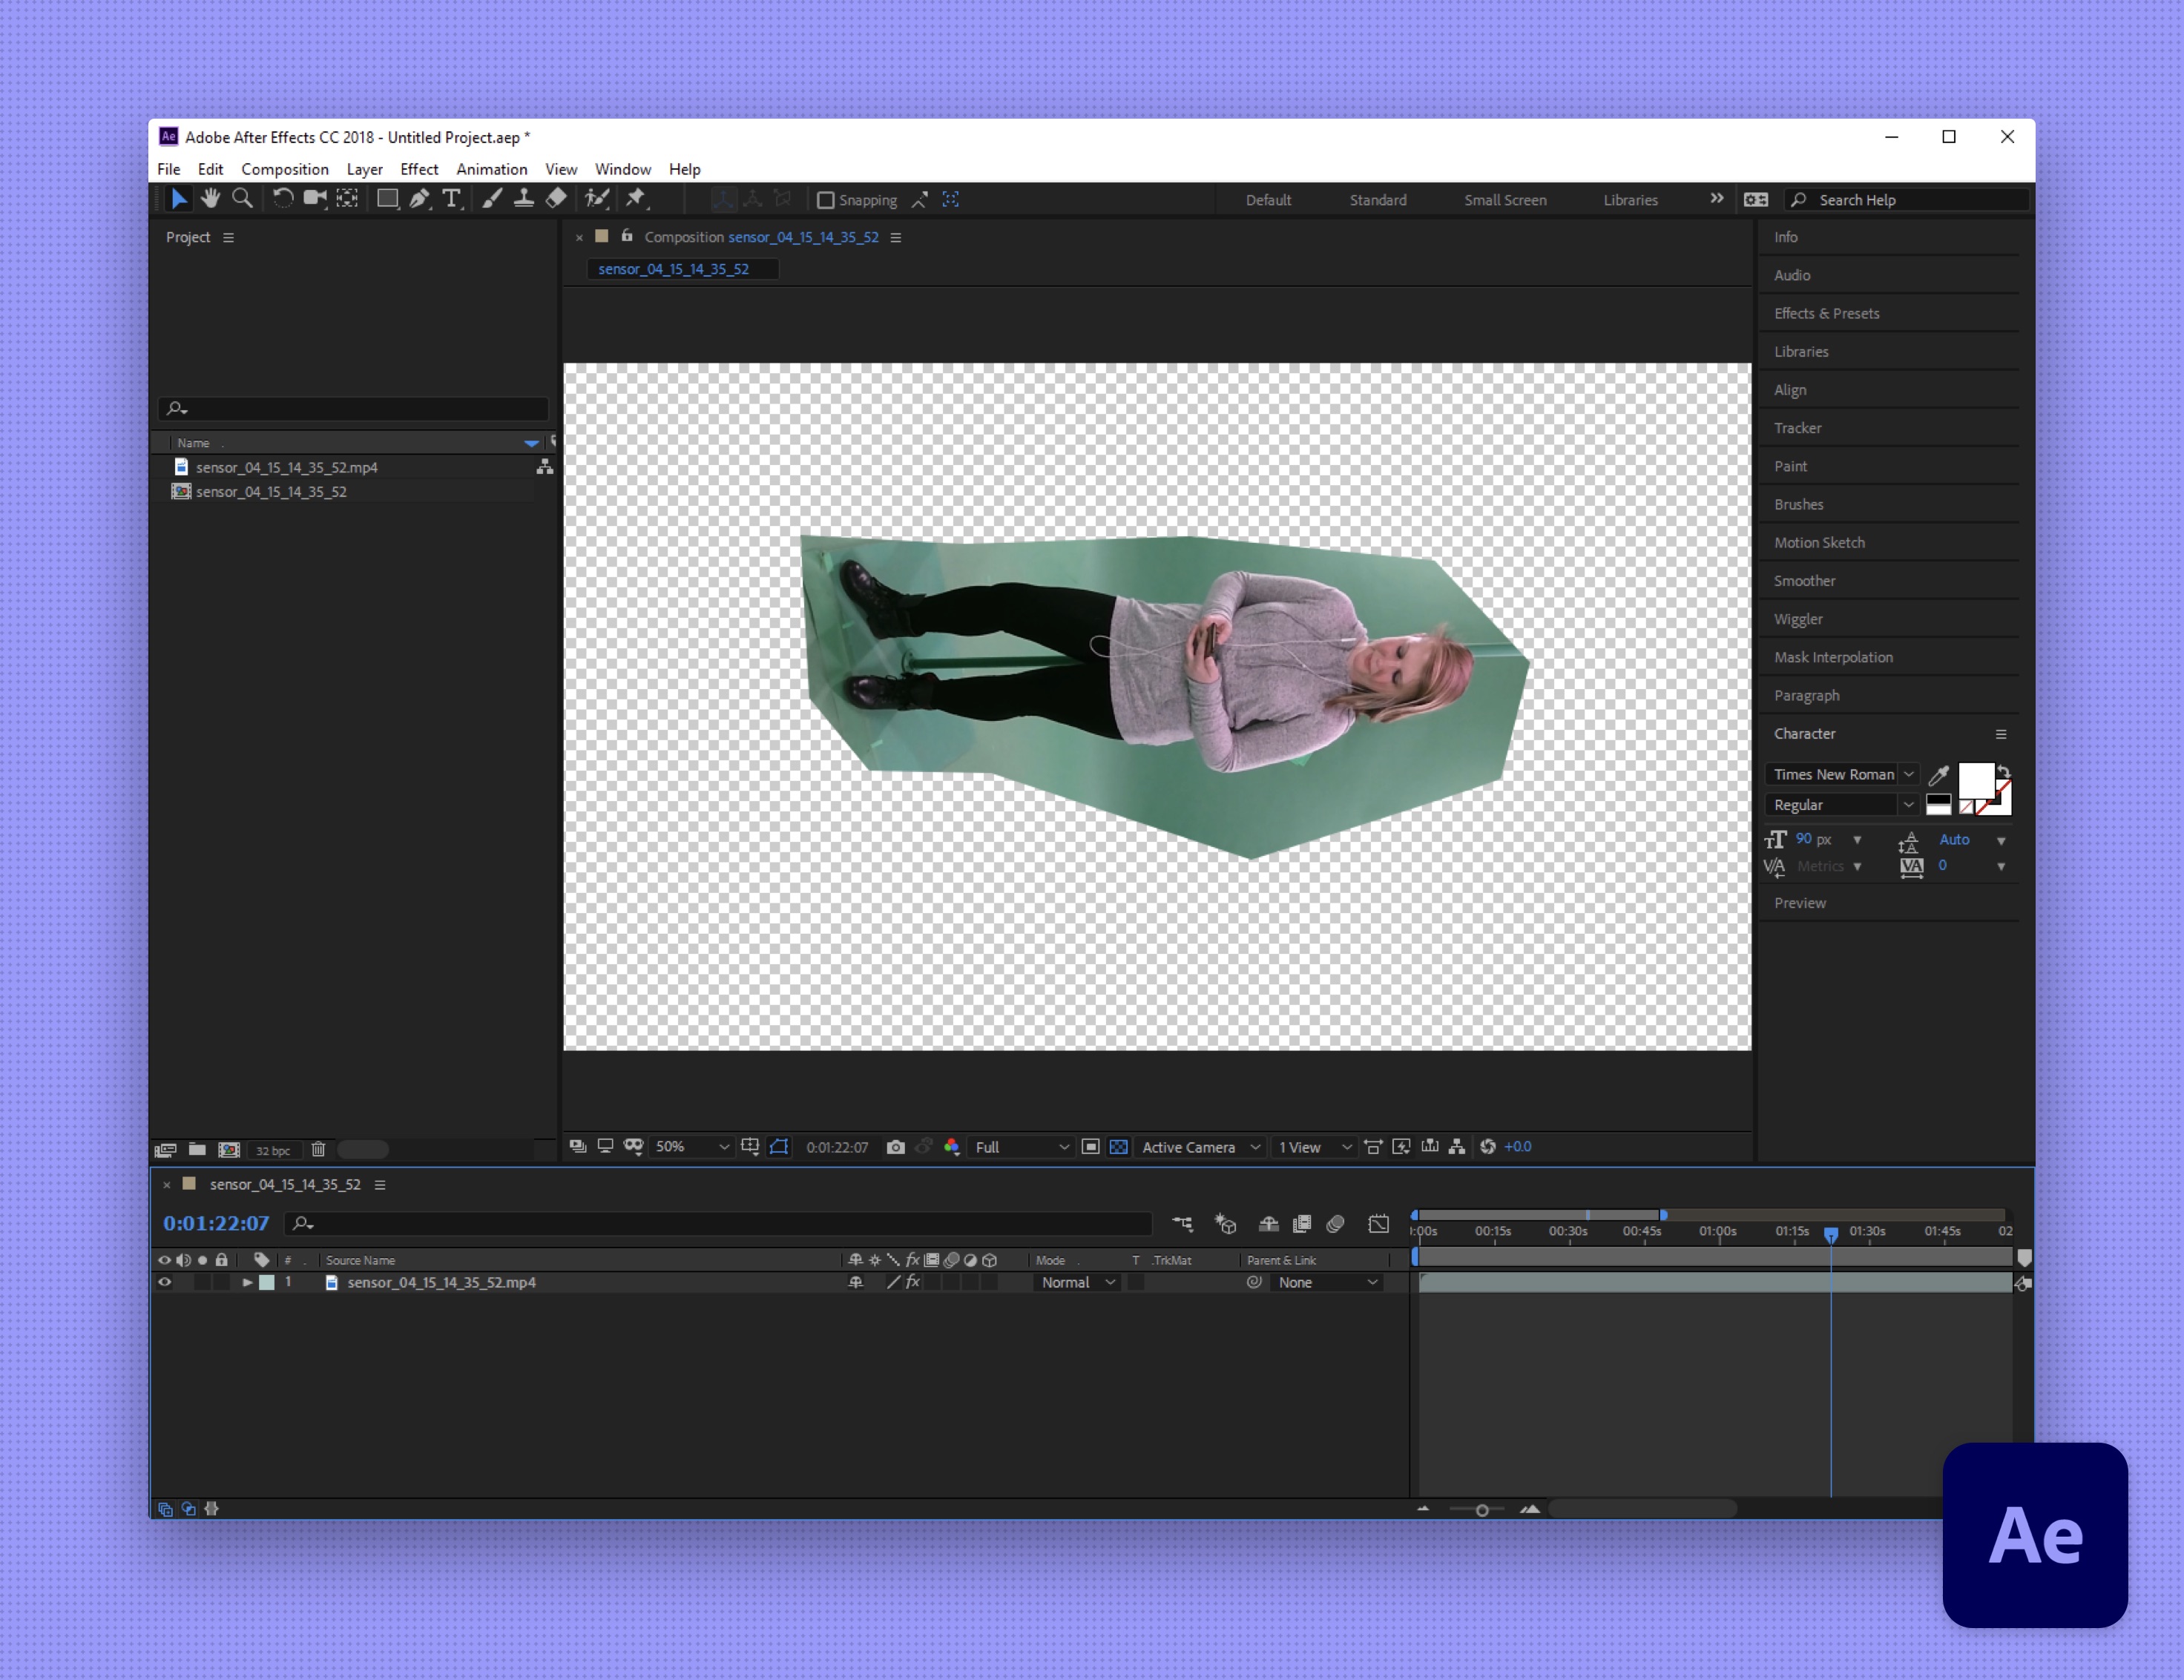
Once you have made a comp with your imported video file, select the clip and draw a garbage mask around the subject.
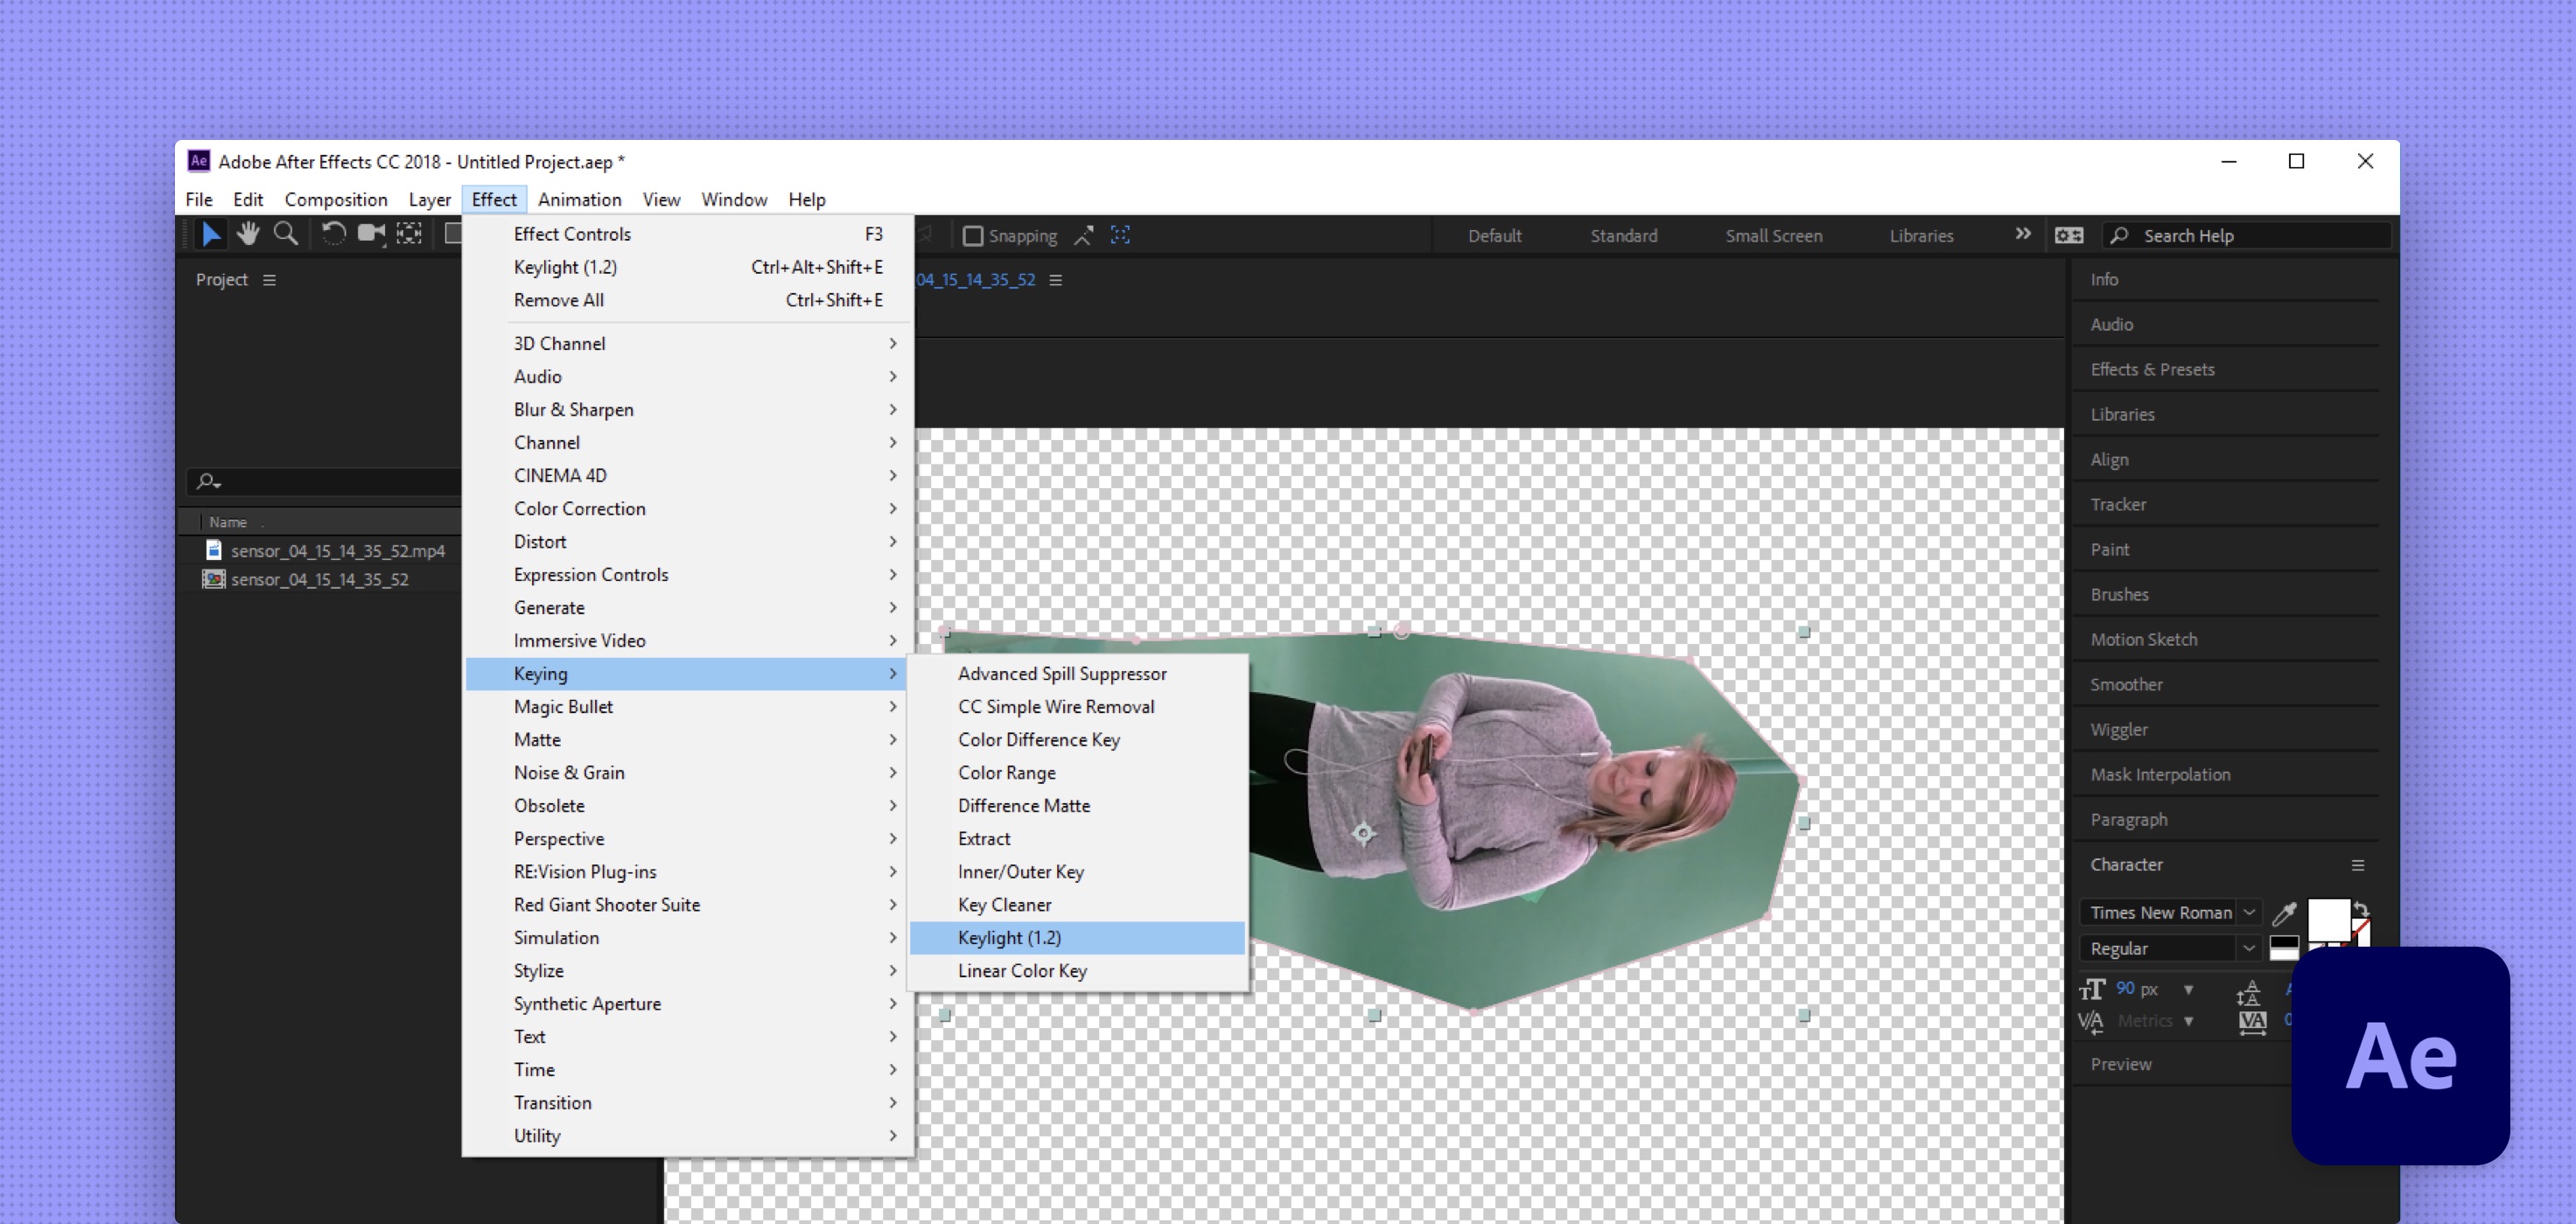
Select your clip again and then go to Effect → Keying → Keylight 1.2.
Expand the clip and select the screen color dropper under Keylight to select an area on the green screen. This will remove the majority of the background.
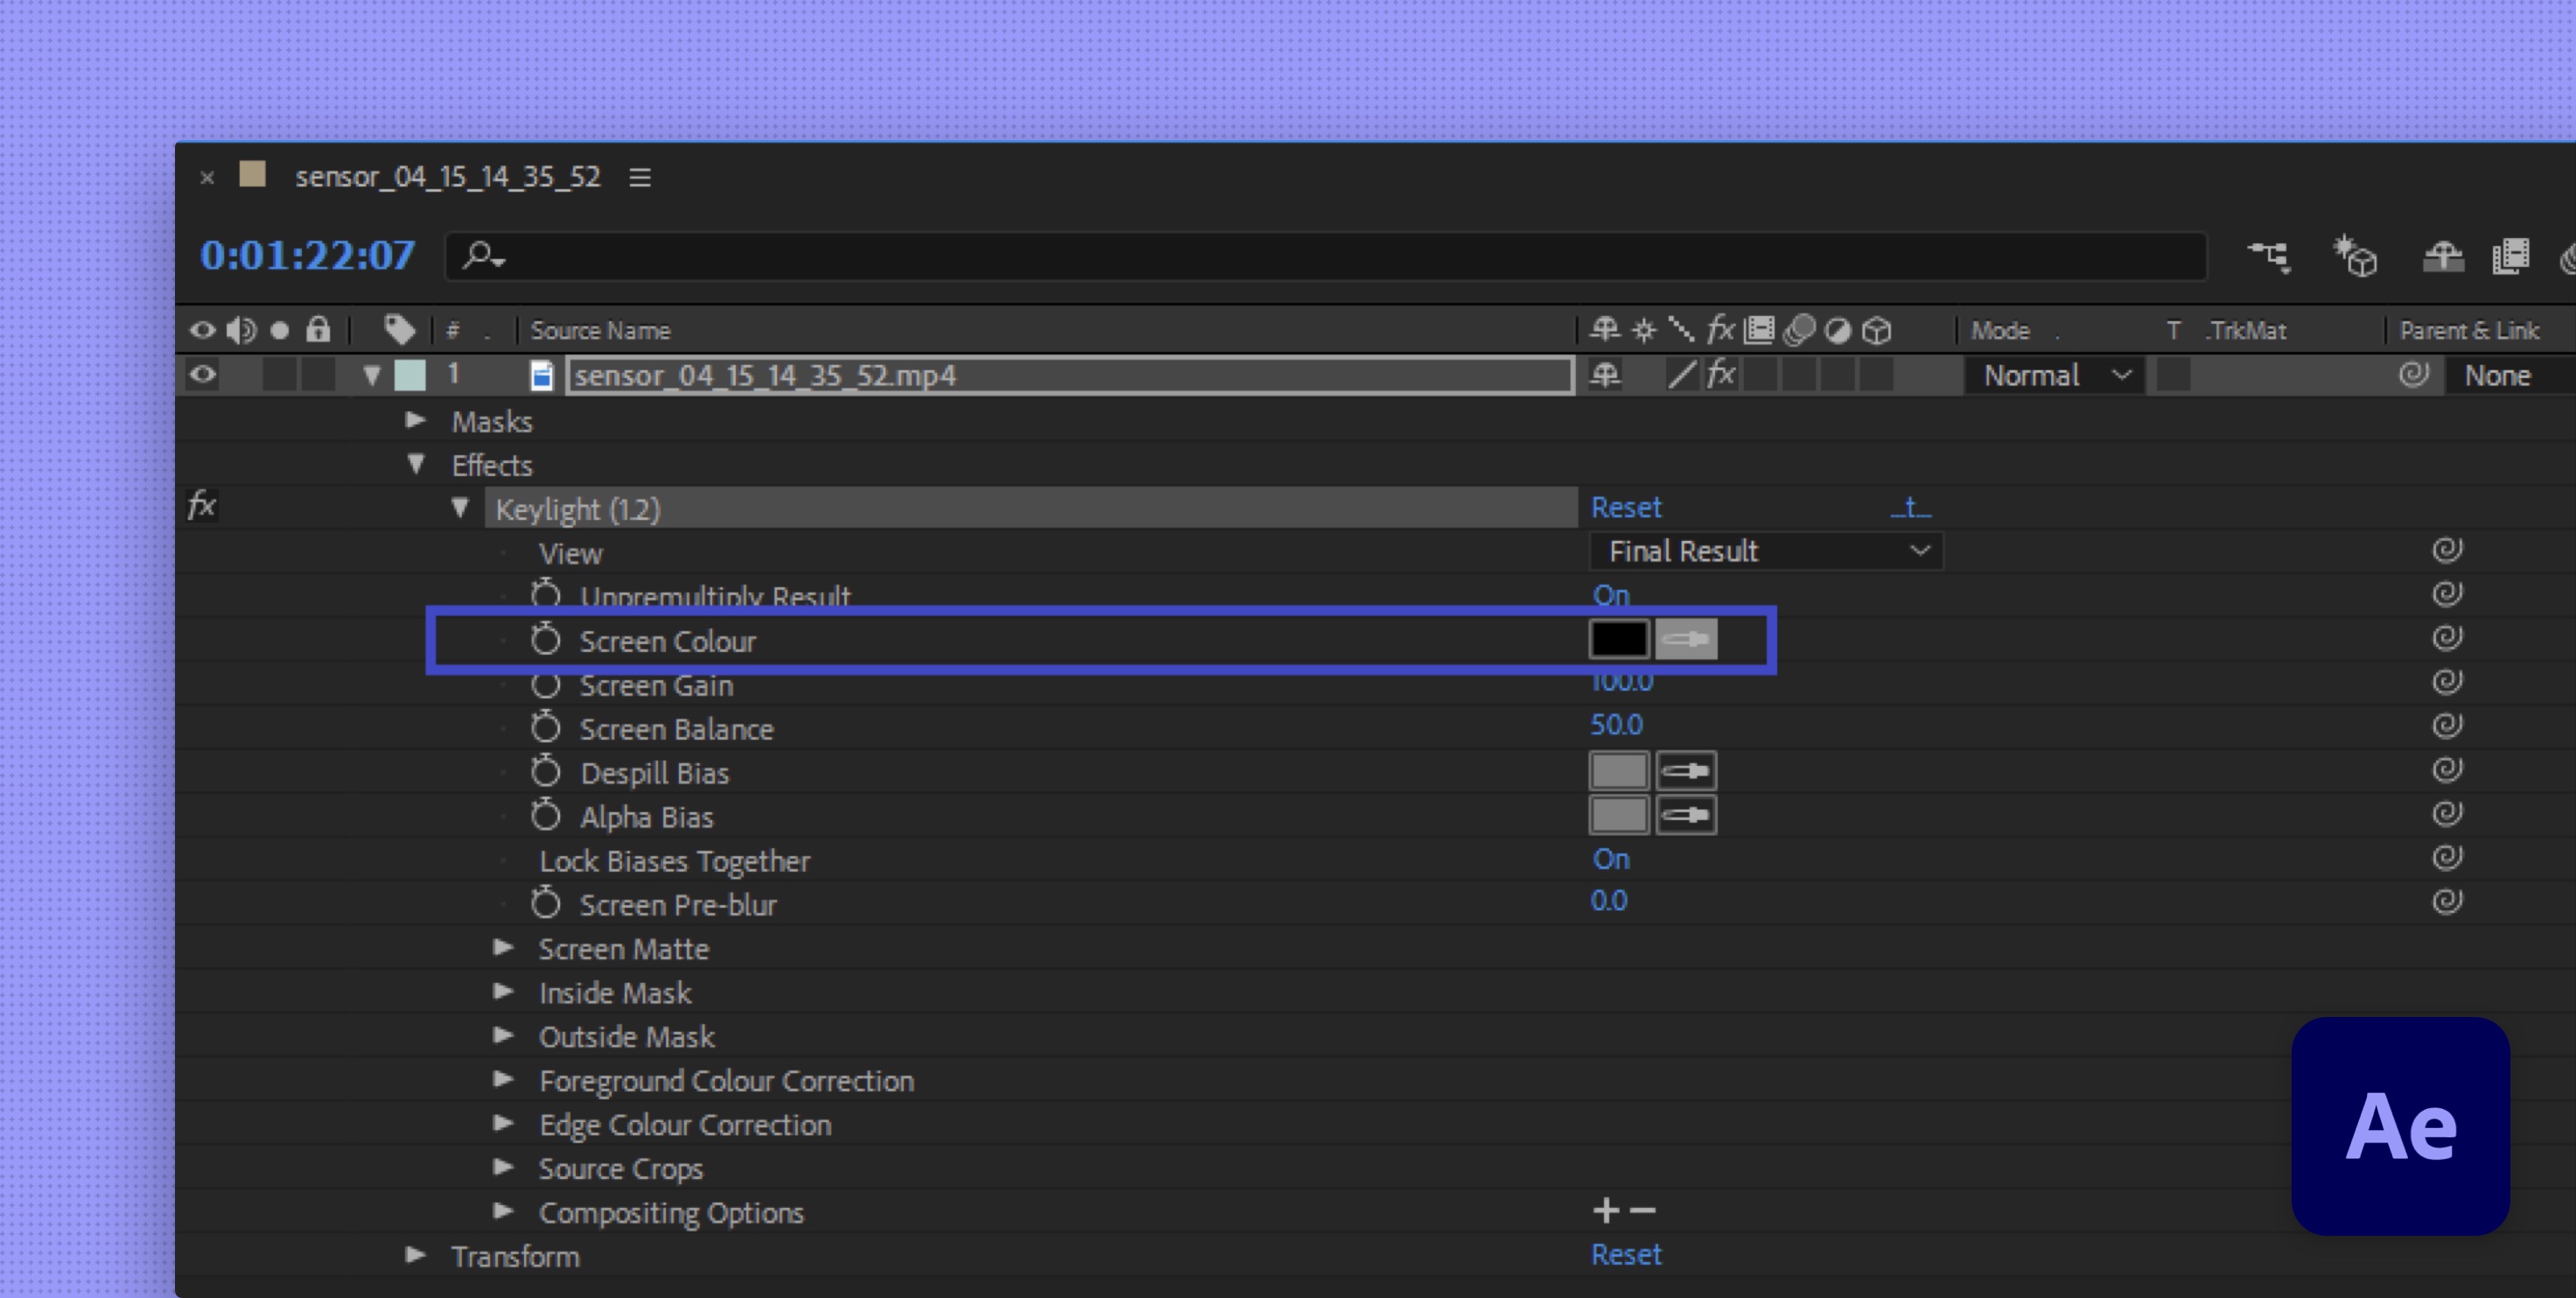
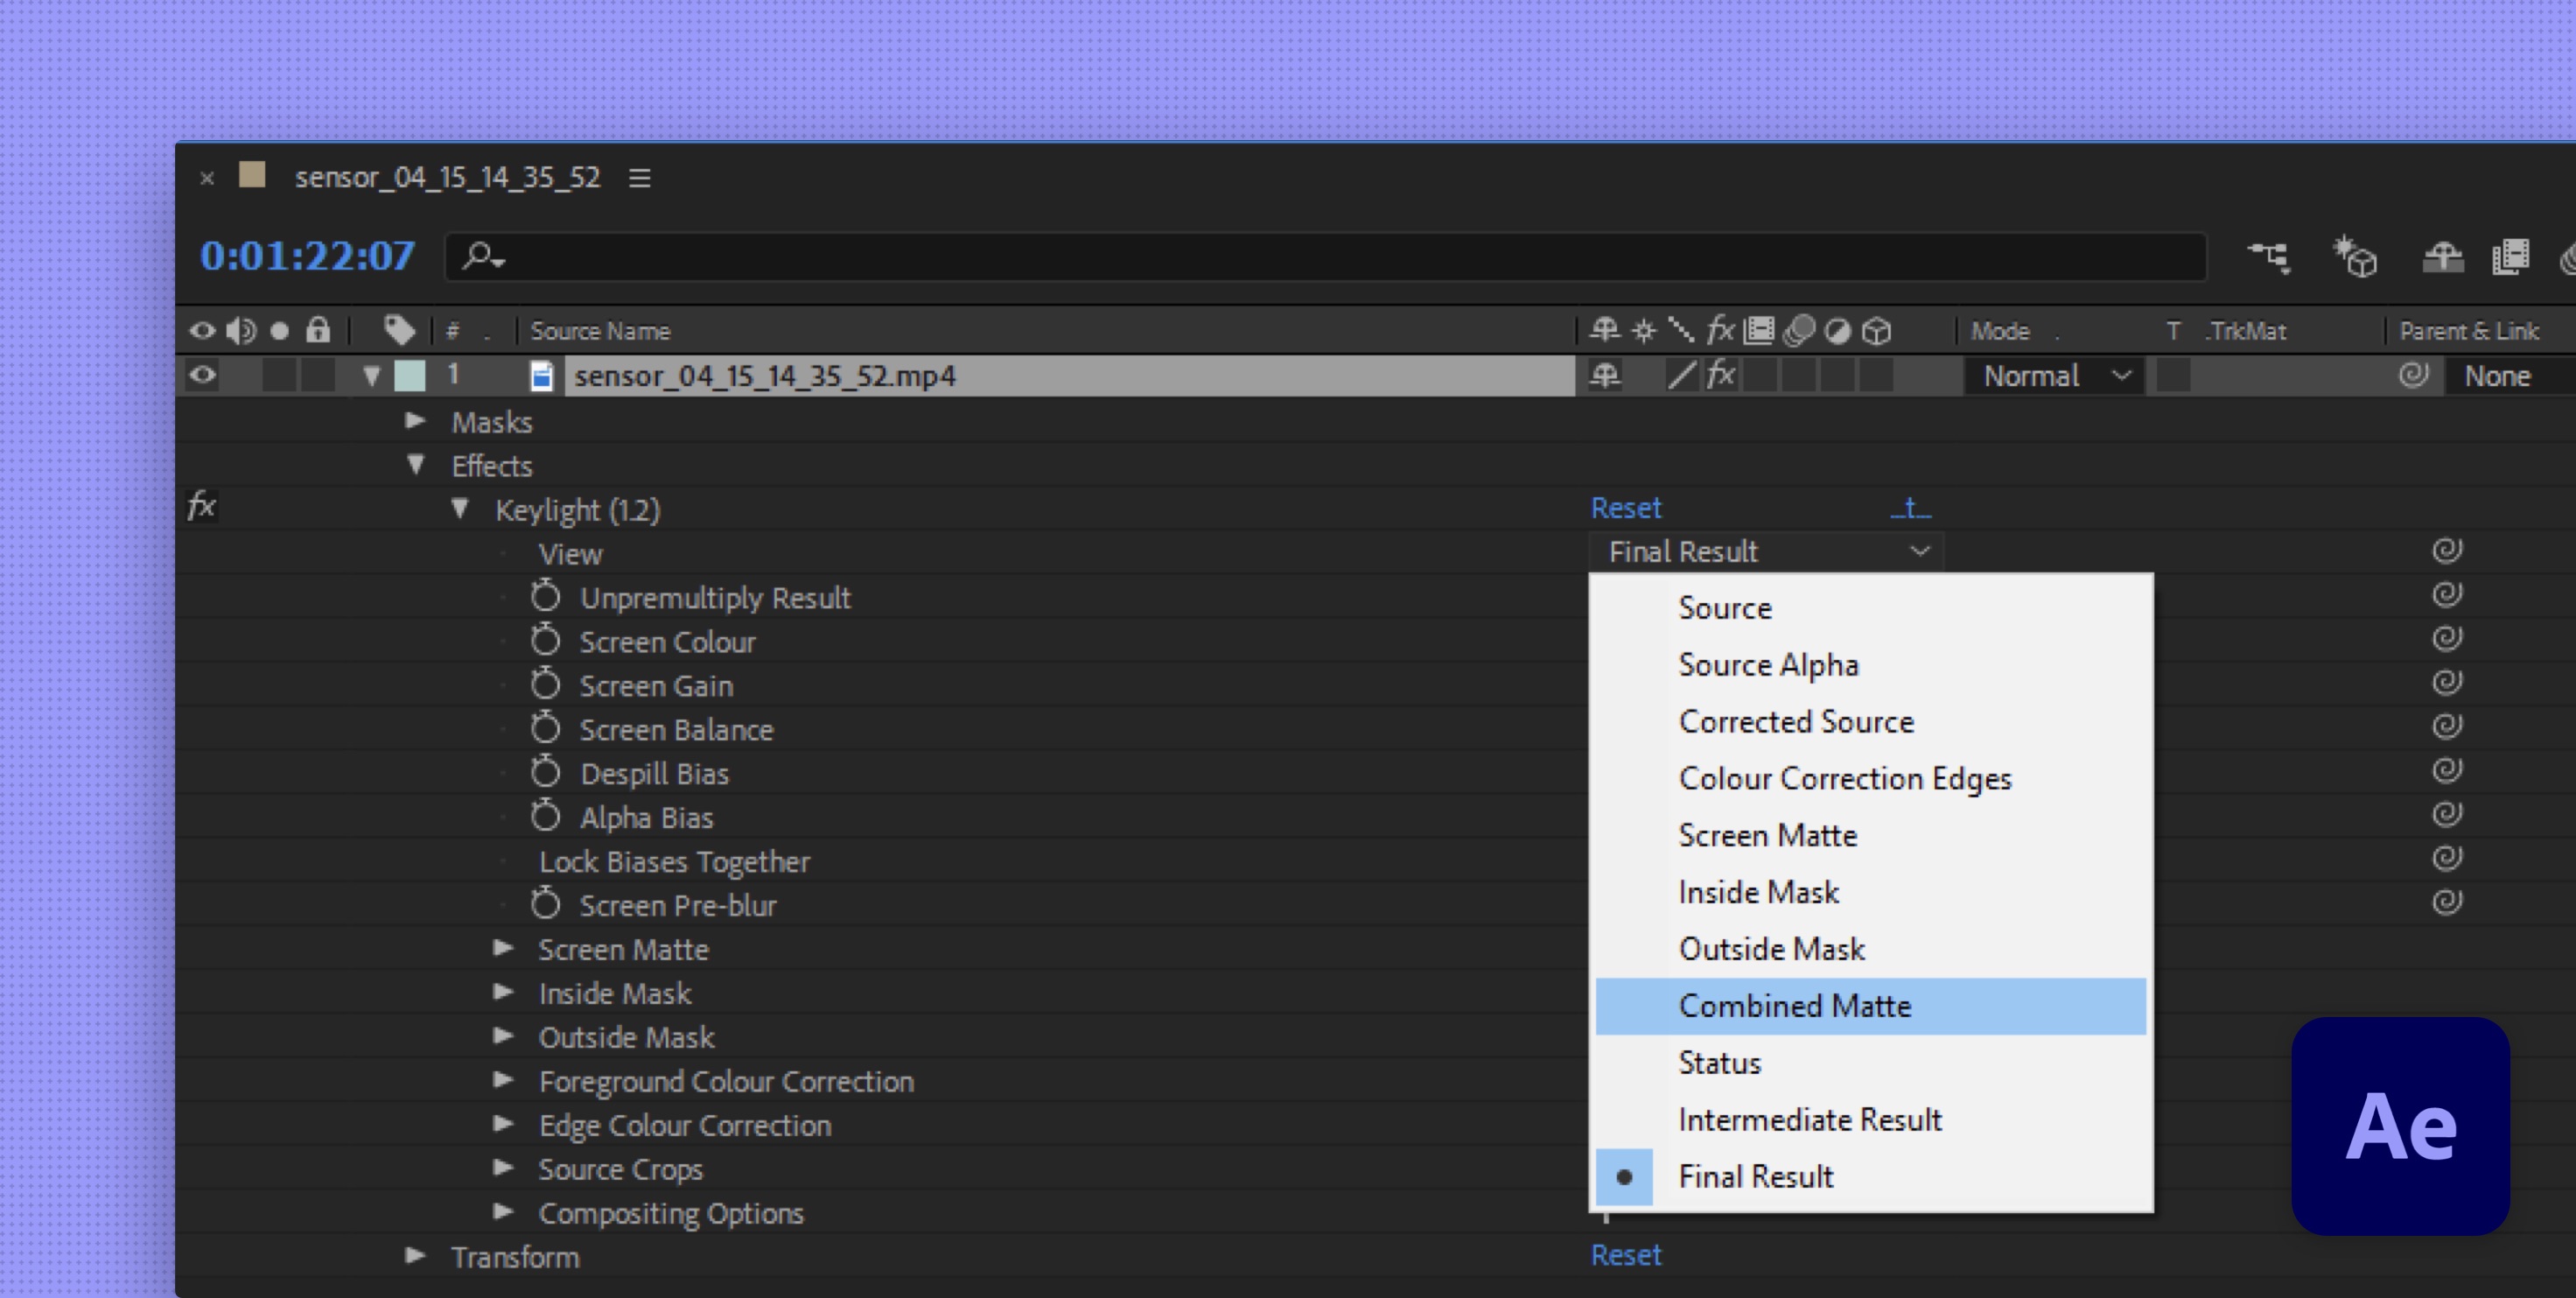
In the Keylight dropdown, change your View to Combined Matte to clearly view what will be included in the matte.
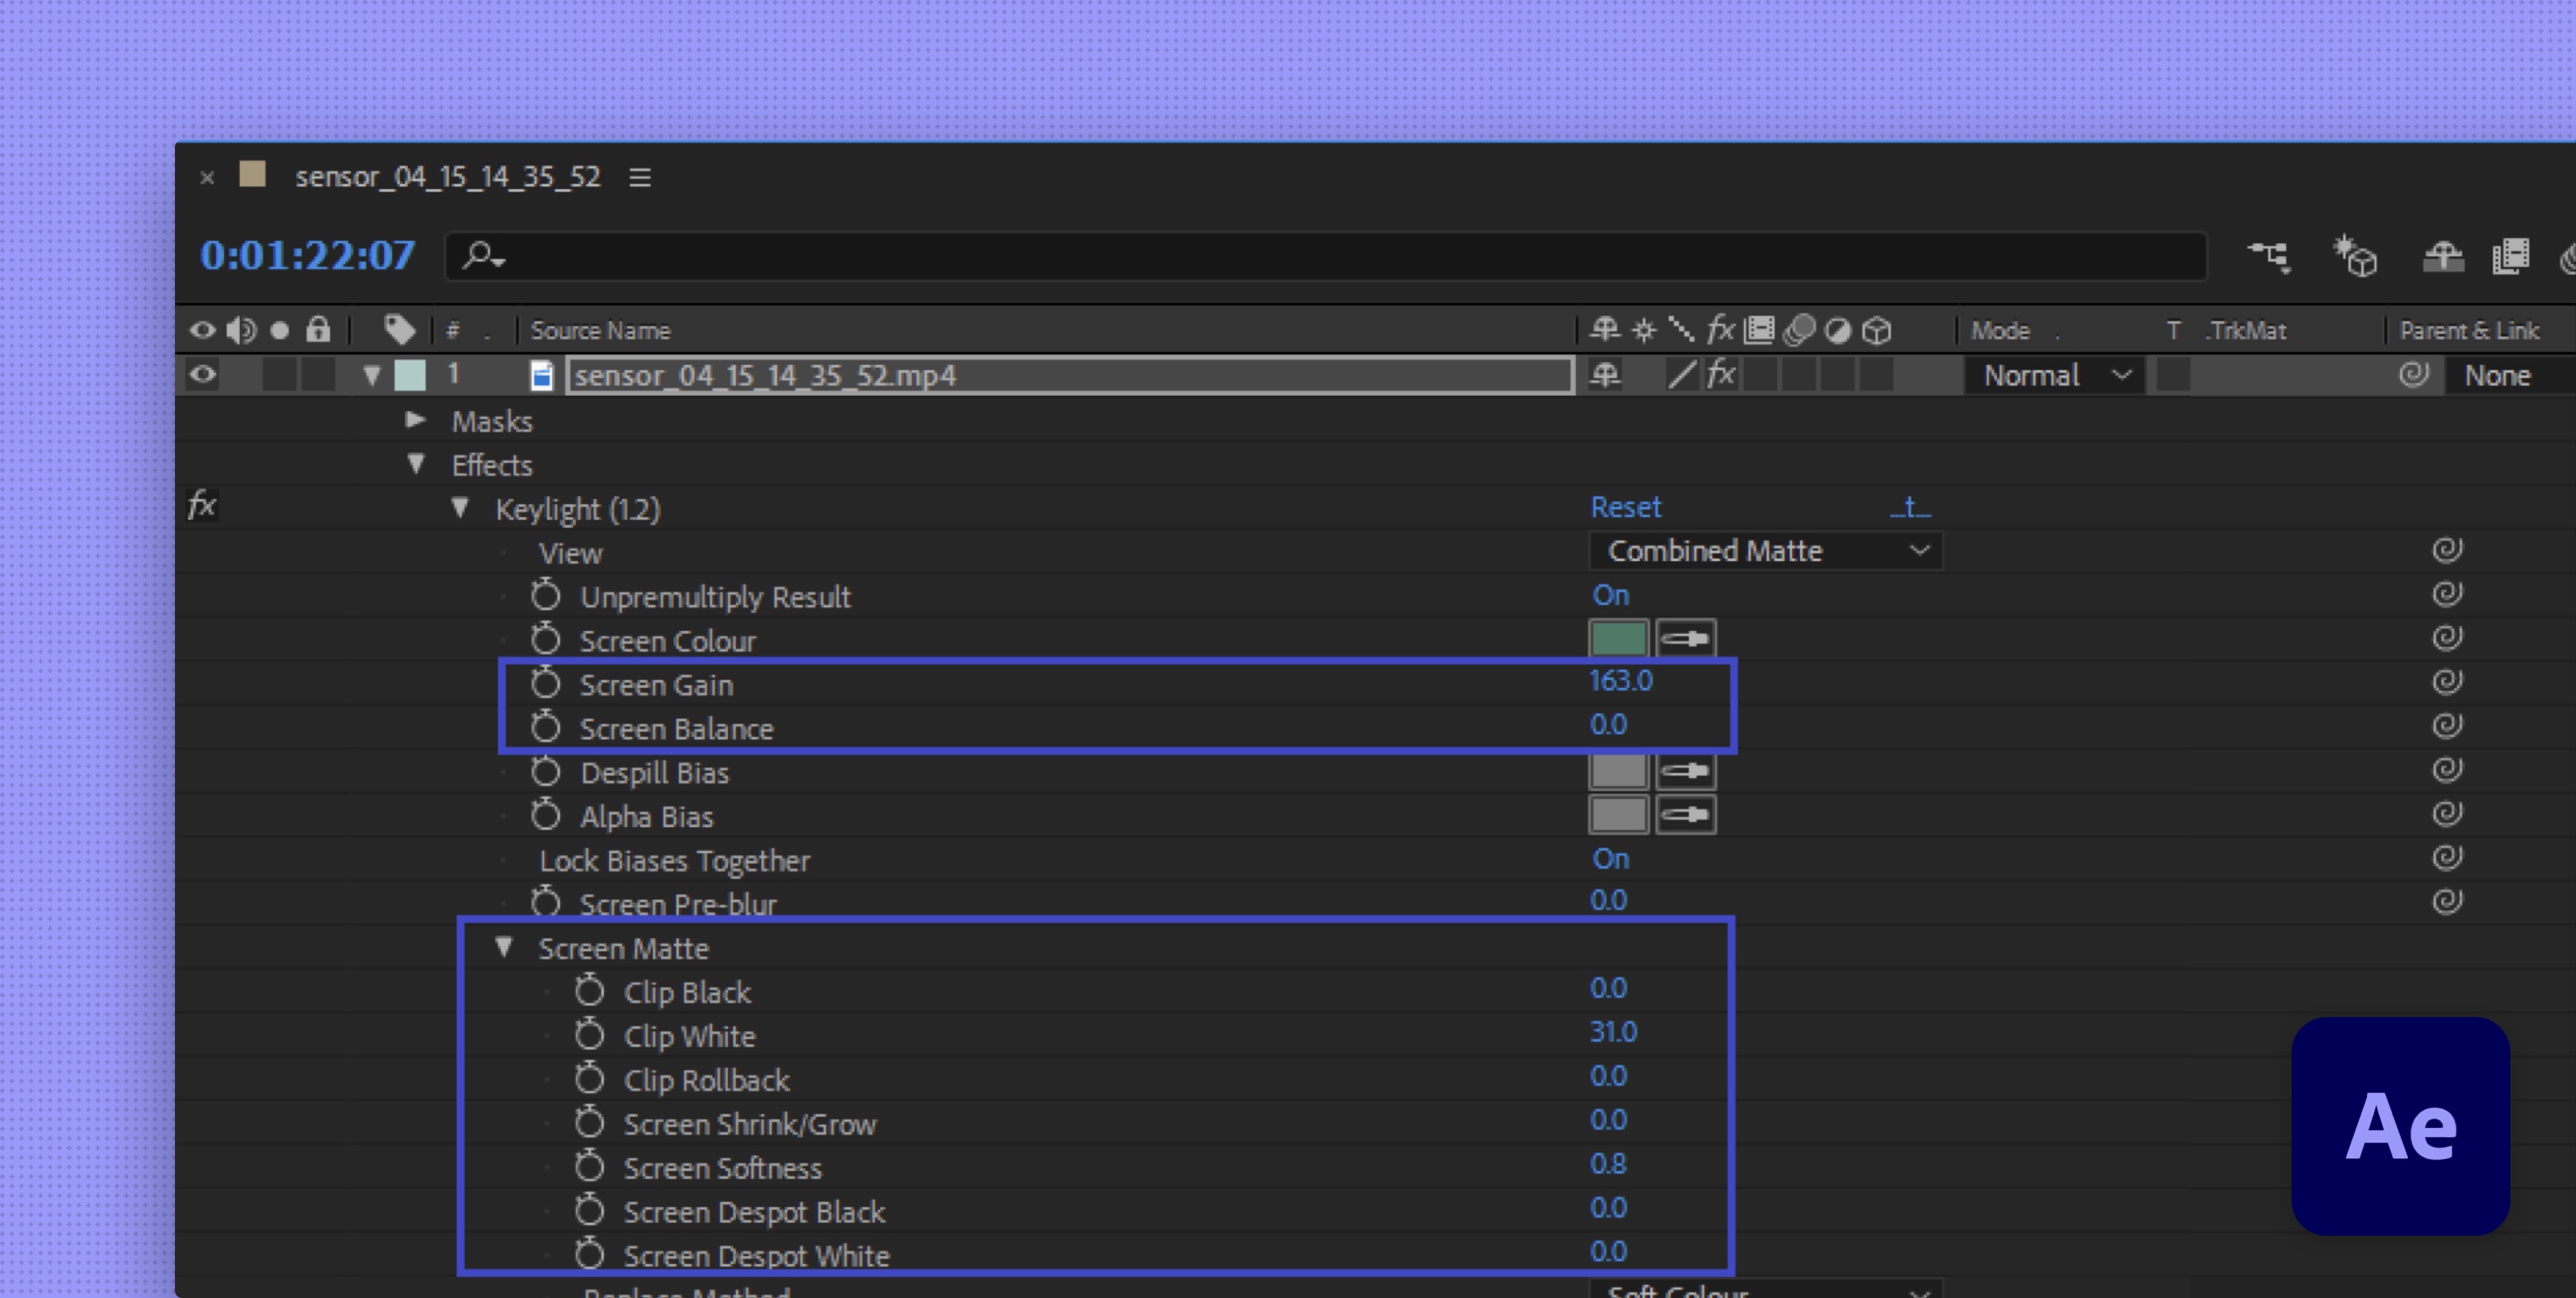
Under Keylight, adjust the Screen Gain and Screen Balance to clean any bits of the green screen that have not been removed. You can also adjust this under Keylight → Screen Matte with Clip Black and Clip White.
Now you are ready to export the mask! Export at H264 (mp4 or mov).
Now you can link the custom mask in your Depthkit project to move ahead with the Refinement workflow.
Creating a Refinement Mask in Premiere
There are many ways to pull in a key in Adobe Premiere. For this tutorial, we will stick with Ultra Key.
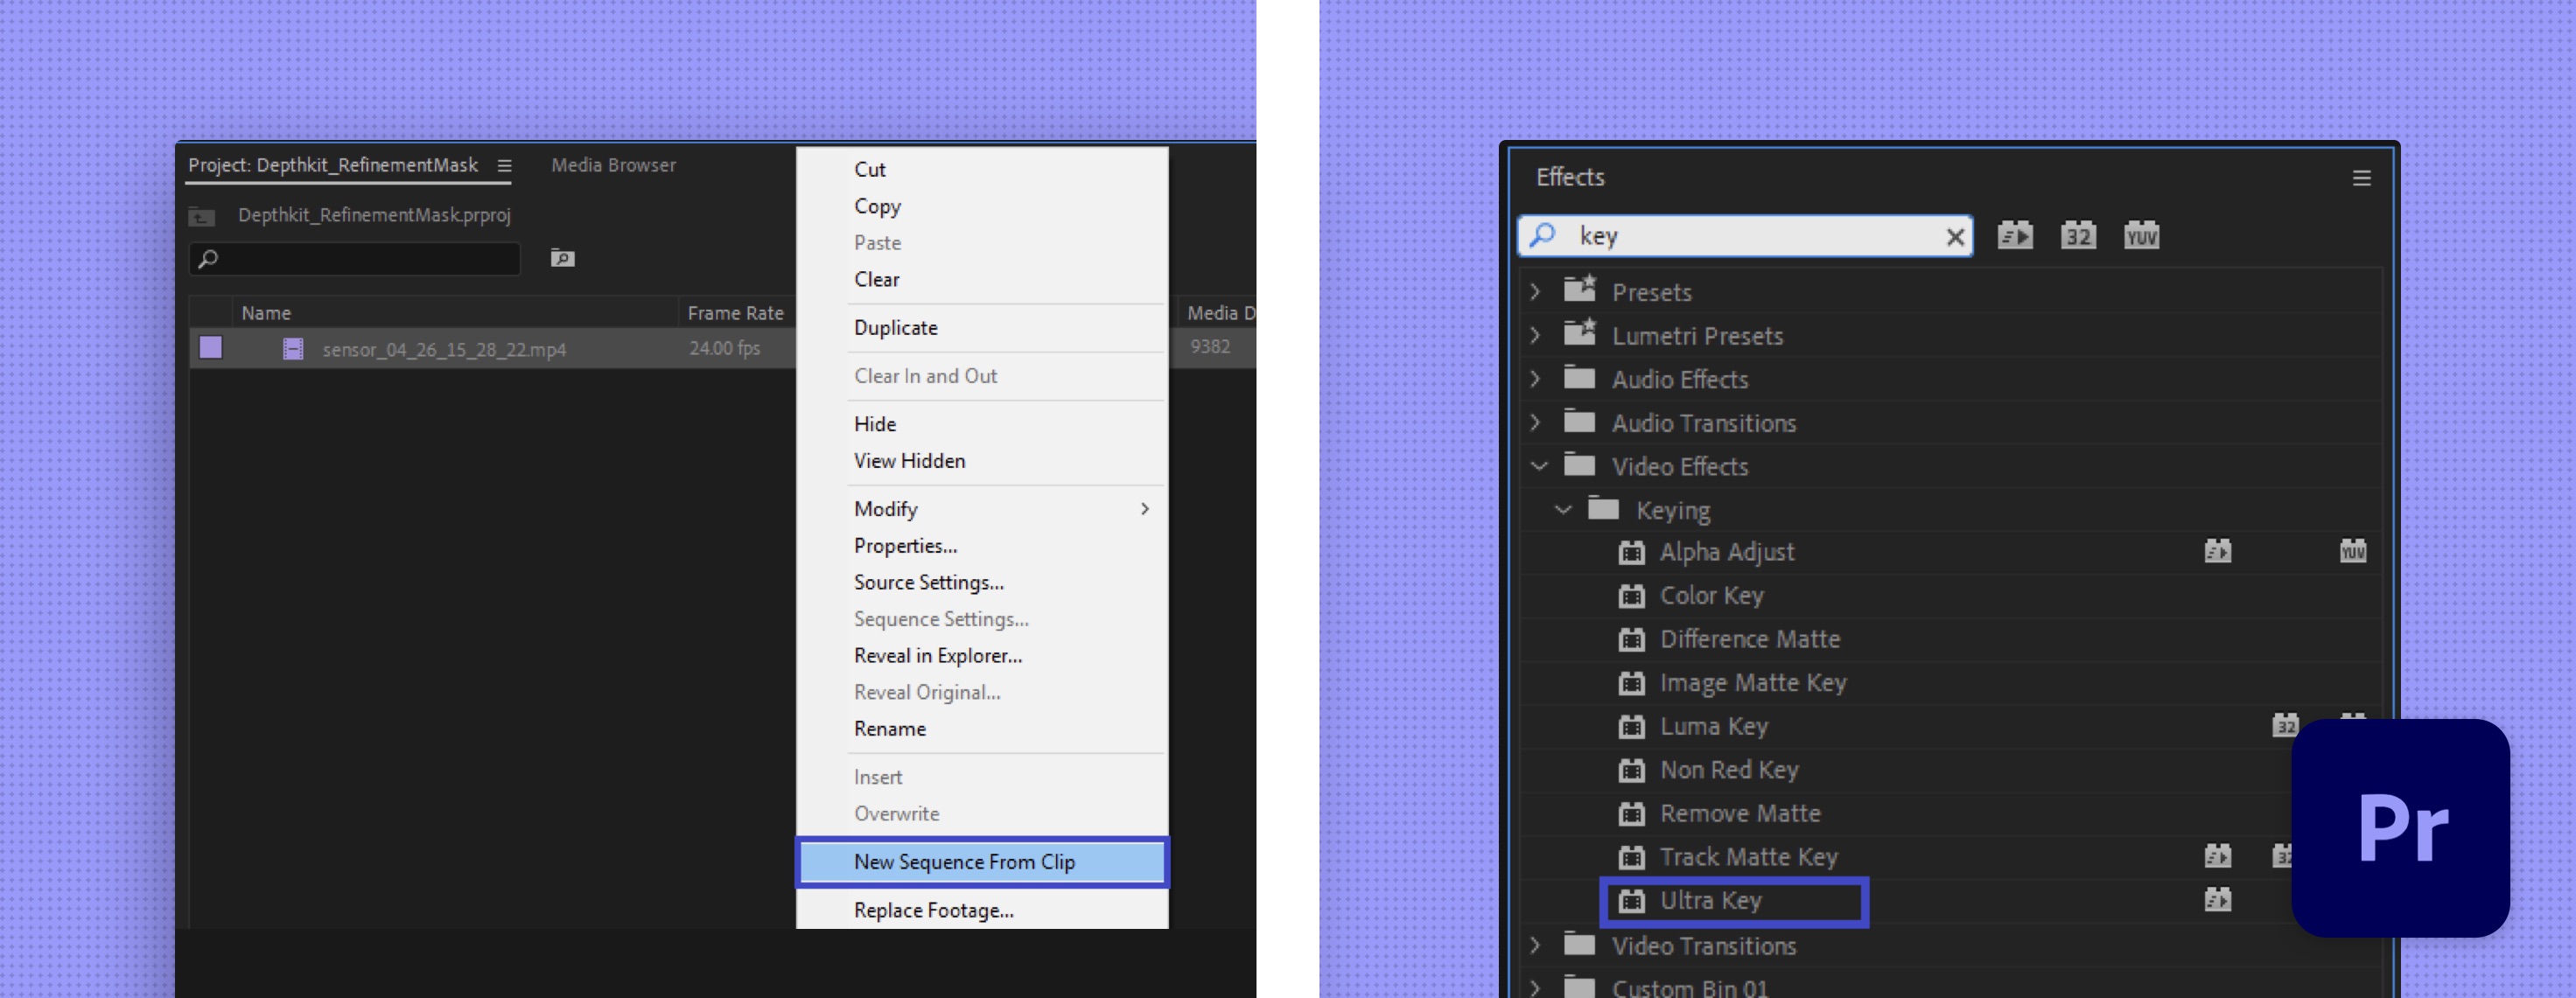
Import your footage and create a New Sequence From Clip.
Drop the Ultra Key effect onto your clip. You can find Ultra Key by searching for it in the Effects panel as seen below.
Go to the Effects Control tab.
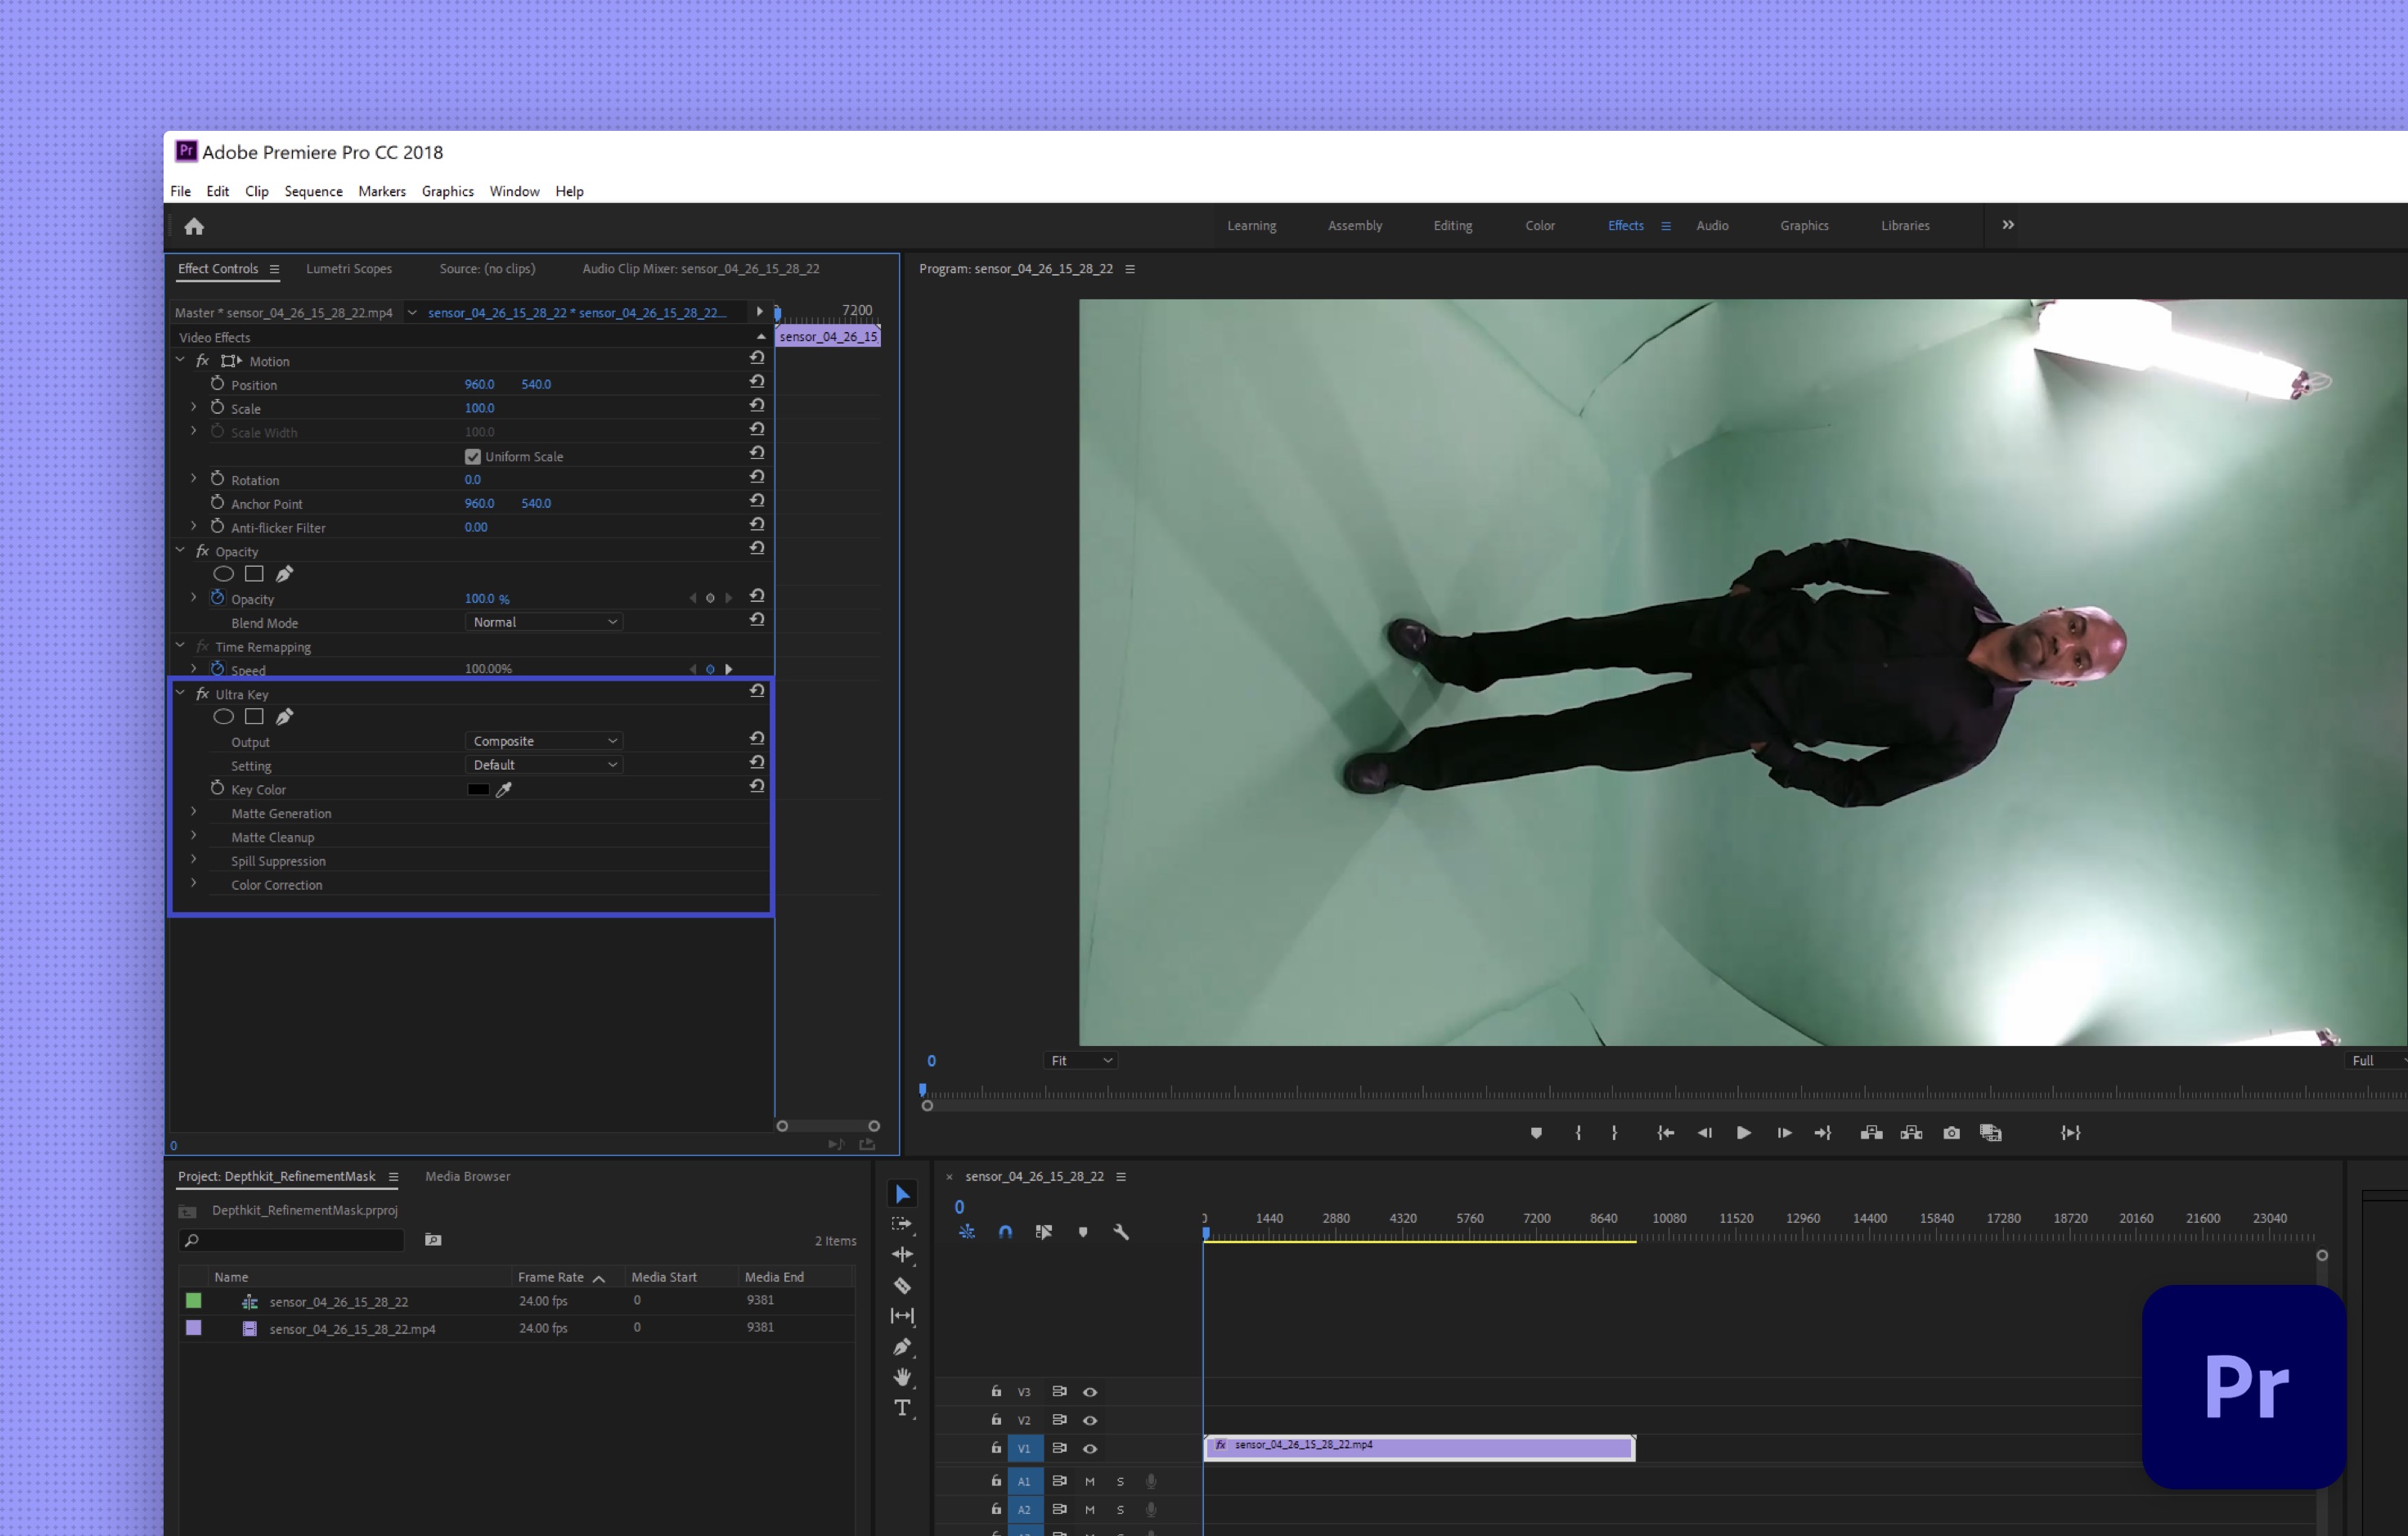
Use the eyedropper to select the green color on your video frame
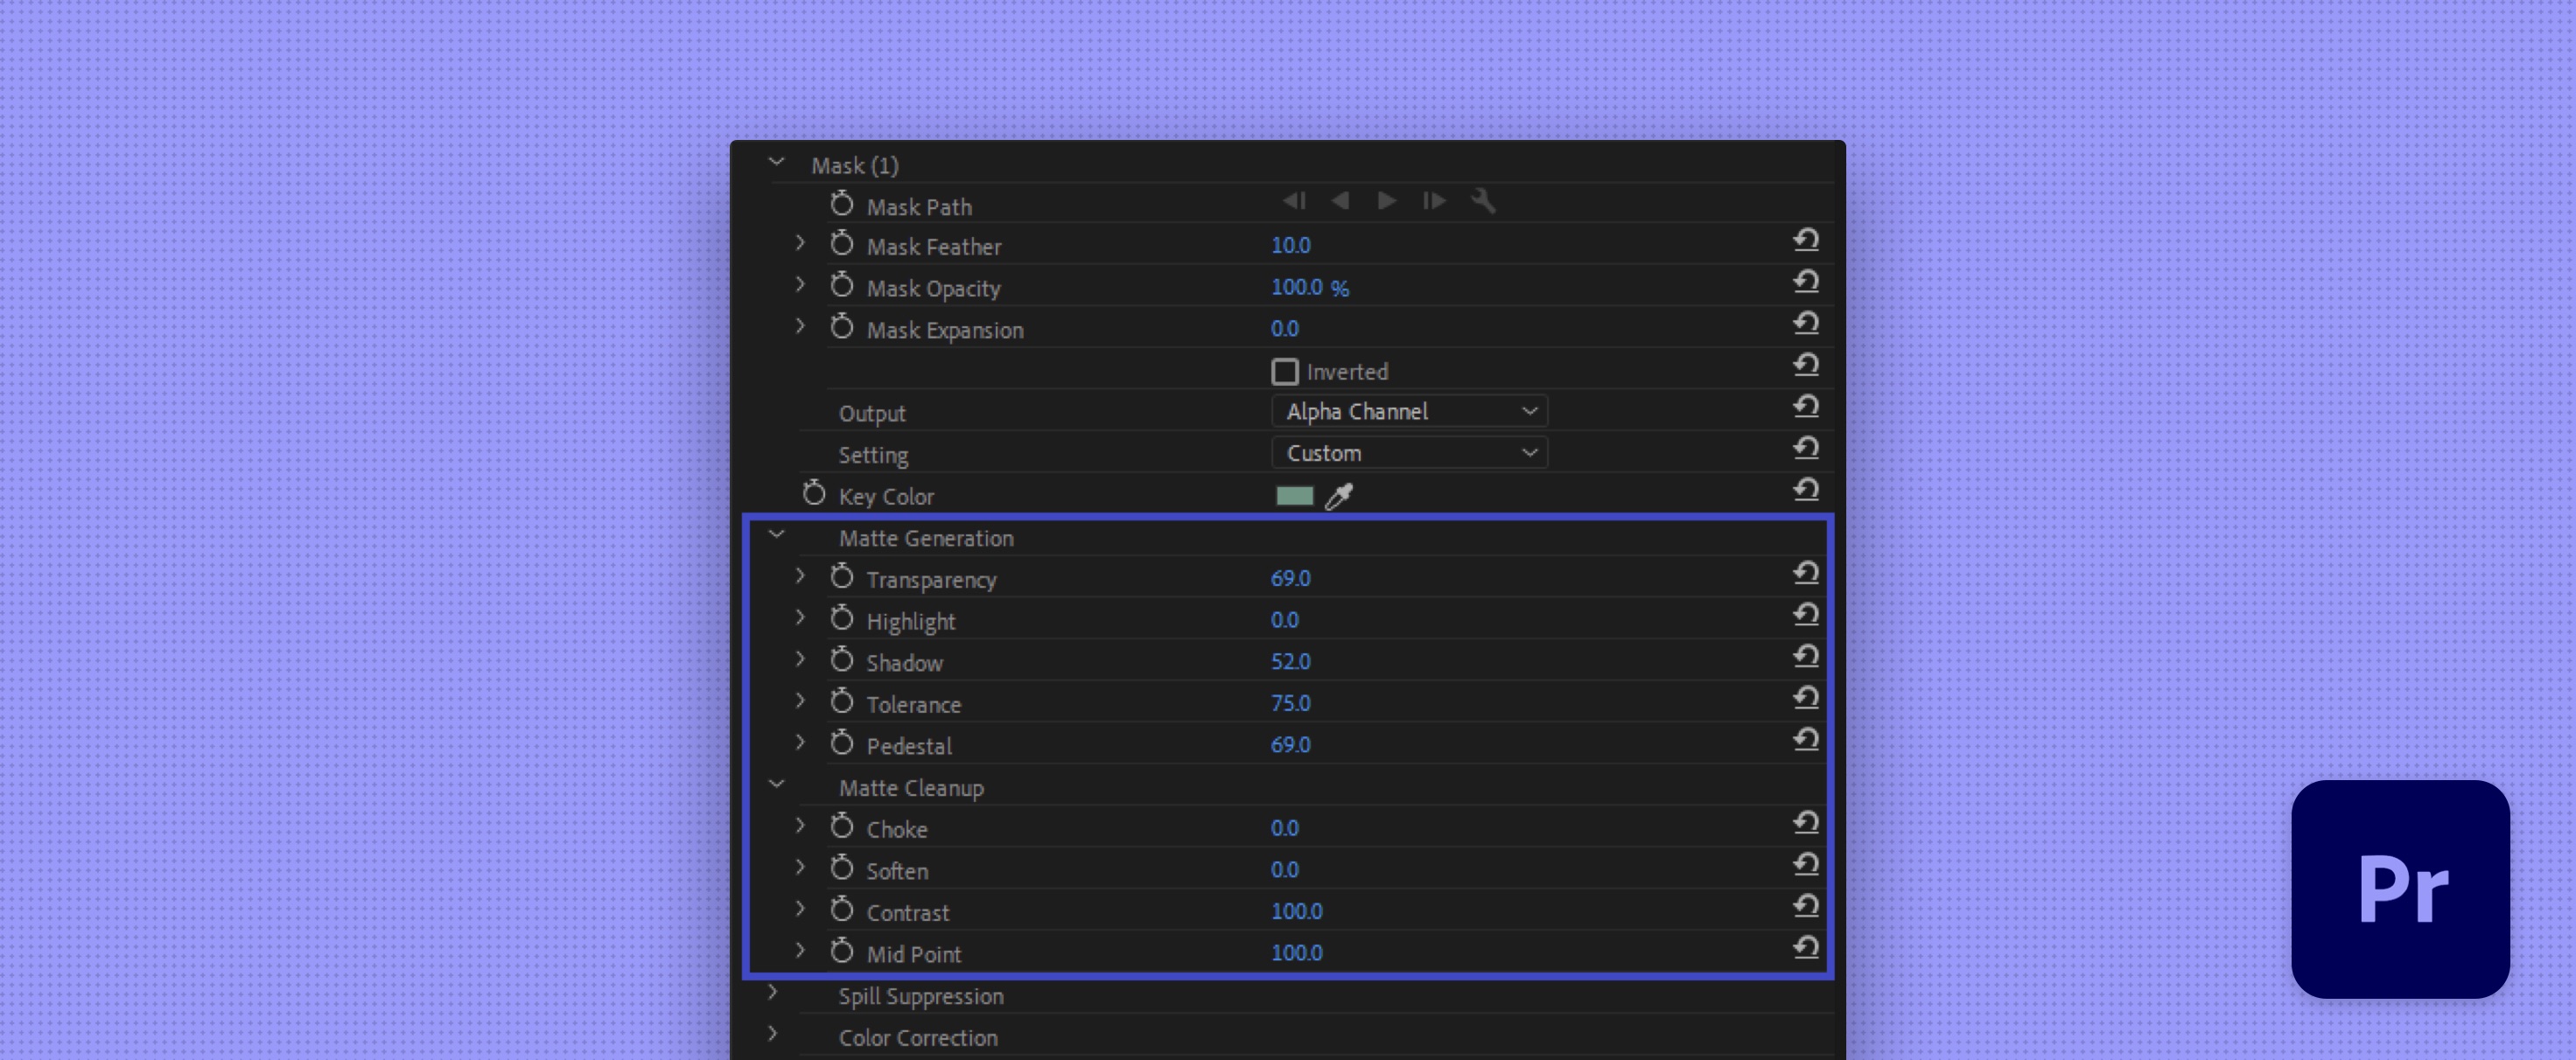
In Output, change the setting to Alpha Channel so you have a clean black/white mask.

Clean up the mask with the settings under Matte Generation and Matte Cleanup until you have a clean black and white mask with minimal noise. This is key to create a clean
Creating a Refinement Mask in Davinci Resolve
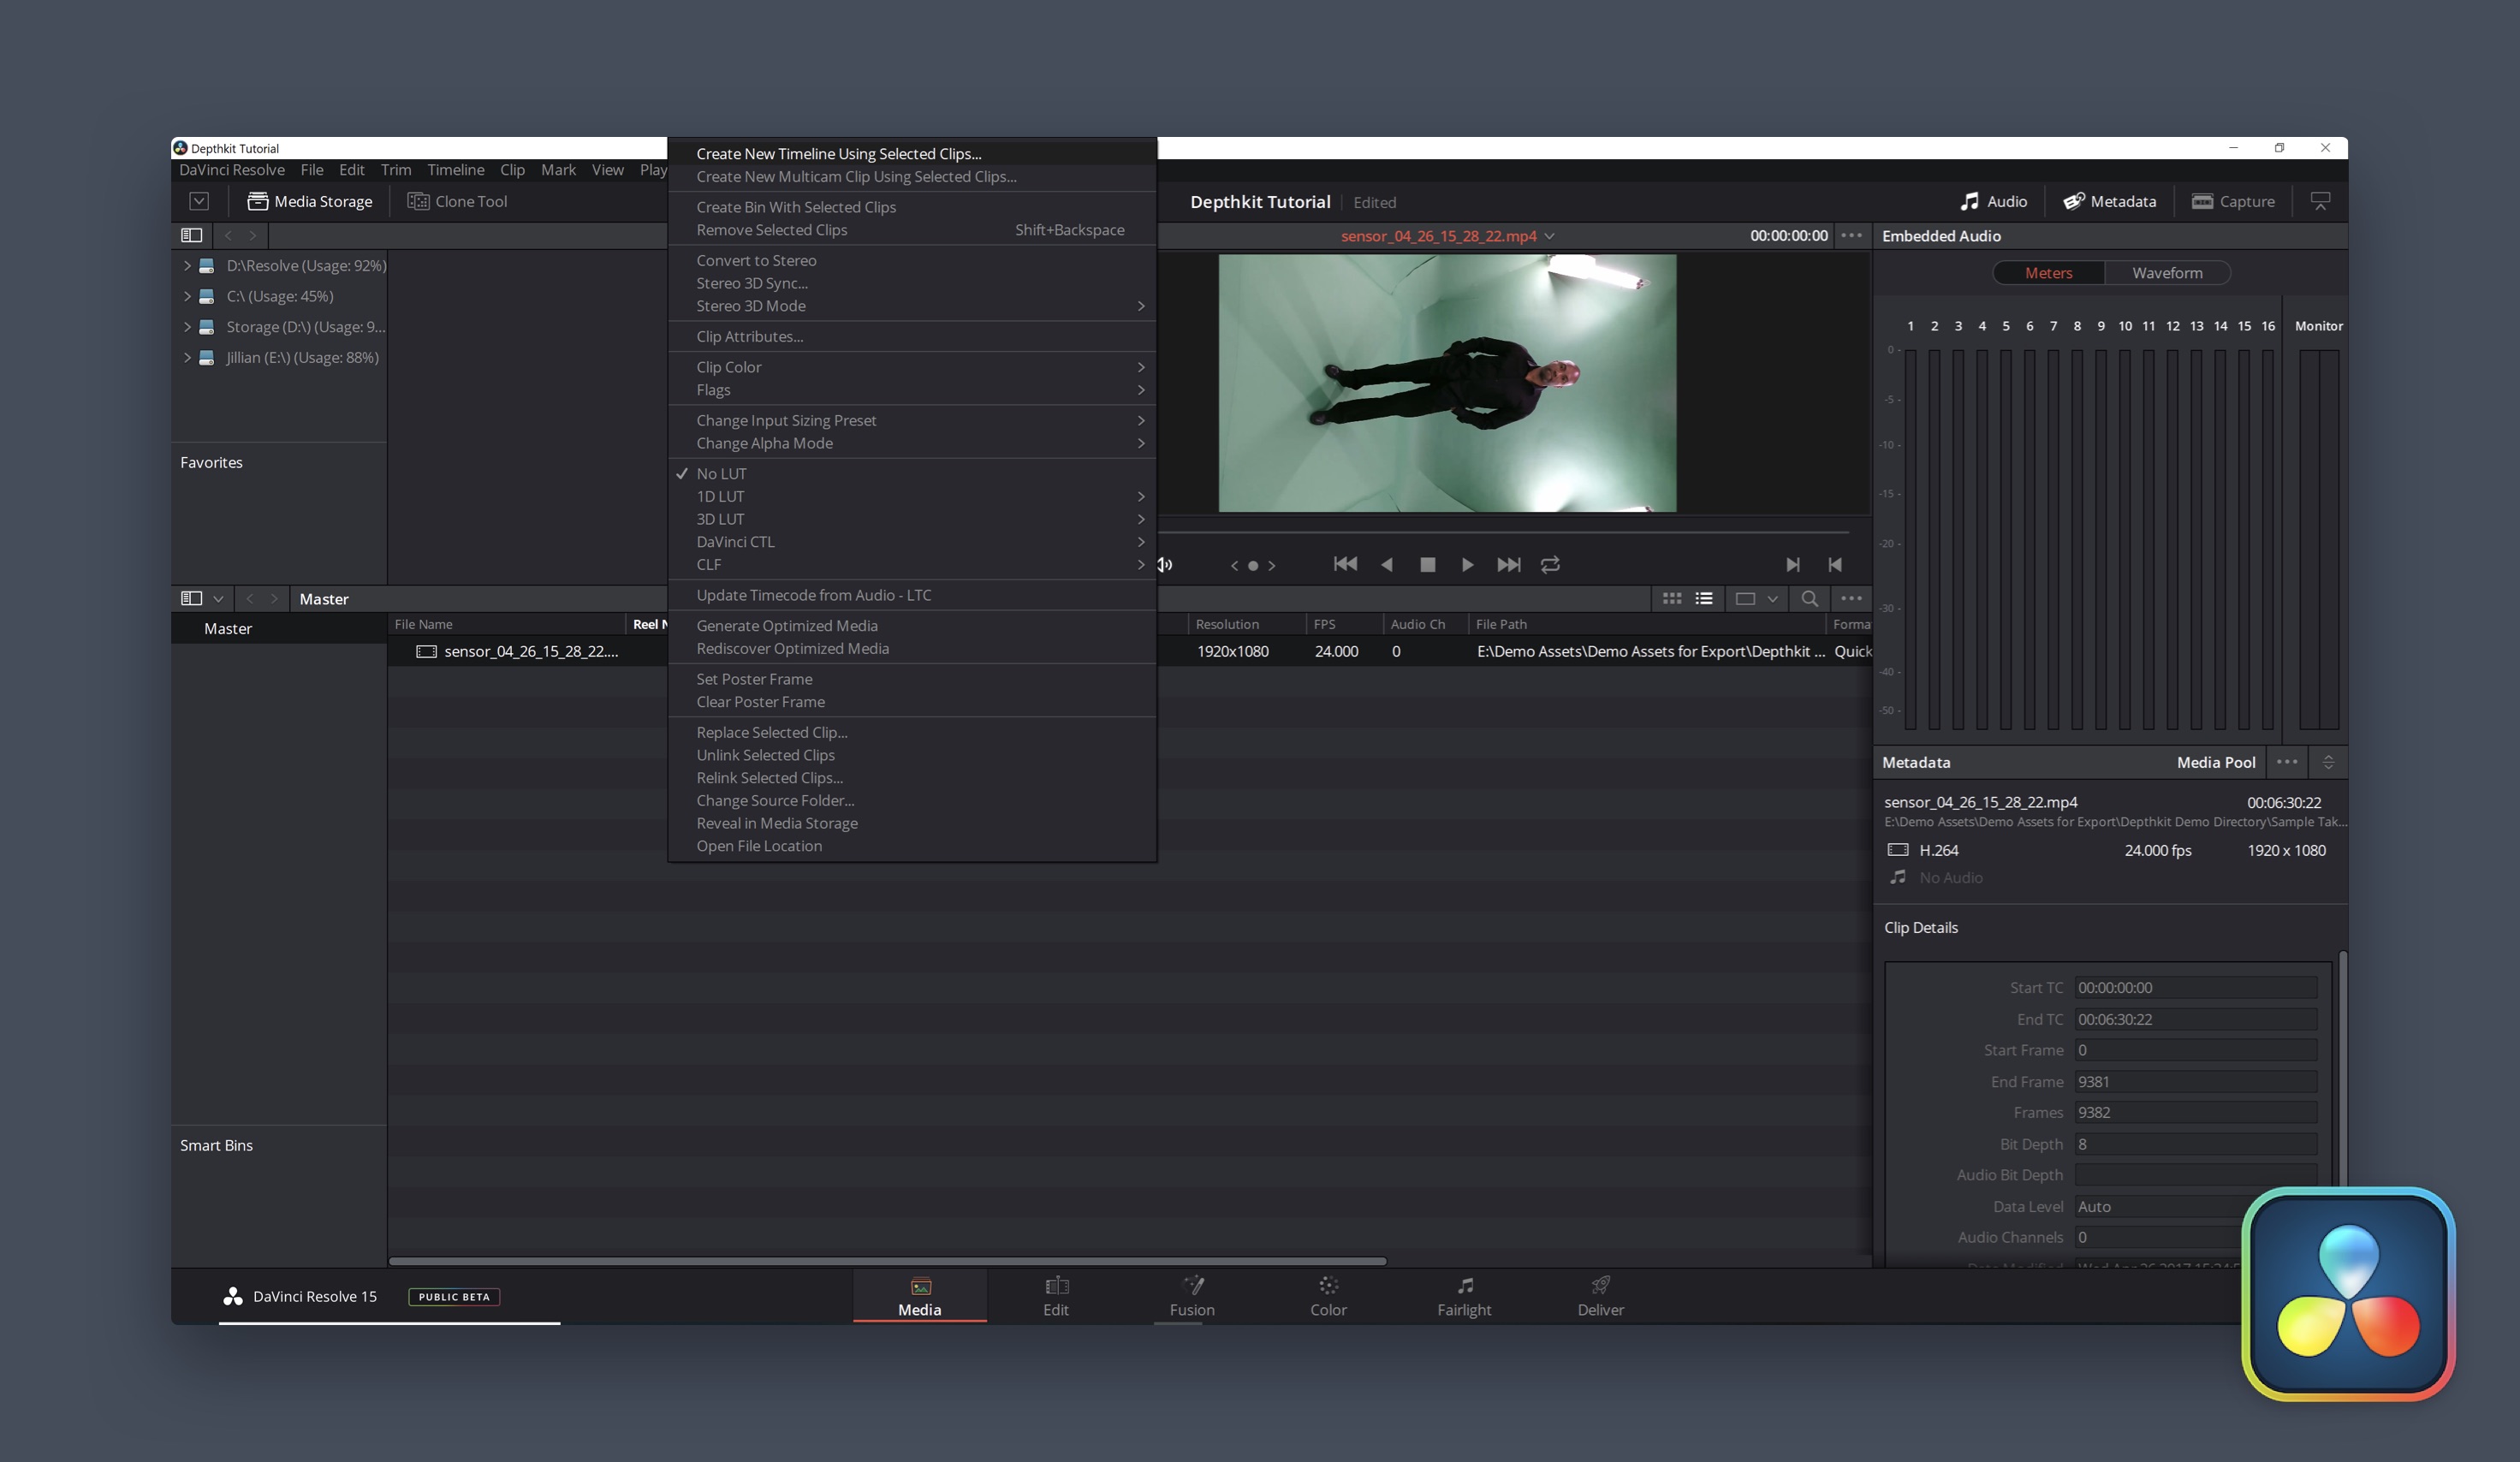
Import your footage in the Media tab and create a new timeline from the clip.
Now click on the Color tab. This is where you will create your mask.
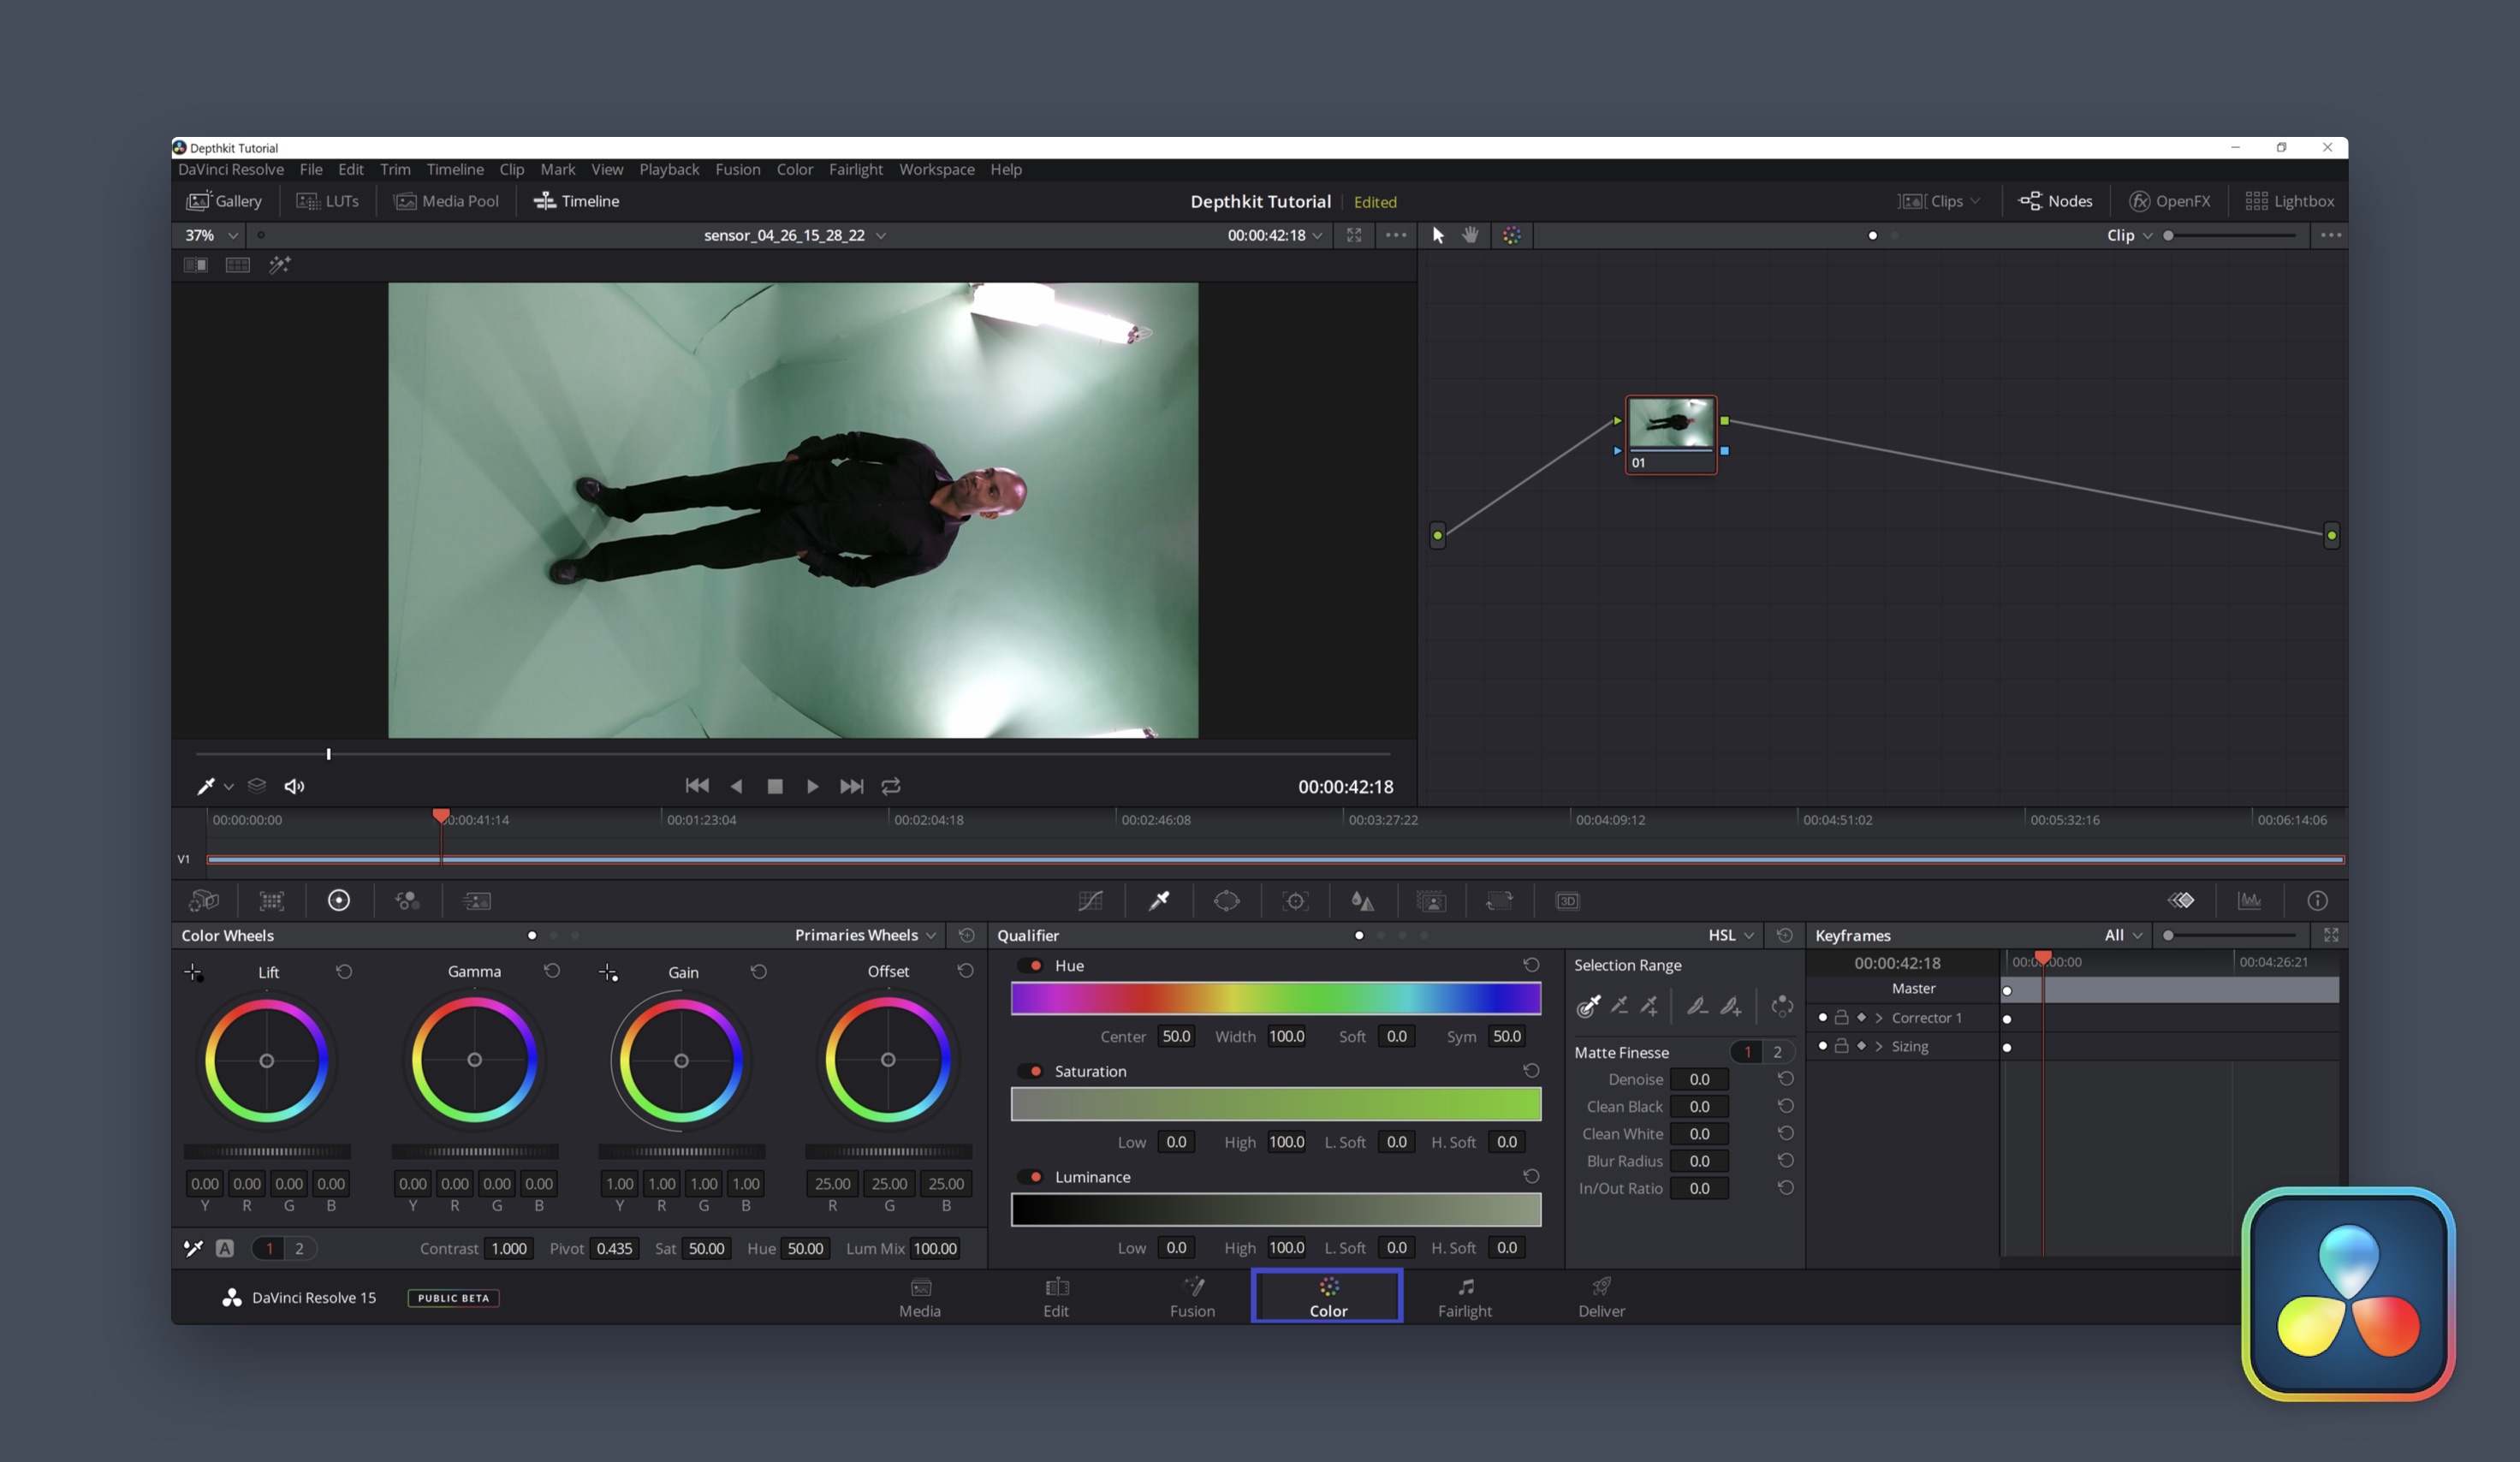
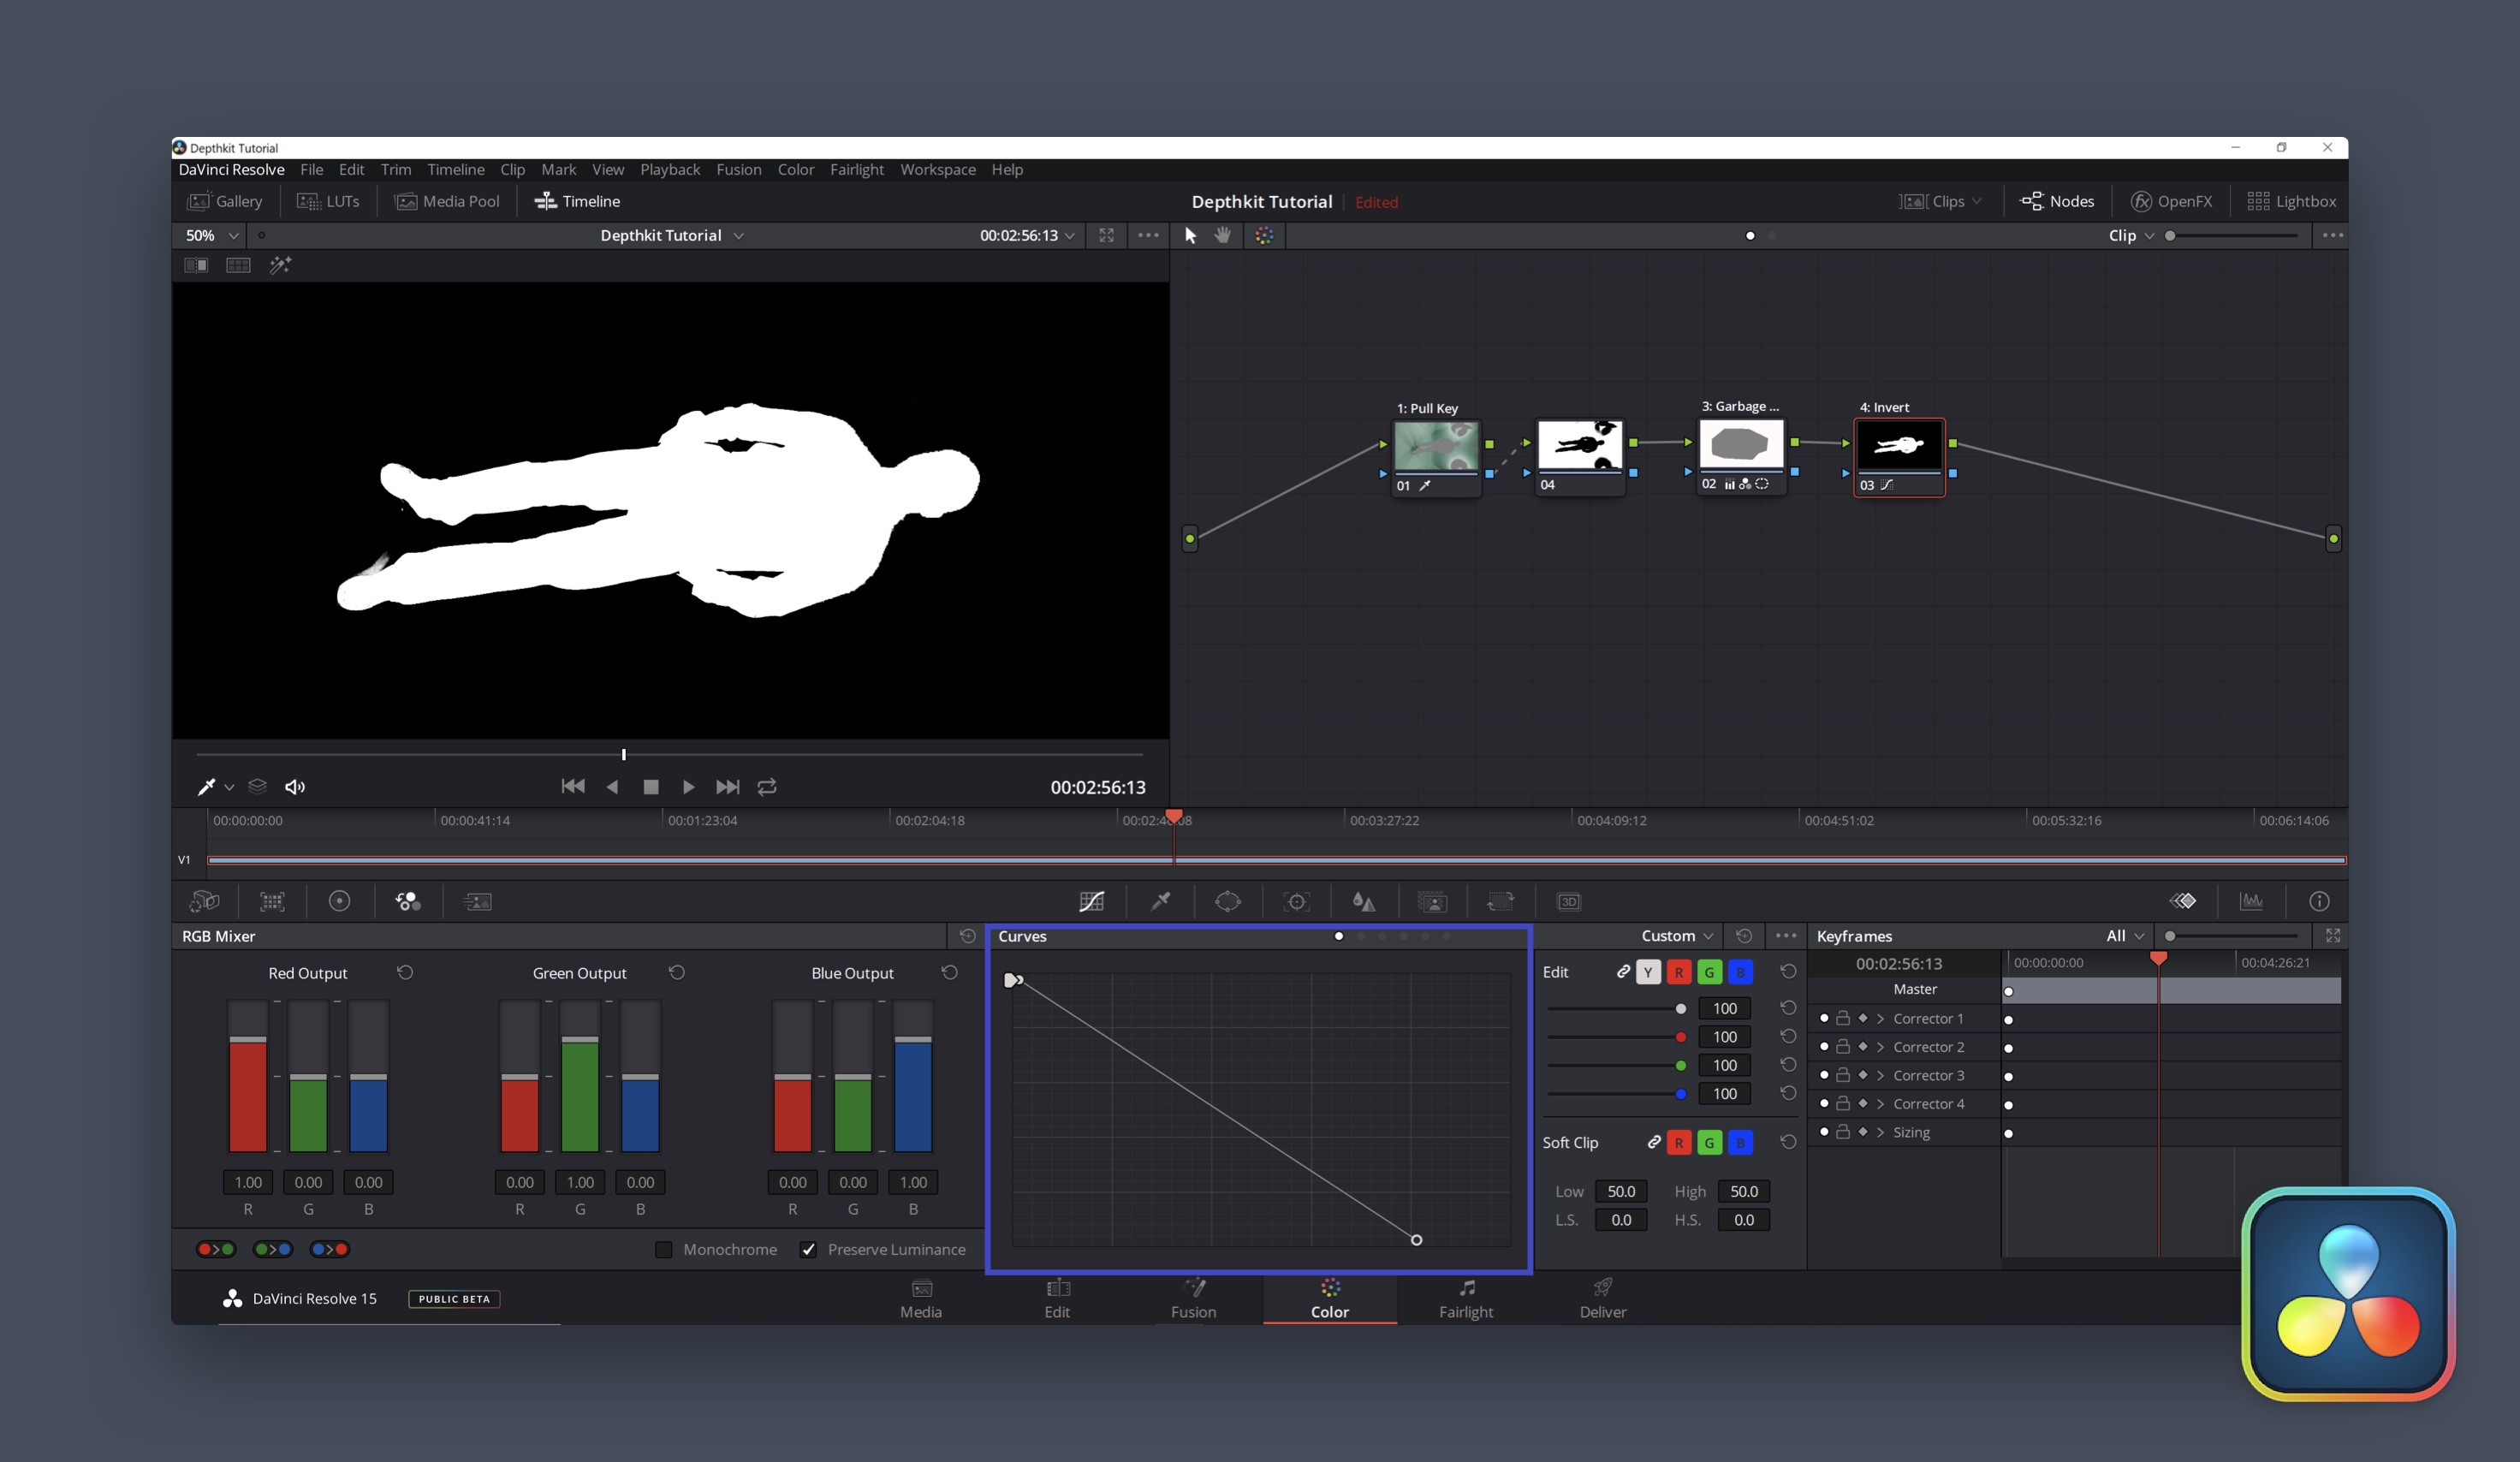
In Resolve, editing is done with a series of nodes. Use the following nodes to create a simple and clean mask for your project.
Node 1: Qualifier
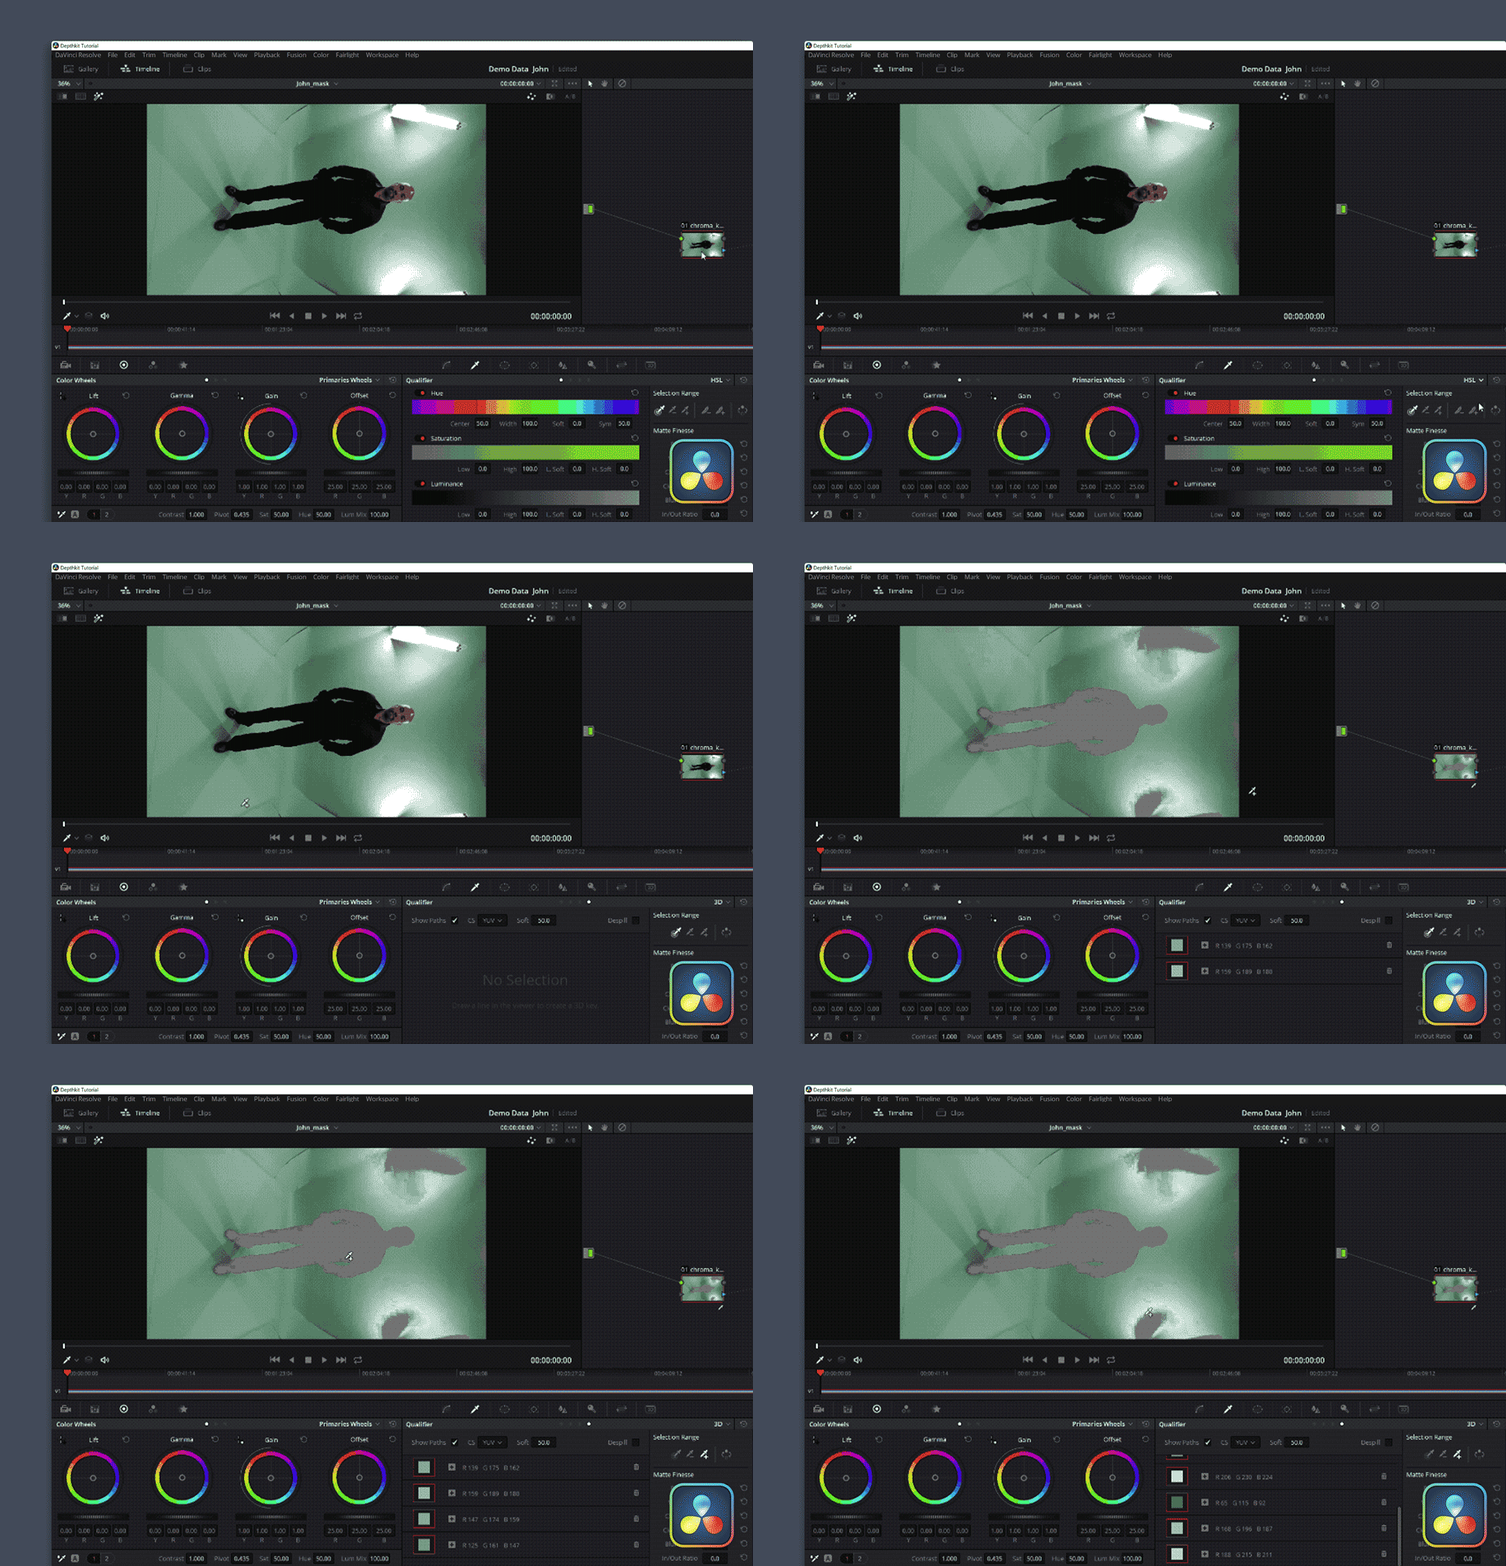
You will see your source footage in the first node in the Nodes panel. Click on this first node and select the Qualifier to pull a key. This is the color picker icon. In the Qualifier dropdown, select 3D as seen in the image below. Now you can click and drag across the green screen to remove the background. Don't be shy about the color selection. This is the step that will isolate your subject from the green background.
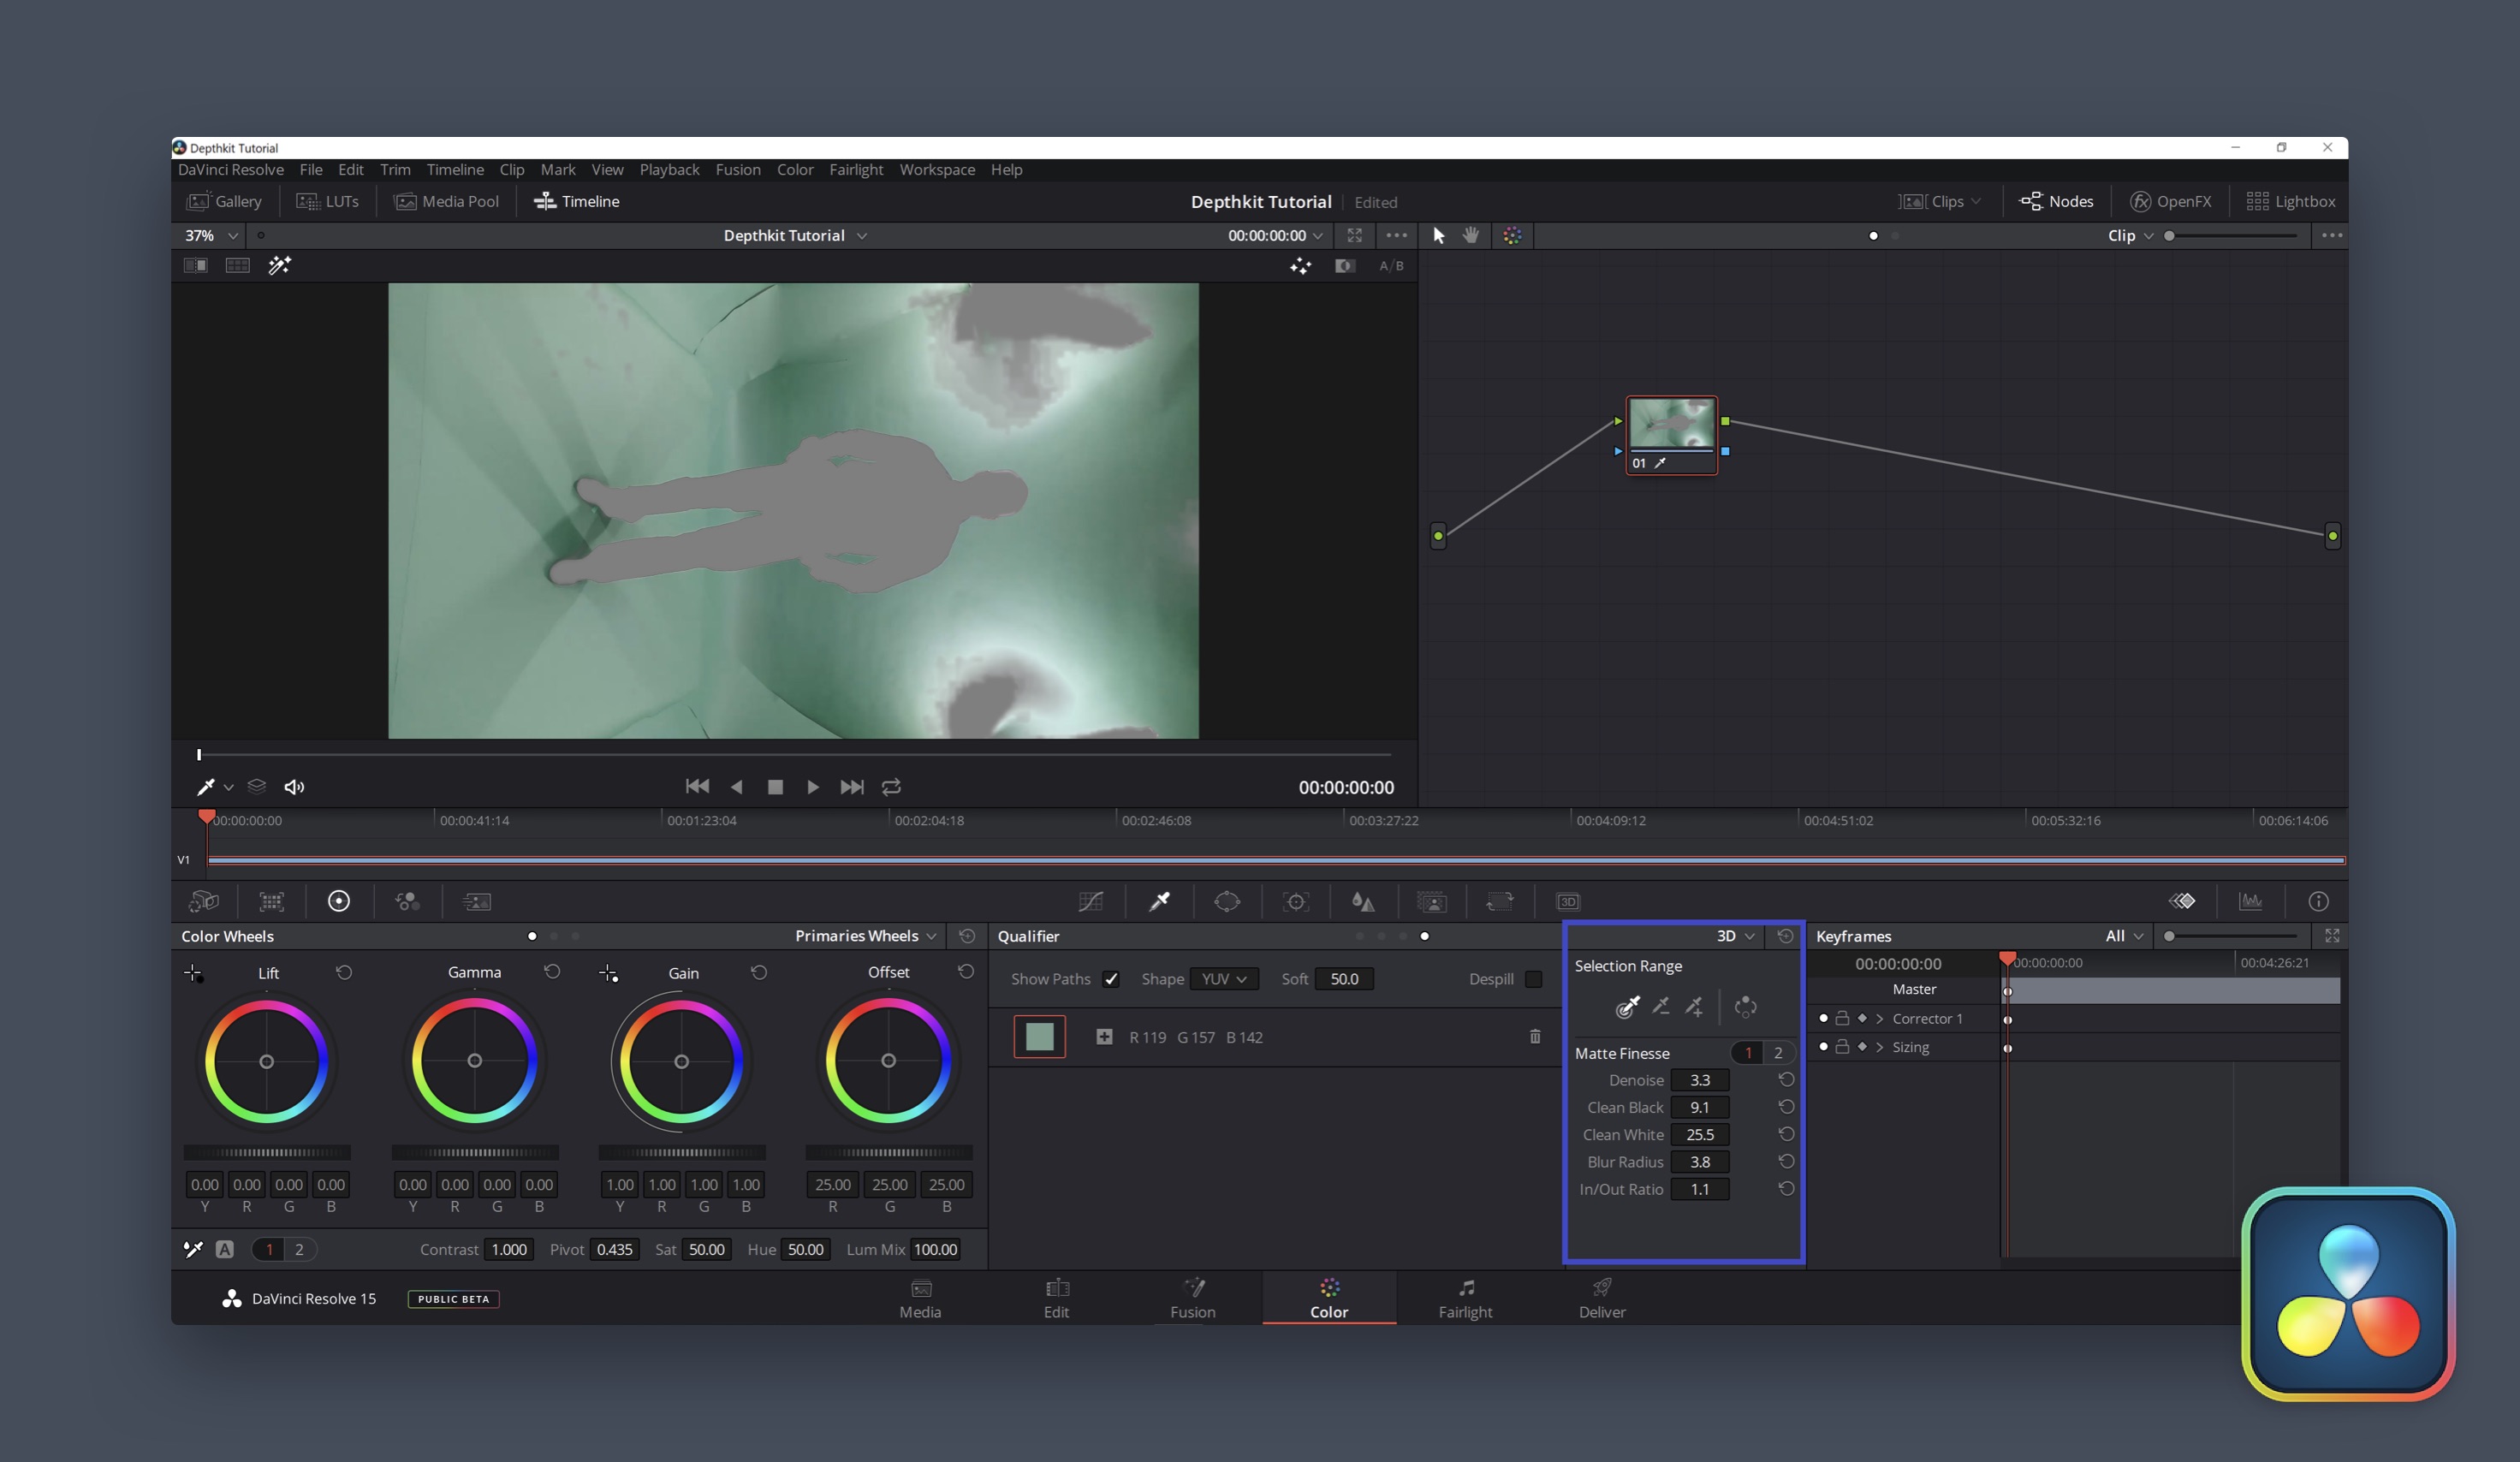
At this point you will want to adjust your qualifier settings to clean up the mask. Here you will need to use the color picker tools under Selection Range to add of subtract shades of green from your mask. Once you get to a place where the selection is relatively clean, you can now tweak the Matte Finesse settings. These will clean up any remaining holes in the mask, reduce edge chatter in your selection, and generally clean up the result.
Node 2: Curves
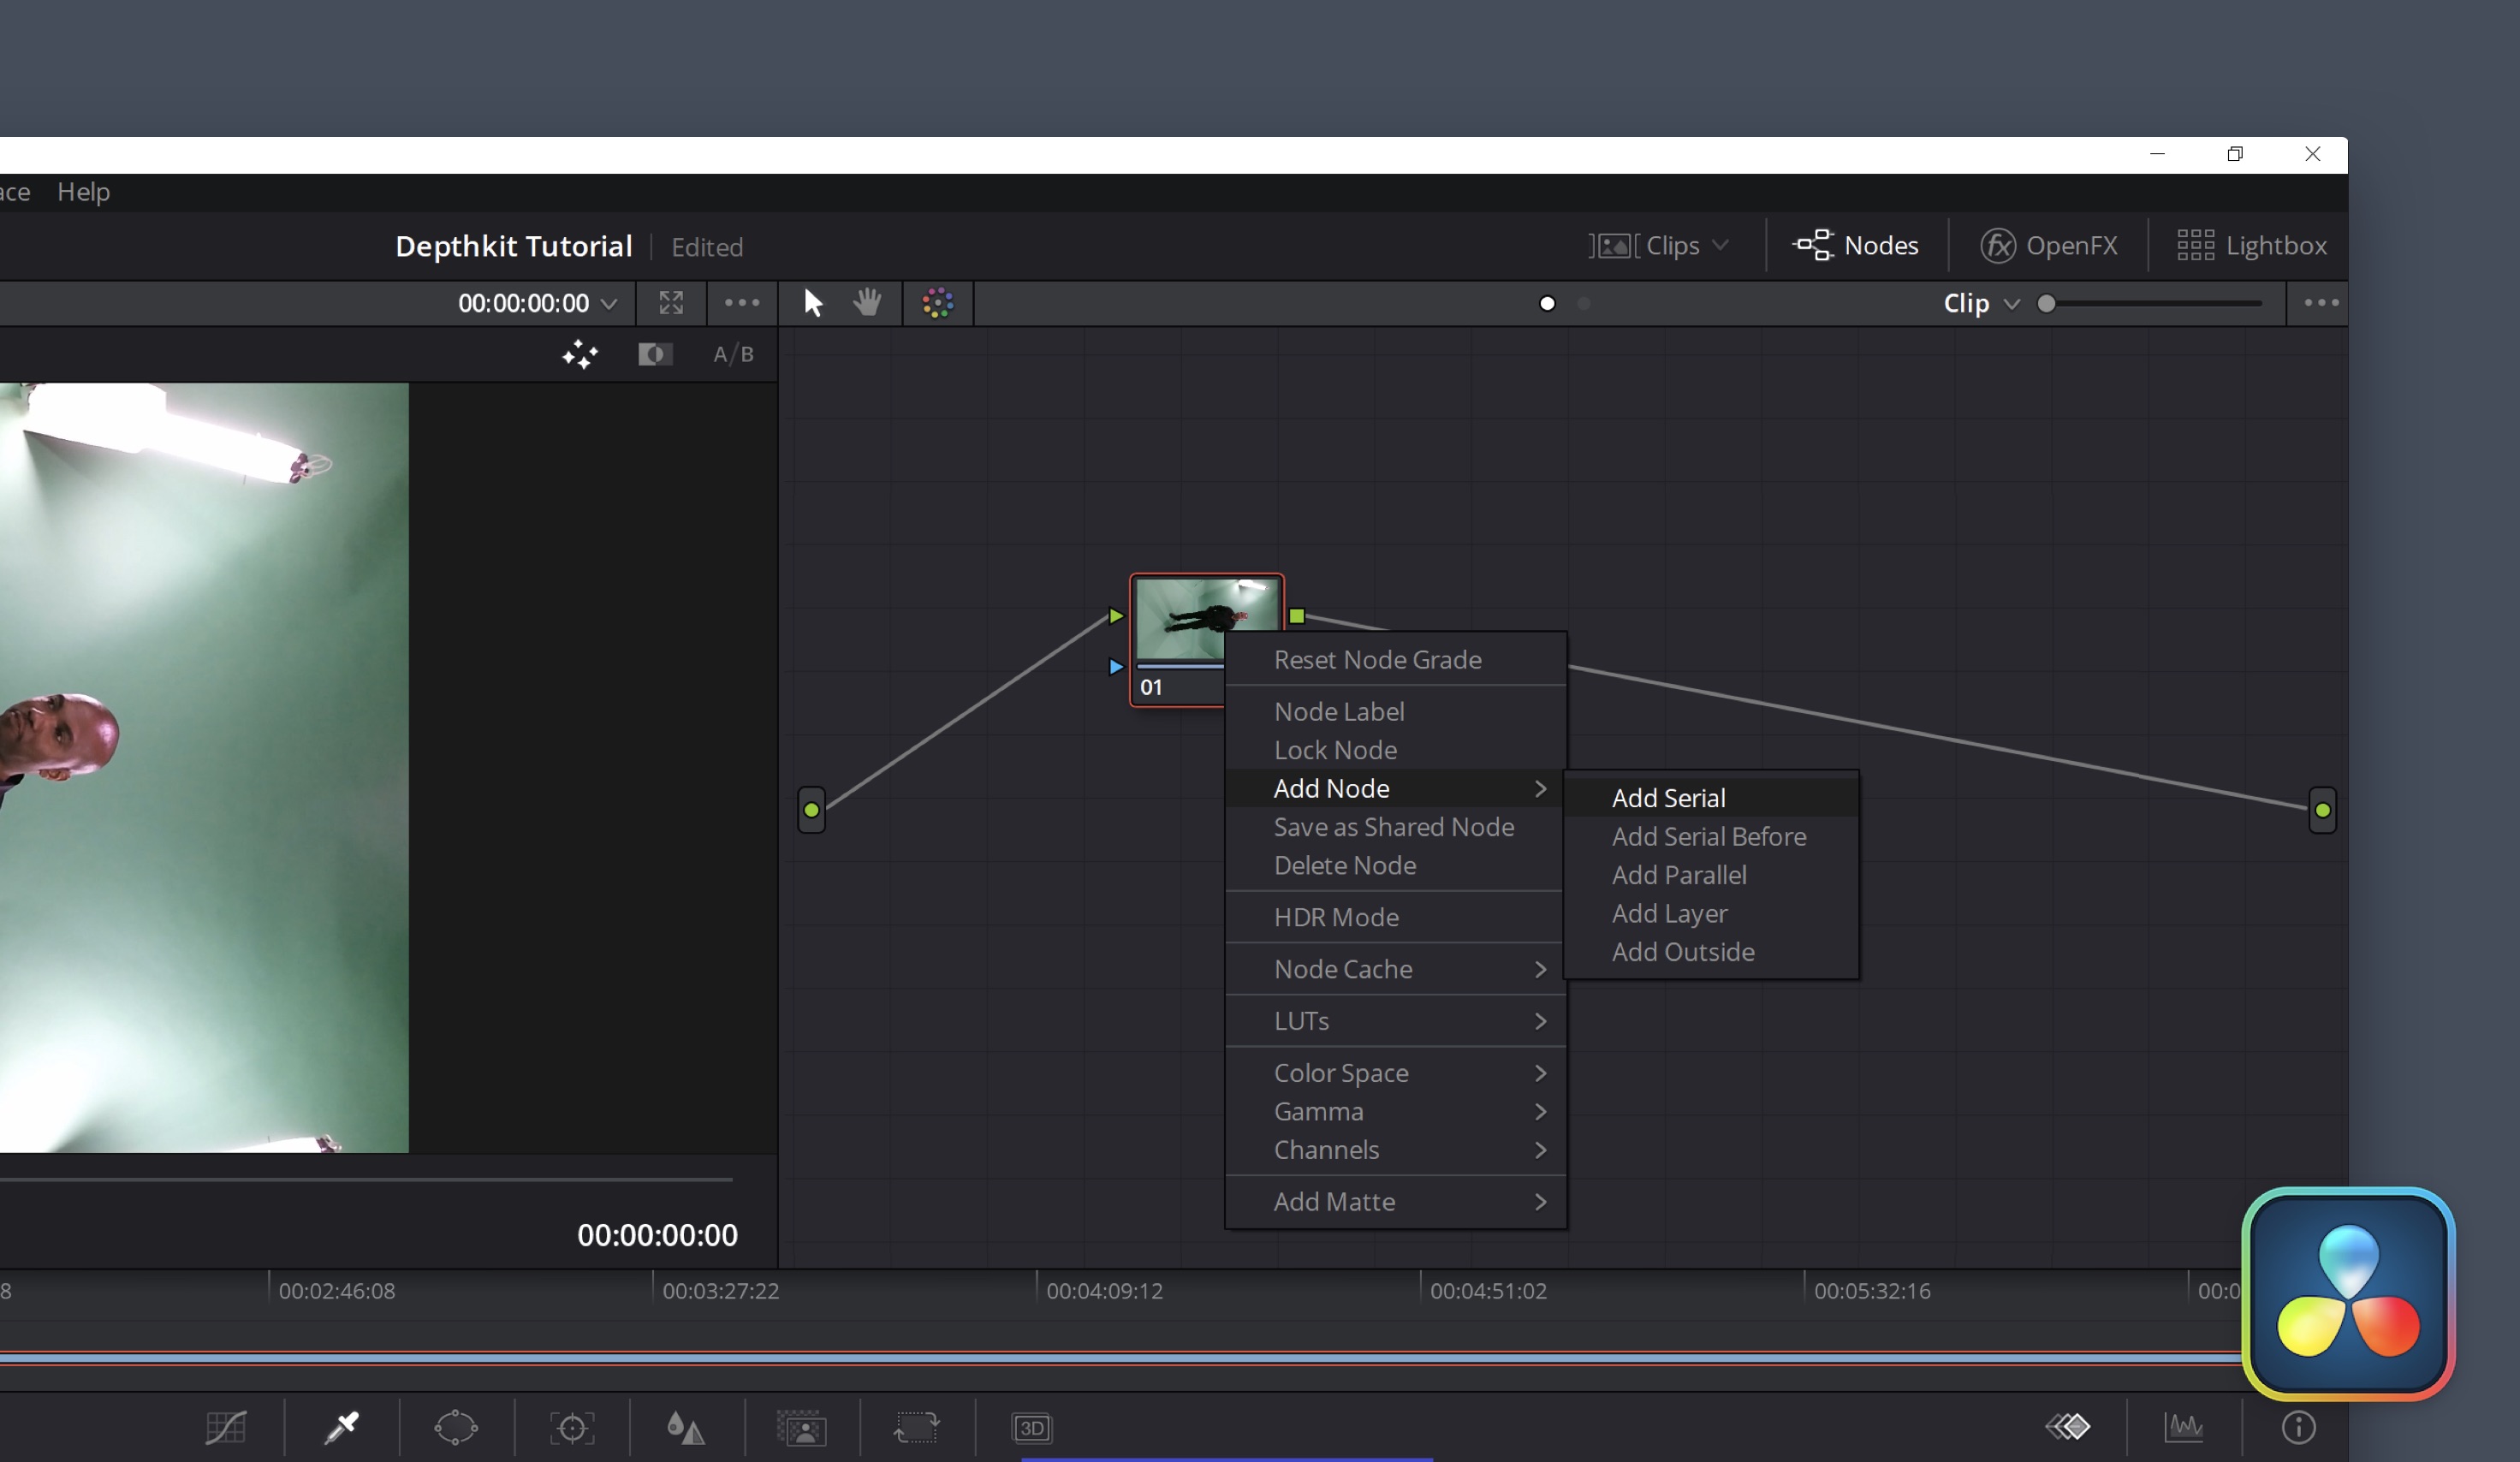
Now you are ready to add another node. Right click on the first node, select Add Node, and click Add Serial. This is how you can build your node system.
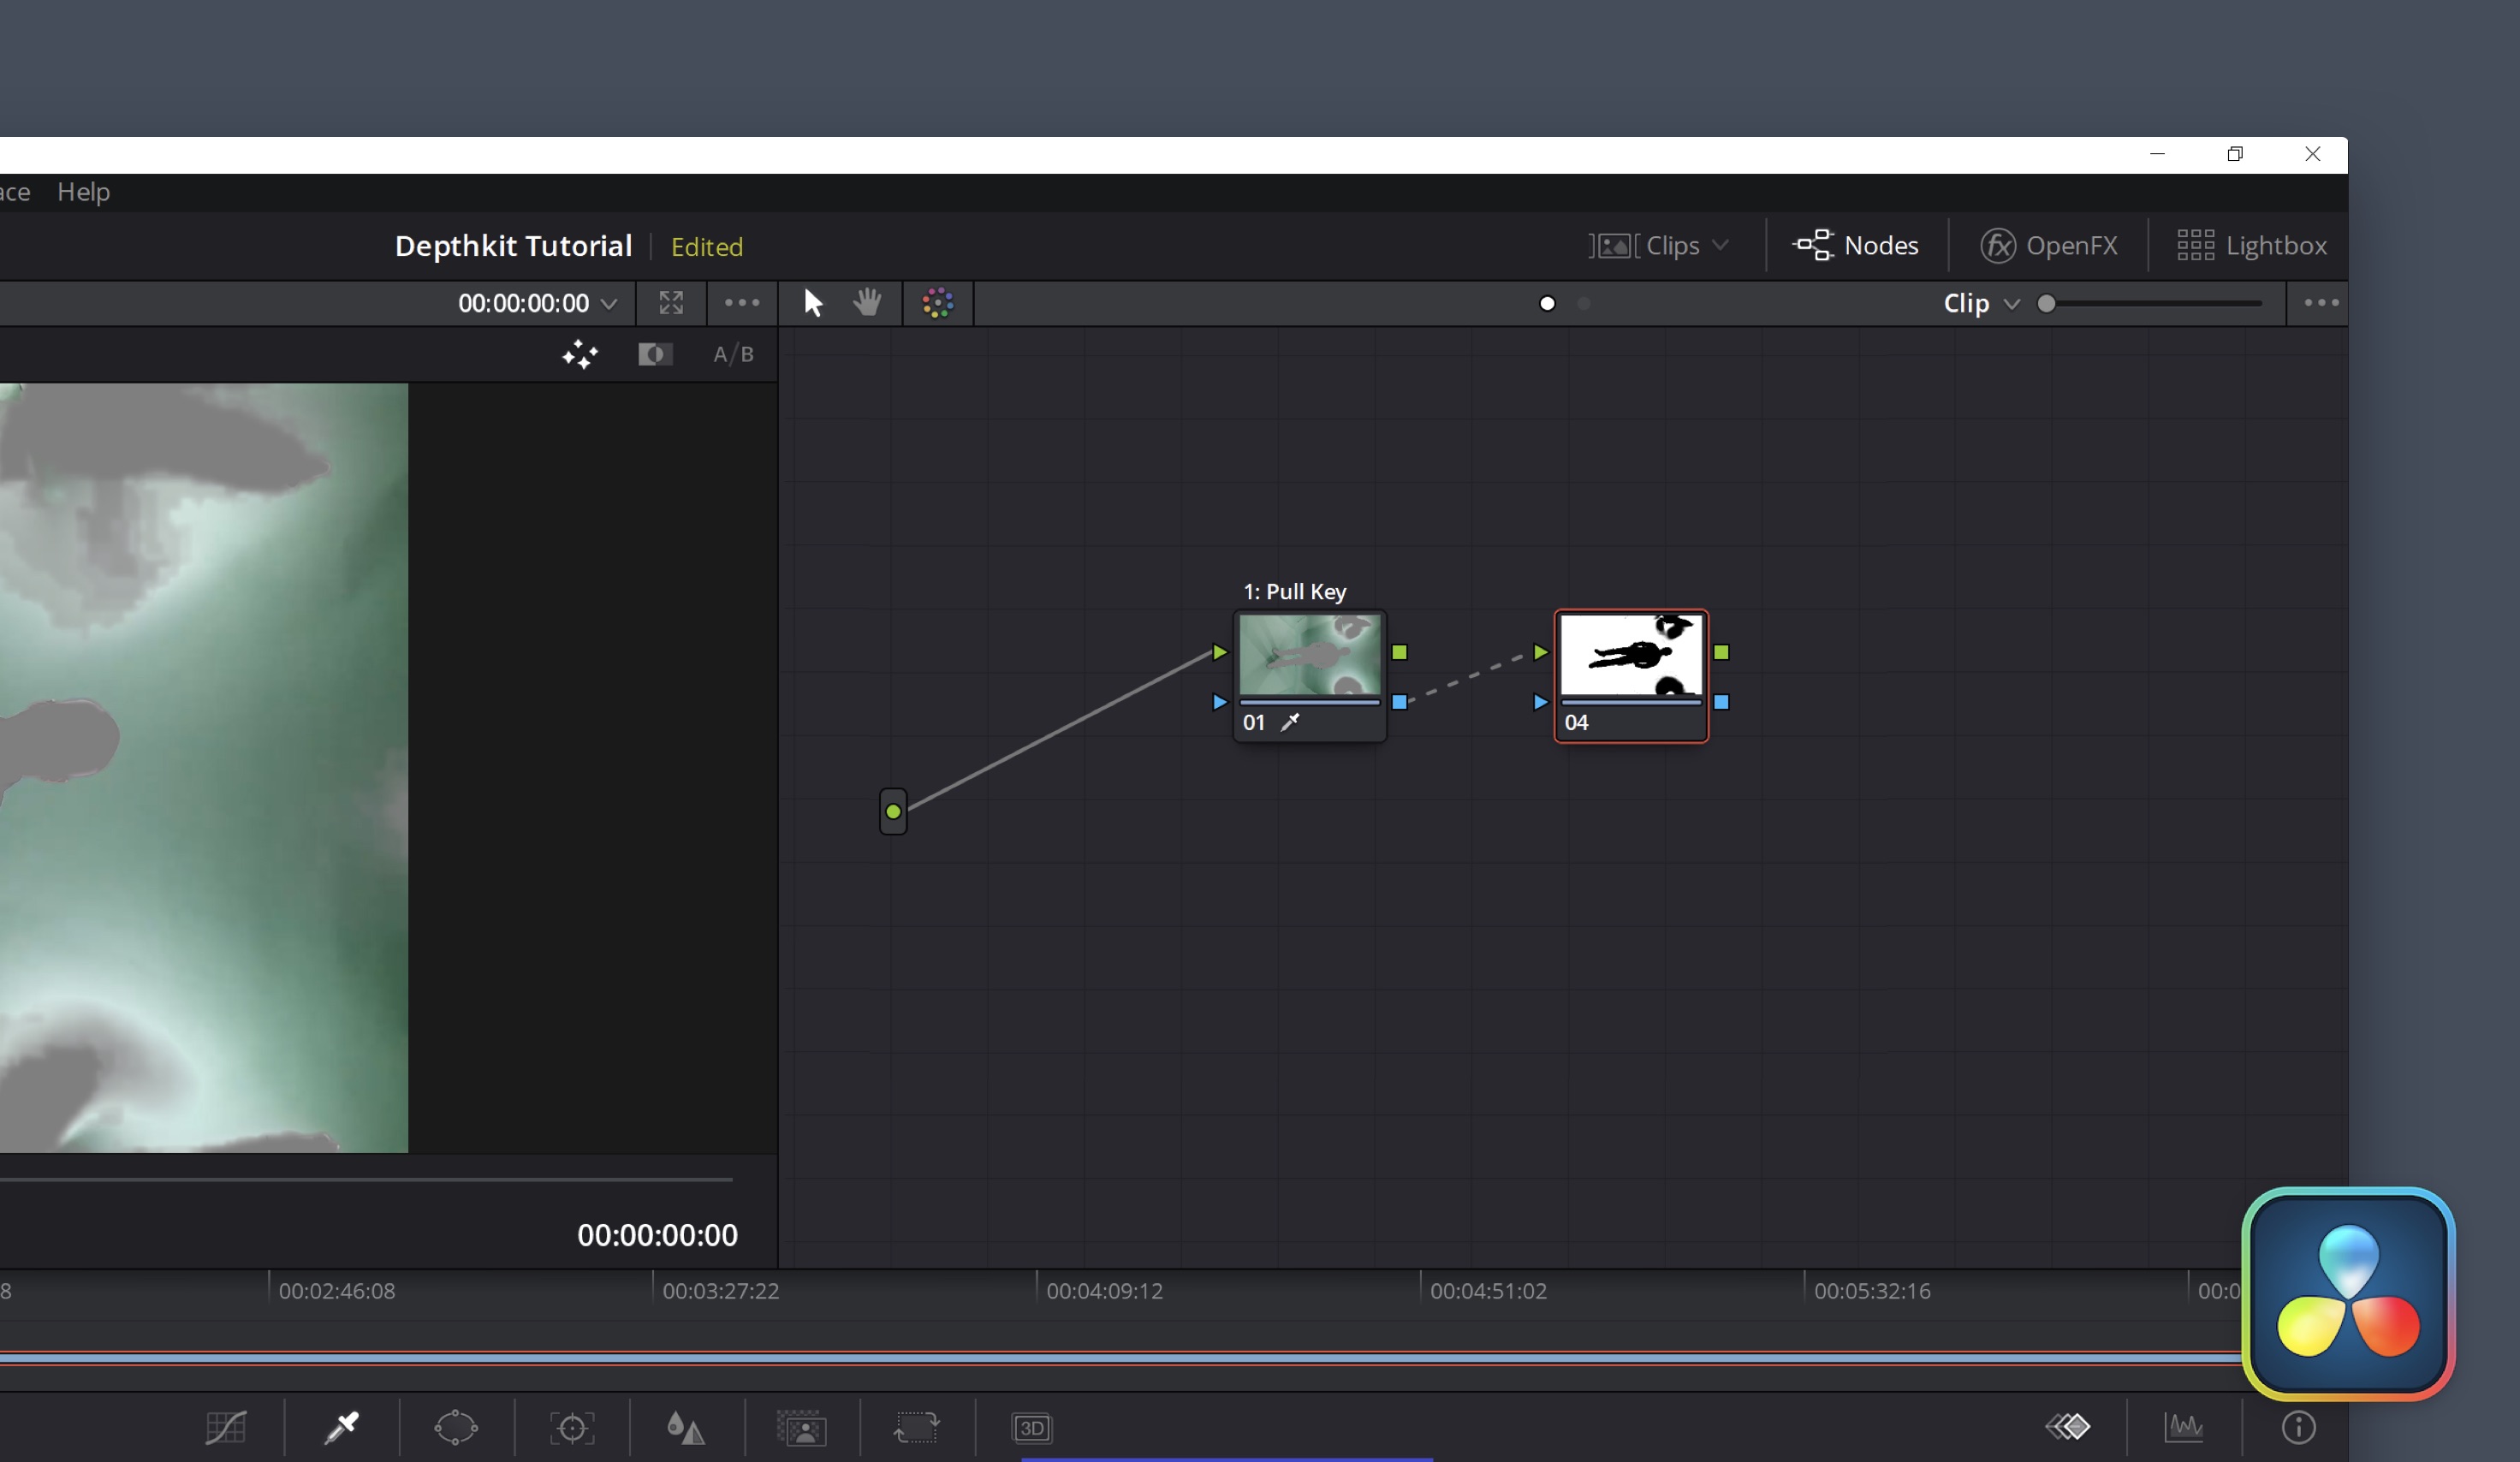
For this second node, you will need to change the input from the first node. By default, the input is coming from the color output, in green. However, you want to switch that, so the 2nd node is reading the alpha input, labeled in blue.
Now with the 2nd node selected, click on the Curves tool. This will convert your key into black and white. Adjust the curve as needed to clean up your mask.
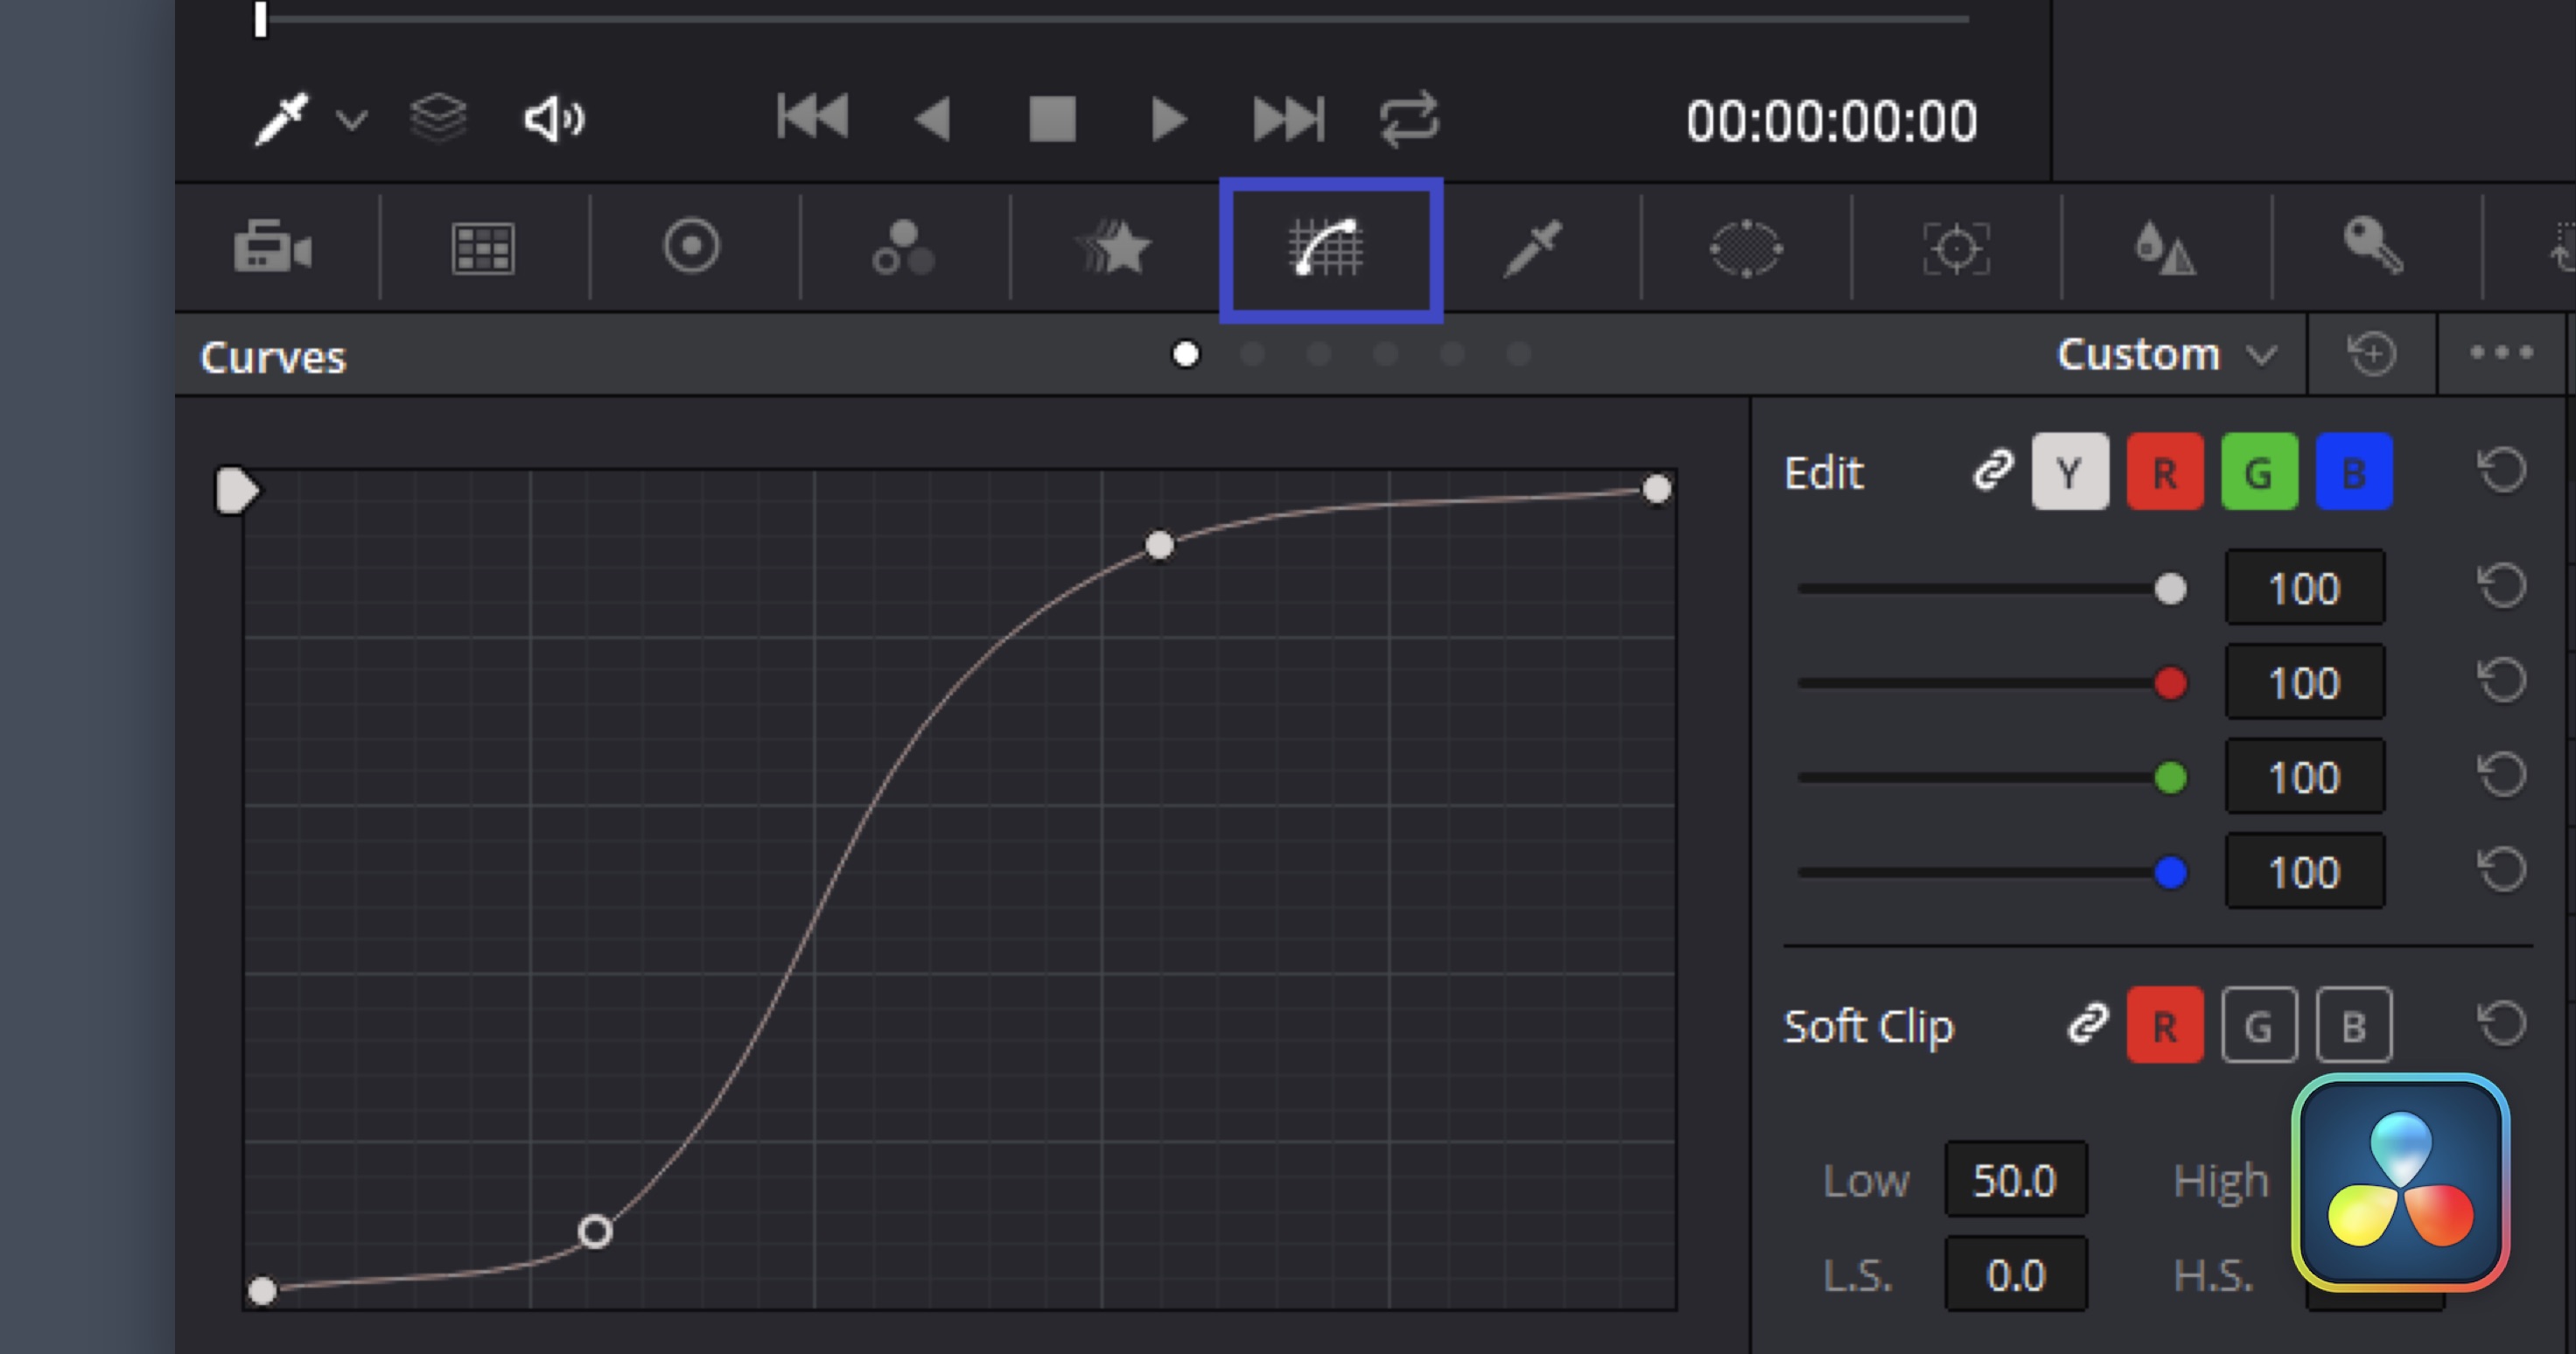
Node 3: Garbage Mask
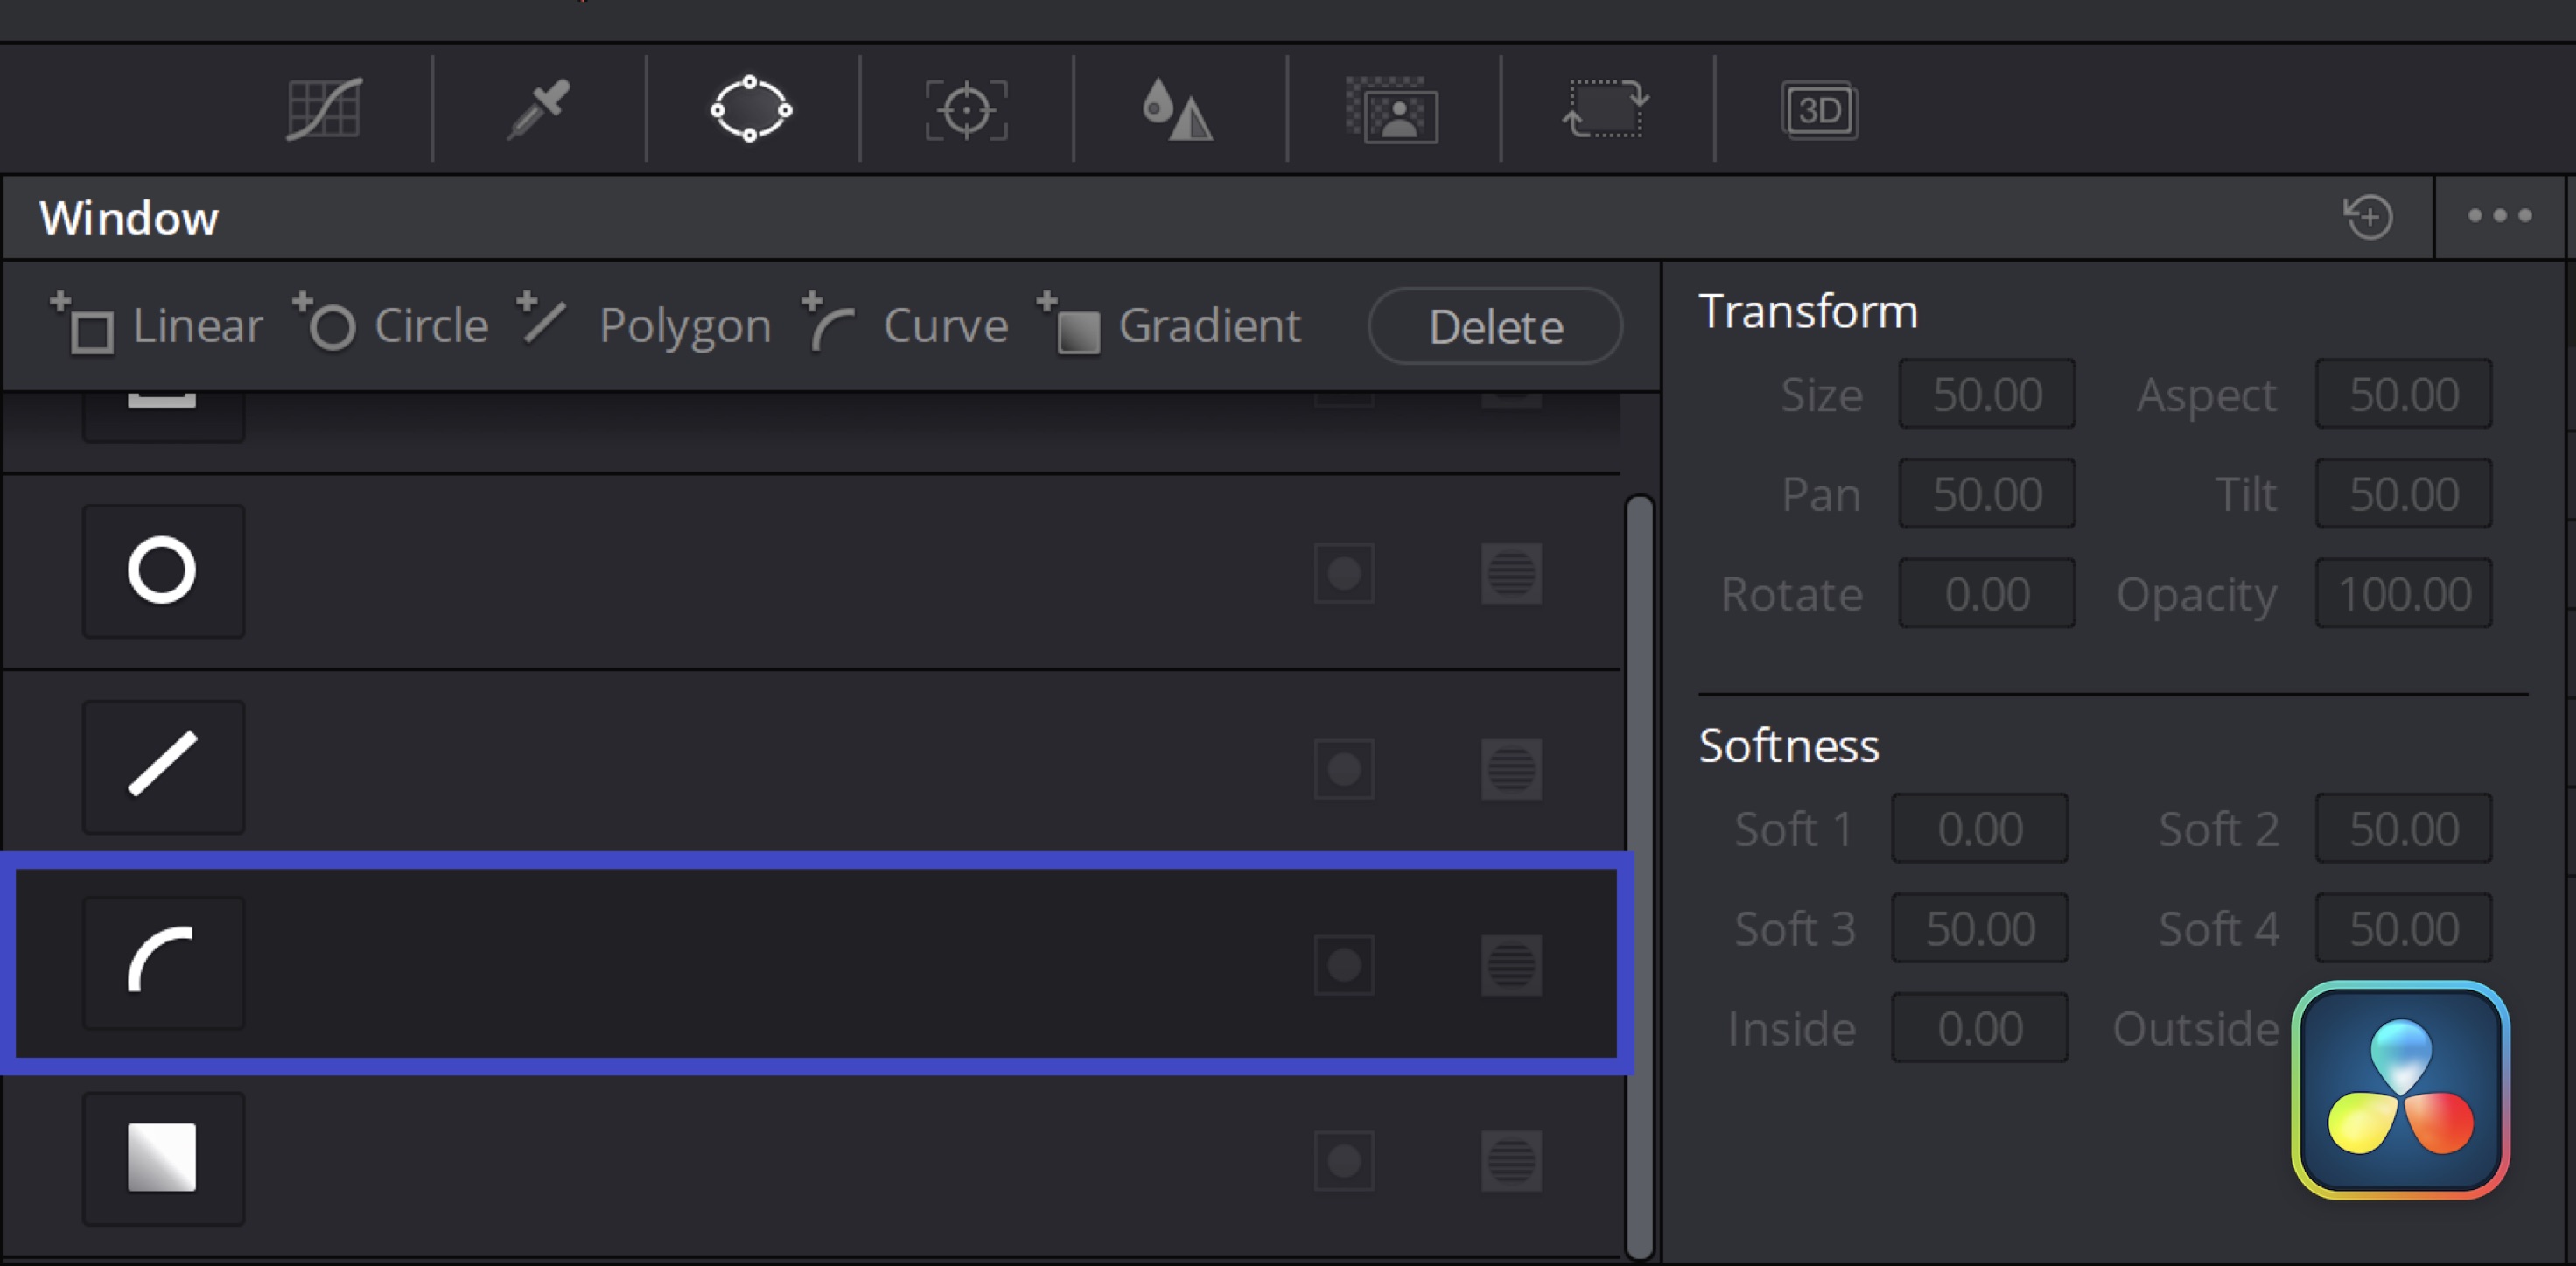
Add a 3rd node and select the Window tool. In this stage, you will create a garbage mask around your subject to remove bits of the background that you may not be able to key out. In the Window panel, select a curve and draw a mask around your subject in the preview window.
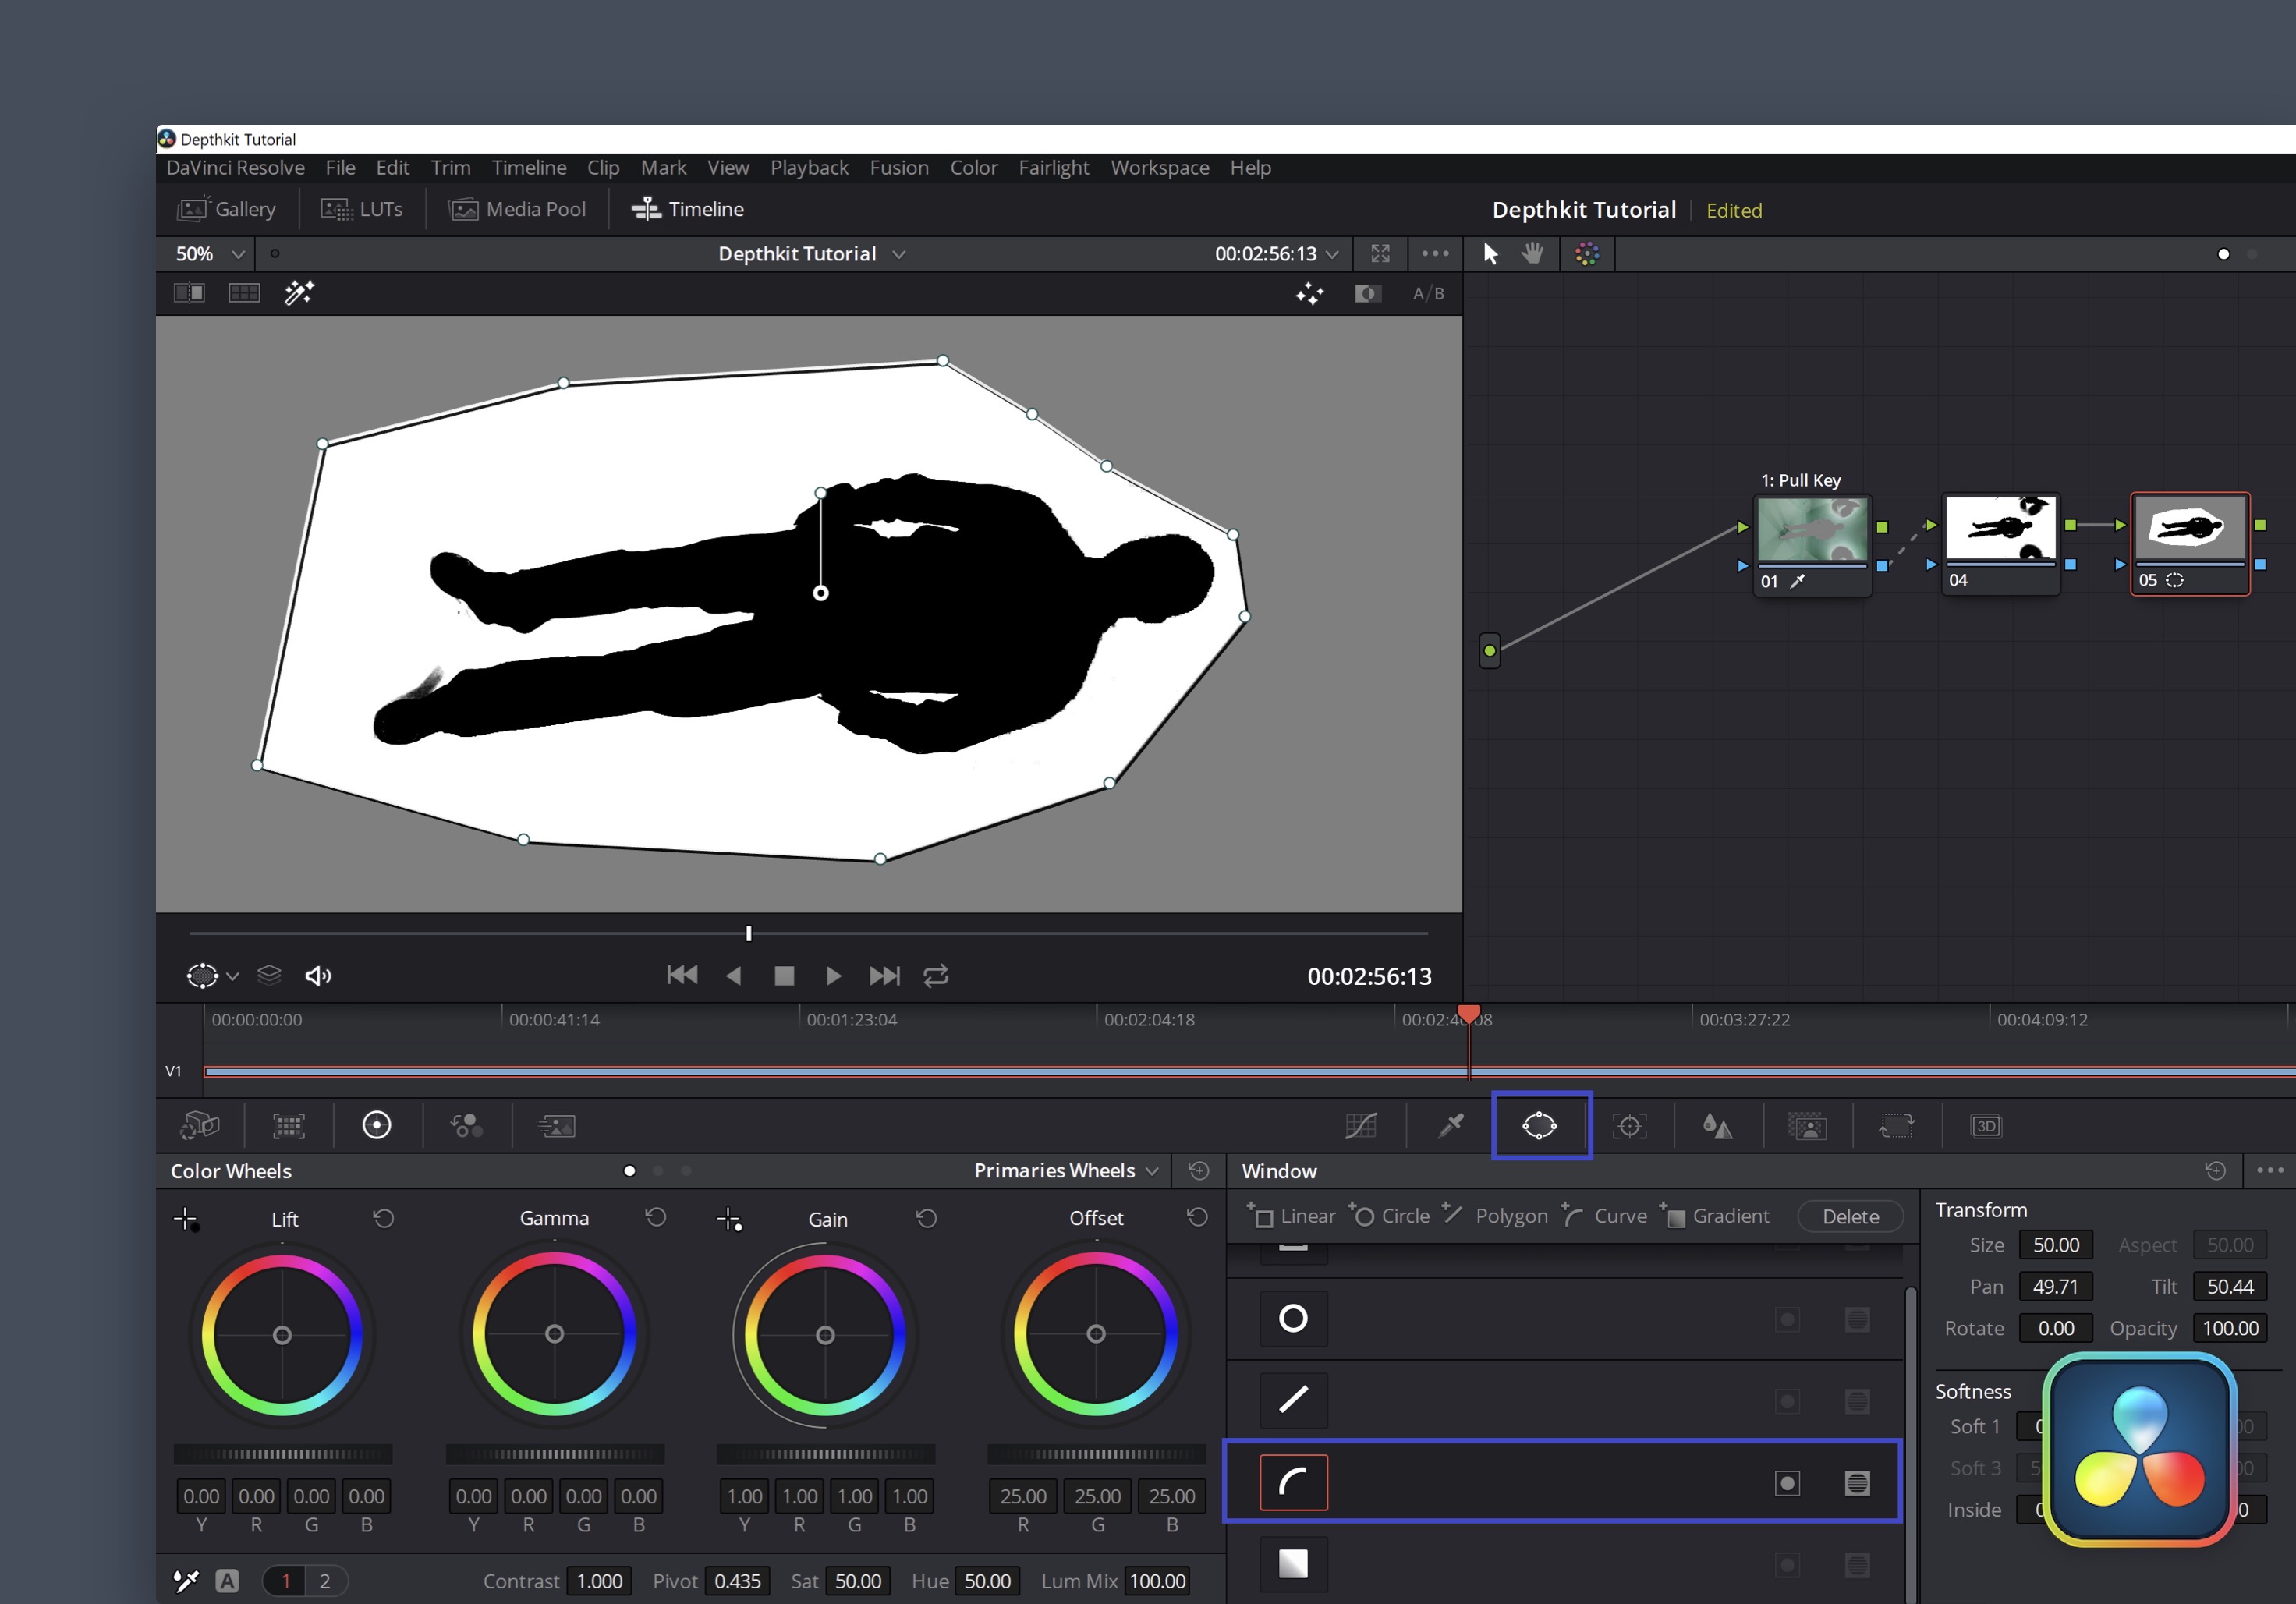
Now invert the garbage mask with the circular invert toggle in the Window panel.
Next, select the Color Wheels tab and increase the Lift color wheel. This will remove any black splotches outside the garbage mask.
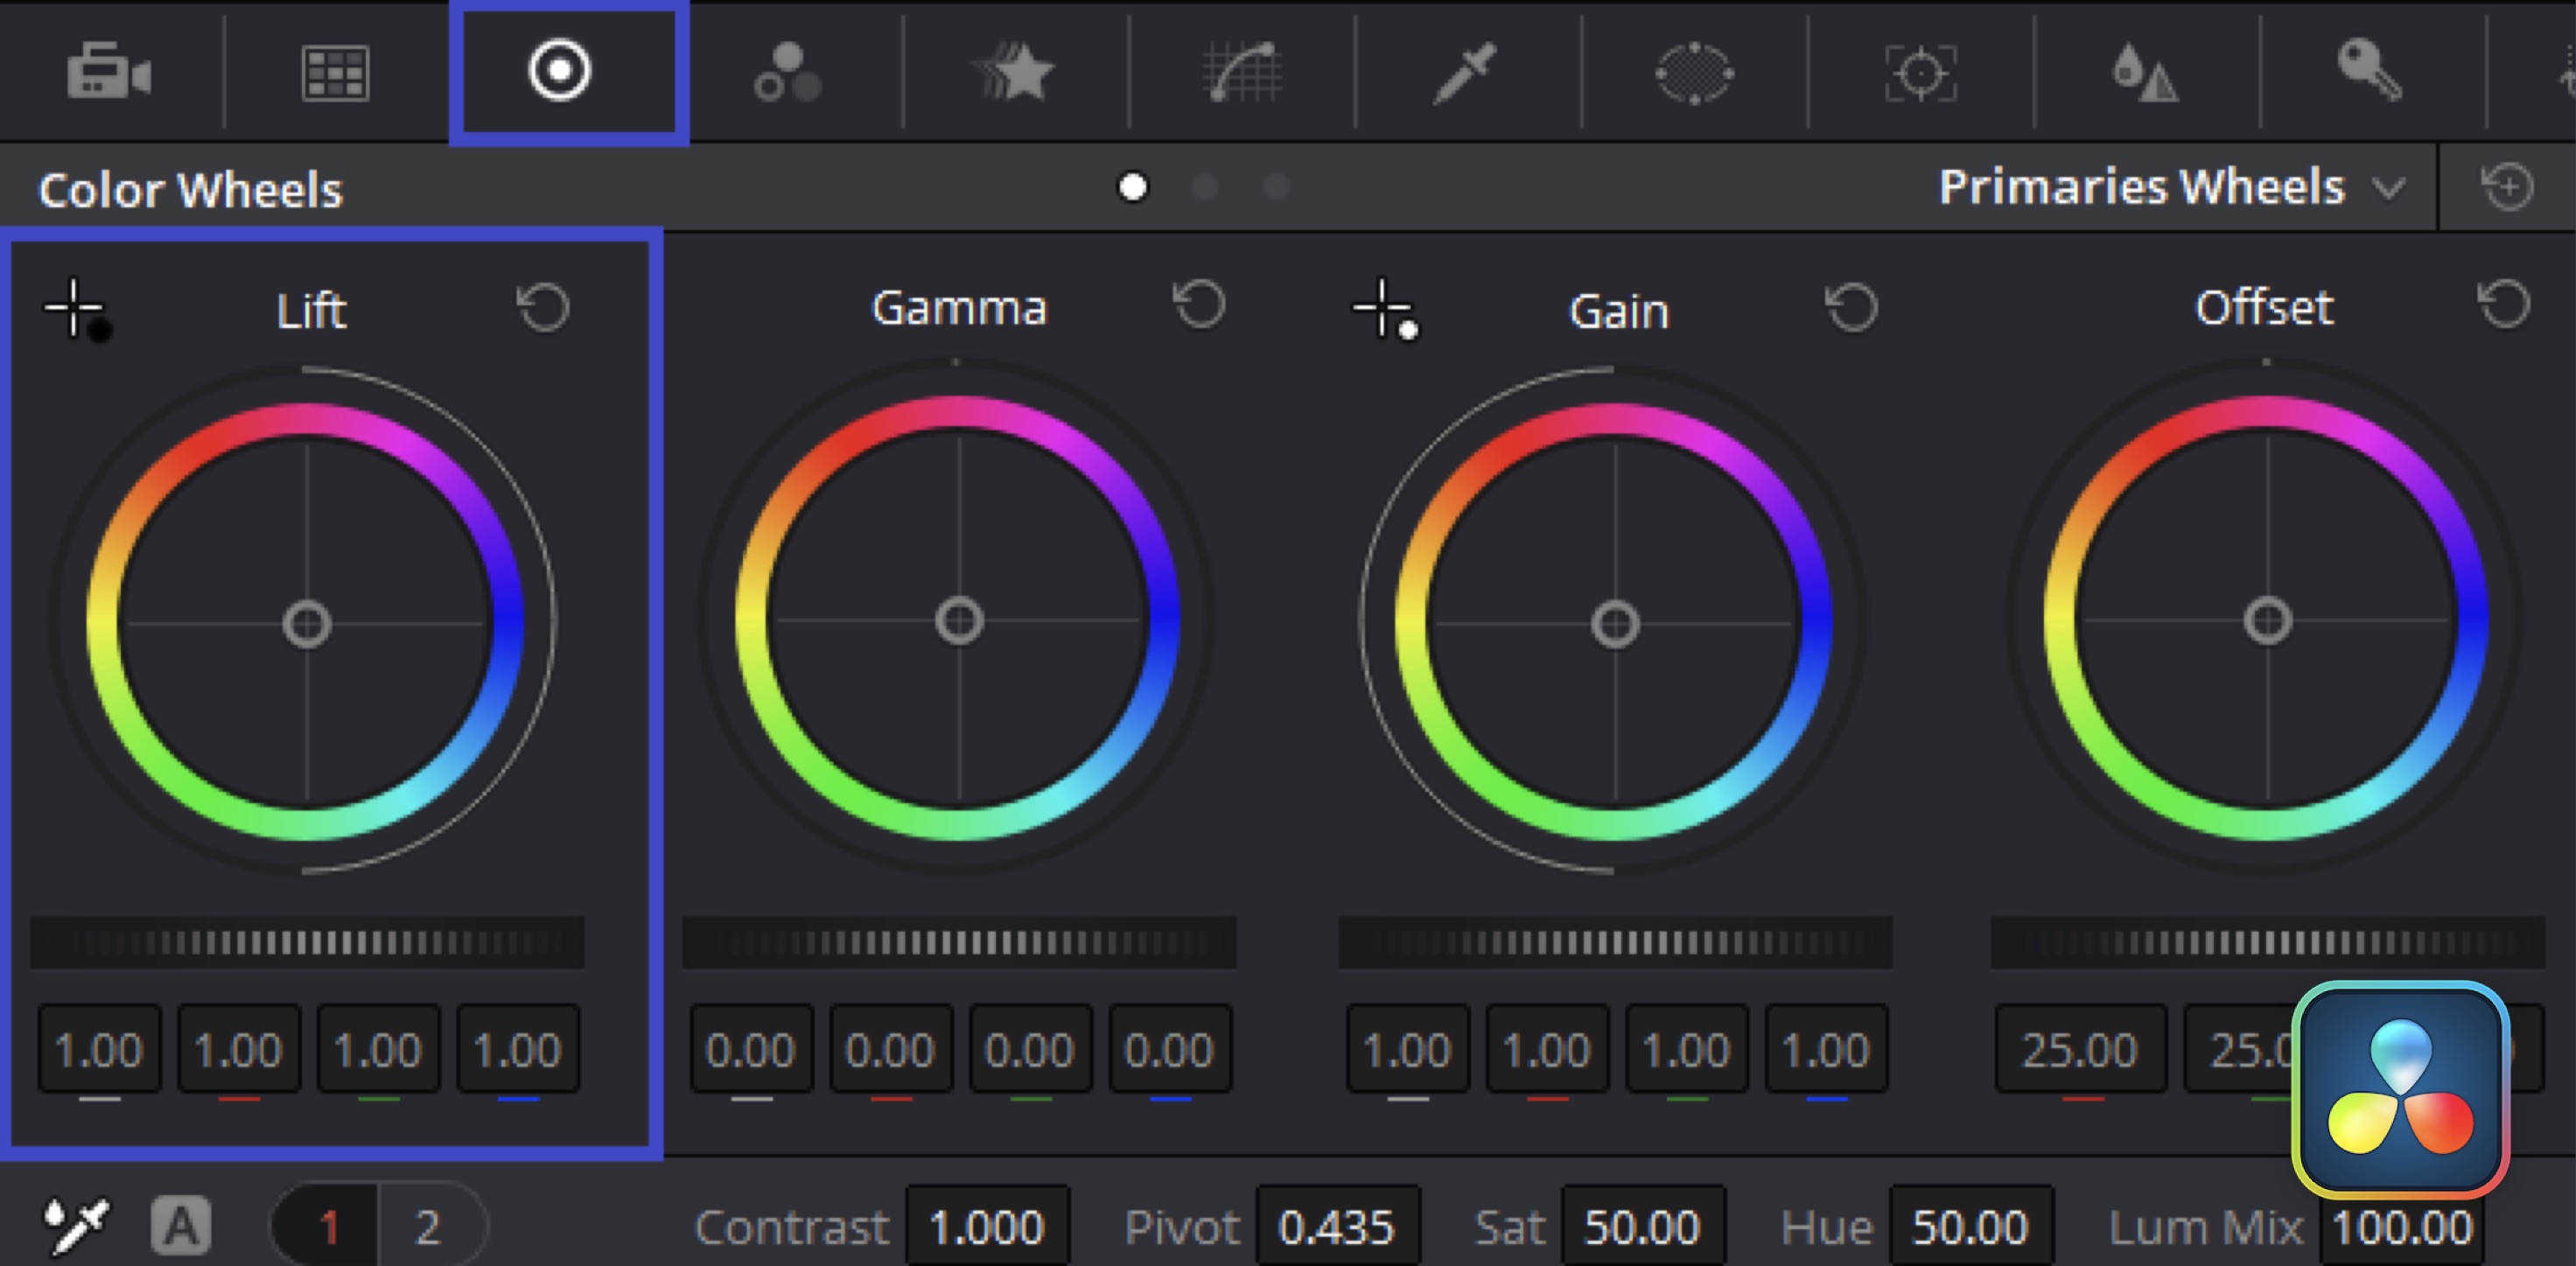
Node 4: Invert
Add another serial node and select Curves. Invert the curve so that you have a clean inverted black and white mask. It should match the curve in the image below.
Export
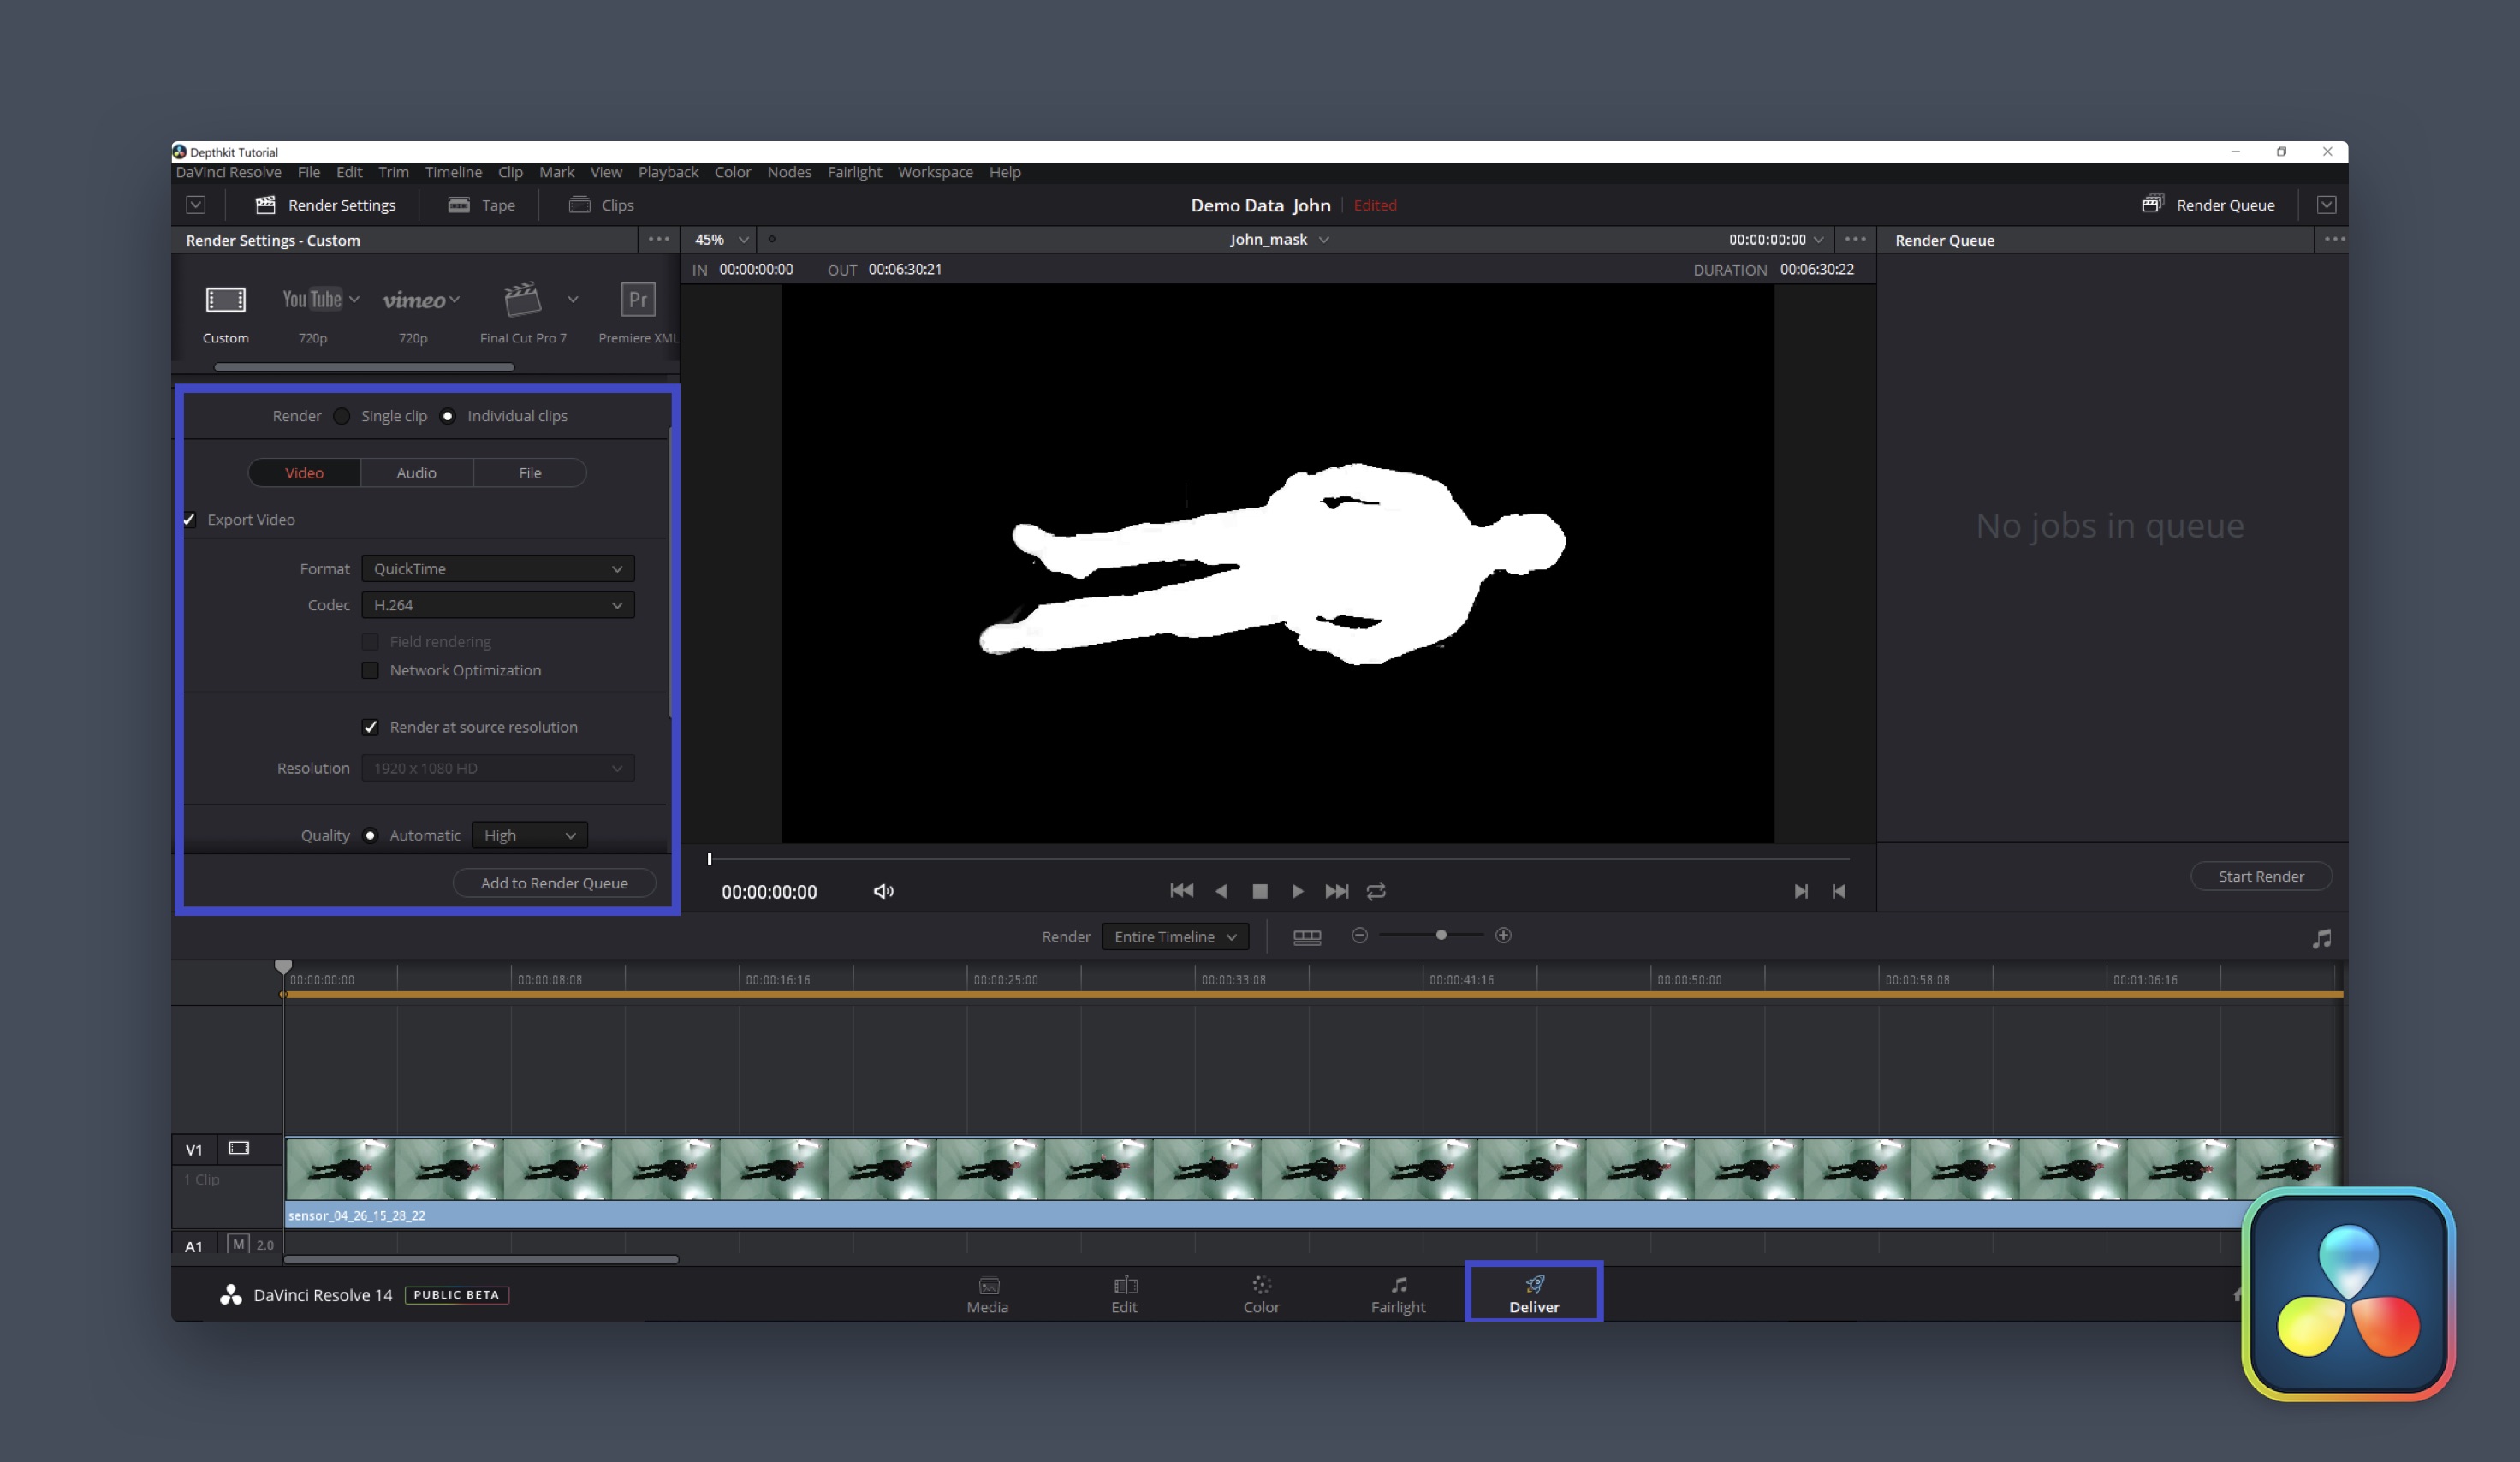
Now you have a custom mask! At this point, you are ready to switch to the Deliver tab and set up your mask to export. Here you want to export with the source resolution. The export format QuickTime with codec H264 are recommended for export settings. Click add to render queue to export.
Now you can link your refinement mask in you Depthkit project to move ahead with Applying Refinement.
Updated over 1 year ago
