Setting up a Depthkit clip
Now that you've imported the Depthkit Unity Plugin you're ready to add Depthkit captures to your Unity project.
What You Need
To get started, drag and drop the Depthkit exported assets from the Depthkit Export location
- combined-per-pixel video export
- metadata file export
- poster image (optional)
📘 Workflow Tip
Before exporting out of Depthkit, you can set your export directory to point to your Unity Assets folders and avoid the step of relocating the assets.
Creating a Clip from a Depthkit Capture
After importing the plugin create a scene with a Depthkit Clip object by right clicking on the hierarchy panel and selecting Depthkit -> Depthkit Clip in the toolbar. You can also select Depthkit from the menu to create a Depthkit Clip in your scene.

A Unity component will be attached to the GameObject in the Inspector panel as seen below:

Adding your Depthkit Files
You will notice that your Depthkit Clip is not setup. Follow the following steps to setup your clip in the Depthkit Clip Editor.

-
Select your Player Type. The Unity Plugin supports the Unity Player and AVPro. To select the latter, you will need to import your own AVPro package separately.
-
Set your Look. The default Look is the Photo Renderer. You can select the Zero Days Look once the Zero Days Look package is imported.
-
Specify your Meta Data Source Type. If you have imported your Depthkit clip into your Unity project folder, you can leave this at the default Text Asset. If your clip is outside of your Unity folder or in Streaming Assets, you can specify File Path and enter it manually.
-
Drag your meta file into the Meta Data File field.
-
Optional: Drag a poster image into the poster field. This will allow the clip to show up in the editor when the video is not playing.

📘 Poster Image Import Settings
Make sure your import settings are set to Non Power of 2 when importing the poster image. Unity does this by default. However, if you have changed these settings in your project, it may introduce poster image artifacts.
- Assign the Depthkit video file to the Video Player component. If using the Unity video player, you can simply drag your video file into the video clip field when your source is set to video clip. If using AVPro as your video player, you want to make sure that your video is located in your Streaming Assets folder and your file source is "Relative to Streaming Assets Folder".

Now your clip is ready for playback!

Which Video Player is Right for Me?
The Unity video player is a great way to get started in Unity. There are no extra packages to import and you can get up and running instantly. We provide AVPro as a video player option for its performance and for the ability to stream from outside of the Unity project.
| Video Player | Pros | Cons |
|---|---|---|
| Unity |
|
|
| AVPro |
|
|
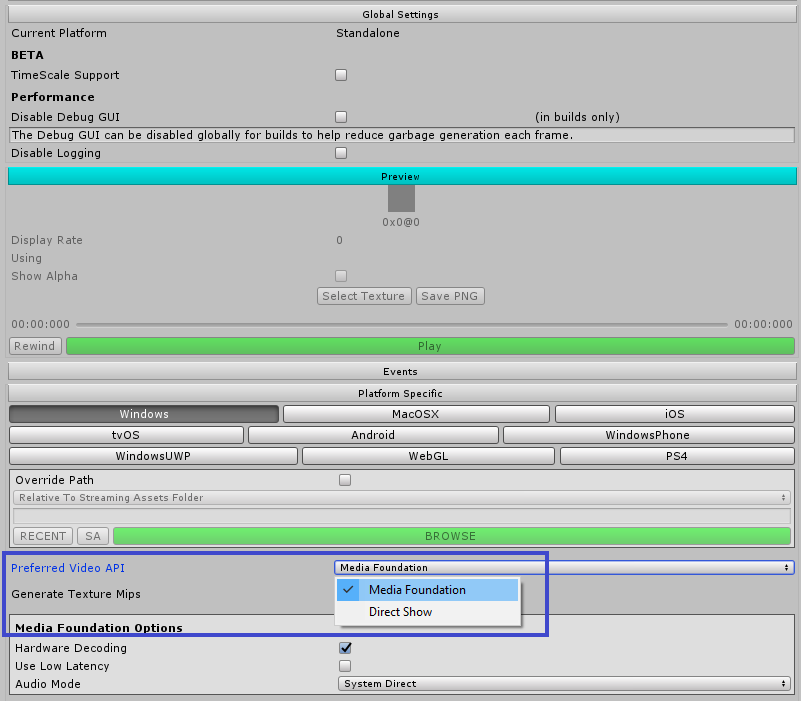
❗️ When using AVPro, we strongly recommend using the default Preferred Video API, Media Foundation. We recommend to avoid Direct Show, because clips using this setting sometimes display depth artifacts that look like lines in your depth data. This setting is found in your Global Settings at the bottom of the Media Player component of the Depthkit clip.
Refining Your Clip's Display Settings
Mesh Density
Set your mesh density. This setting determines the amount of geometry that is used to render your asset. By default, this is set to medium, but we recommend setting it to highest unless you are having performance issues in Unity. Higher values result in better quality, but may lead to performance problems.

Clean Up Filters
The Depthkit clip has two variables that allow you to clean up your depth data by adjusting the sliders below.

Spike removal: Set the maximum size a rendered triangle to be displayed. This reduces edge artifacts that appear as spike along the edges of your asset. Triangles whose size are higher than this value won't be displayed.
Edge choke: Filter out depth samples that have a brightness lower than this value. This will refine the edge of your asset and should be set after the Spike Removal for best results.
You should also note that the clean up values may differ with color space and video player.
These variables persist between different Looks and allow you to tune the rendering of your Depthkit clip. Because we encode the depth from your capture to a video, quality loss can be introduced through video compression. By adjusting these values, you can filter out many of these compression artifacts.
📘 For best results, set the Spike Removal before the Edge Choke.

Audio in Unity
If working in Unity for a VR platform, headsets such as the HTC Vive and the Oculus Rift require audio to be redirected to the headset audio device instead of the system default. Unity does this automatically. However, if you are using AVPro, you will need to adjust the following settings. These steps will differ based on your preferred video API which may be set to either Media Foundation (recommended) or Direct Show.
AVPro
Media Foundation
- With your Preferred Video API set to Media Foundation, make sure the Audio Mode is set to Unity. You can find this under Media Foundation Options.

- Add the AudioOutput component. This will redirect the audio to be rendered by Unity for the intended headset.

- Apply your Depthkit clip as the Media Player.

Direct Show\ If you need to use the Direct Show API, you can set the output device manually in the Media Player Component under Direct Show Options. If trying to redirect audio to the Oculus Rift, type Rift Audio in the Force Audio Output Device Name field. For the HTC Vive, use HTC VIVE USB Audio.

Audio Spatialization
For a detailed explanation of audio spatializer using the Unity Player, visit the Unity Audio Documentation.
AVPro\ In order to spatialize your audio so the sounds rotates accordingly around the user in the headset, you will also need to use the AudioOutput component. This component should be stacked above the AudioSource as seen below.

To move Unity component, simply click the settings icon in the upper right corner of the component.

- Apply the desired audio spatializer plugin under Edit > Project Settings > Audio.

These plugins will work with or without VR enabled in the XR Settings in the Editor. However, when ready to build, you will need to enable for VR for the spatializer plugin to work. Read more aboutVR Audio Spatializers.

- Next, enable Spatialize in the Audio Source component.

Read more about the ways in which you can work with audio spatialization in theAVPro Documentation.